Silicone baking mats have become a staple in modern kitchens, praised for their non-stick surface, durability, and eco-friendly replacement of parchment paper. However, like any kitchen tool, they accumulate grease, food residue, and discoloration over time. While routine wiping may suffice between uses, a thorough deep clean is essential to maintain hygiene, prevent odors, and extend the mat’s lifespan. Many users assume these mats are maintenance-free due to their non-porous nature, but neglect can lead to staining, reduced effectiveness, and even bacterial buildup in micro-scratches. This guide provides a comprehensive approach to deep cleaning silicone baking mats using safe, accessible household ingredients and techniques backed by culinary professionals.
Why Deep Cleaning Matters
Even though silicone is resistant to bacteria and heat, repeated exposure to oils, sugary residues, and high-temperature baking causes grime to embed into microscopic surface imperfections. Over time, this leads to yellowing, stickiness, or an off-putting smell—especially when exposed to strong-smelling foods like garlic or fish. A surface that appears clean may still harbor organic matter that compromises both food safety and performance.
Regular deep cleaning removes accumulated residues, restores non-stick properties, and ensures consistent baking results. It also prevents cross-contamination, particularly important when switching between savory and sweet recipes. Unlike disposable parchment, silicone mats are designed for hundreds of uses—provided they’re properly maintained.
“Silicone mats are only as good as their cleanliness. Residual fats and sugars degrade performance faster than most people realize.” — Chef Lena Torres, Culinary Equipment Specialist
Step-by-Step Guide to Deep Cleaning Silicone Baking Mats
A successful deep clean involves more than just rinsing with soap. The following method ensures complete sanitation without damaging the material. Follow these steps every 4–6 weeks, or immediately after baking sticky or oily foods.
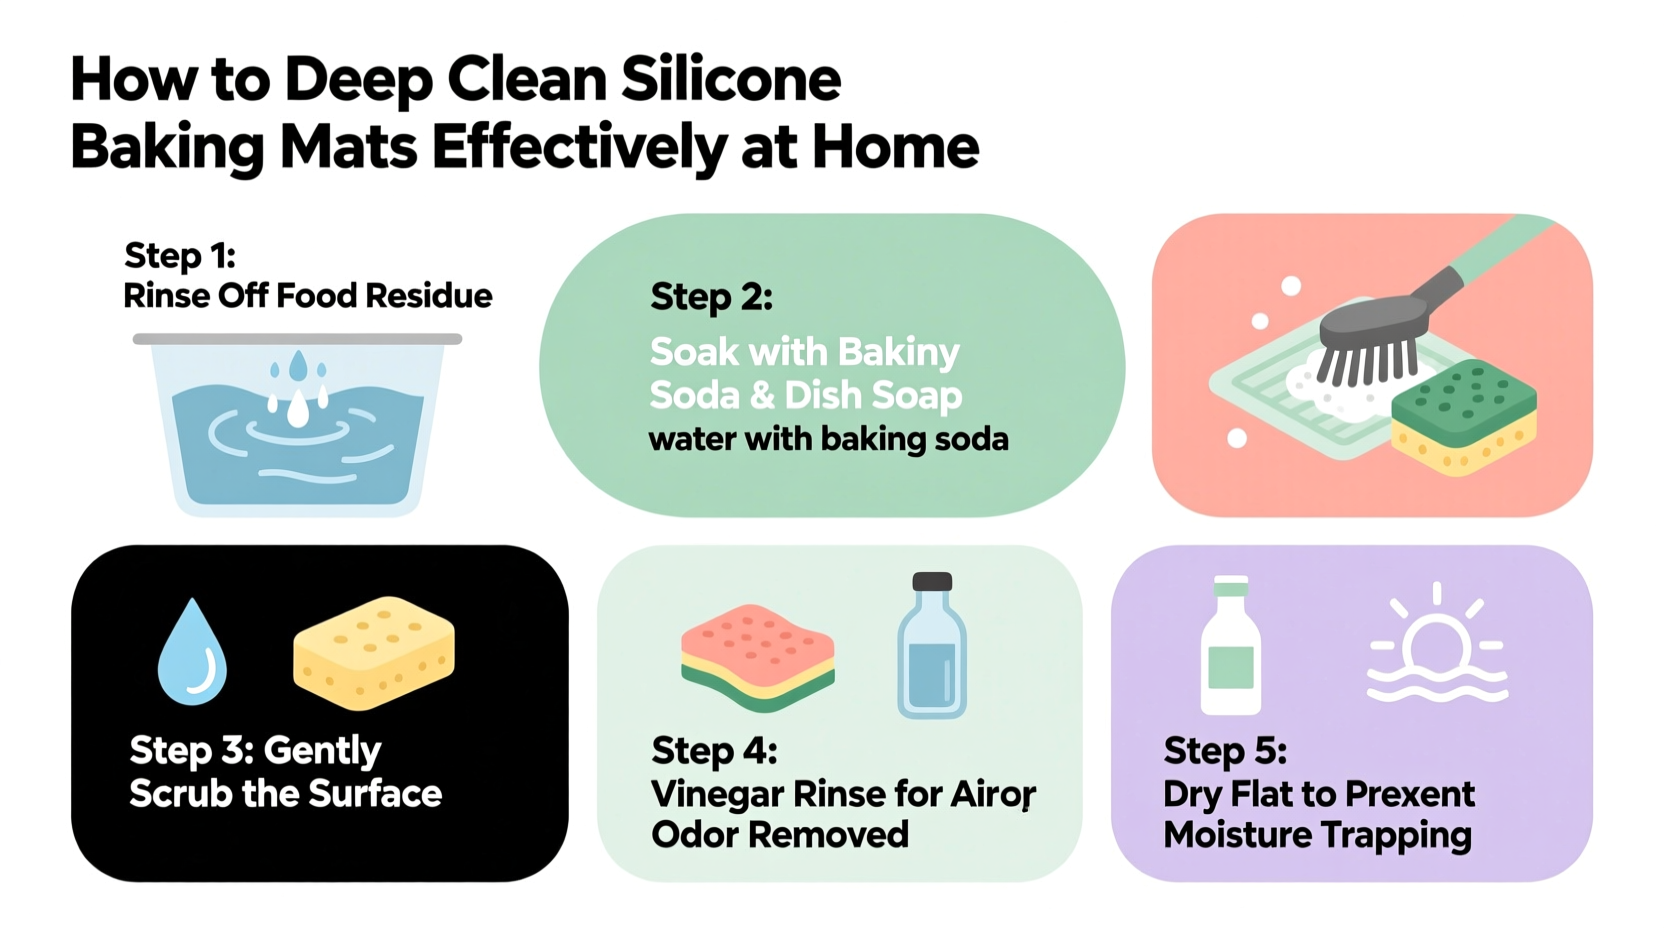
- Remove Loose Debris: Shake off crumbs or food particles outdoors or over a trash can. Avoid scraping with sharp tools that could scratch the surface.
- Soak in Warm, Soapy Water: Fill a sink or basin with warm (not boiling) water and add a few drops of mild dish soap. Submerge the mat for 10–15 minutes to loosen stuck-on residue.
- Scrub Gently: Use a soft sponge or non-abrasive brush to scrub both sides. Focus on discolored areas, but avoid steel wool or scouring pads which can compromise the surface integrity.
- Tackle Stains with Baking Soda Paste: For stubborn stains or yellowing, make a paste of baking soda and water (3:1 ratio). Apply it to affected zones and let sit for 10 minutes before gently scrubbing.
- Rinse Thoroughly: Rinse under lukewarm running water until all soap and residue are gone. Any leftover cleaning agent can affect flavor during baking.
- Disinfect with Vinegar Solution (Optional): To eliminate odors and sanitize, wipe the mat with a 1:1 white vinegar and water solution. Let sit for 5 minutes, then rinse again.
- Air Dry Completely: Lay flat on a drying rack or hang using clips to avoid warping. Do not use towels that may leave lint or fibers.
- Inspect Before Storage: Ensure no moisture remains, especially along edges, to prevent mold growth in storage.
Alternative Deep Cleaning Methods
While the basic soap-and-scrub method works for most cases, certain situations call for stronger or specialized approaches. These alternatives are effective for heavily soiled or odor-prone mats.
Hydrogen Peroxide Soak for Discoloration
If your mat has turned yellow from repeated use, a hydrogen peroxide soak can help restore its original appearance. Mix one part 3% hydrogen peroxide with two parts water. Submerge the mat for up to 1 hour in a well-ventilated area. Rinse thoroughly afterward. This method is particularly effective for sugar-based stains from caramel or meringue.
Bleach Solution (For Sanitization Only)
In commercial kitchens or after handling raw meat, sanitization is critical. A diluted bleach solution (1 tablespoon unscented bleach per gallon of cool water) can be used for immersion. Soak for no more than 5 minutes, then rinse under running water for at least 30 seconds. Neutralize any residual bleach by wiping with a vinegar-water solution, followed by a final rinse. Use this method sparingly—no more than once every few months—to avoid material fatigue.
Sunlight Exposure for Natural Whitening
UV rays naturally break down organic compounds and can lighten discoloration. On a sunny day, lay the clean, damp mat outside on a clean surface (grass or patio) for 2–3 hours. Flip halfway through. This method is chemical-free and gentle, though less effective on deeply embedded grease.
Tip: Rotate your mats regularly if you own multiple. This allows each one ample drying time and reduces wear from back-to-back use.Do’s and Don’ts of Silicone Mat Care
| Do’s | Don’ts |
|---|---|
| Use non-abrasive sponges or cloths for cleaning | Use metal scrapers or abrasive cleaners |
| Store flat or rolled (never folded) | Fold or crease the mat, which can cause cracks |
| Clean promptly after baking sticky items | Leave residue overnight; it hardens and becomes harder to remove |
| Label mats for specific uses (e.g., bread, pastries) | Mix mats used for raw meat with those for desserts |
| Check manufacturer guidelines for temperature limits | Expose to open flame or broil directly on the mat |
Mini Case Study: Reviving a Neglected Mat
Sarah, a home baker in Portland, noticed her favorite silicone mat had become increasingly sticky despite regular washing. After three years of weekly use, the surface repelled nothing and retained a faint onion smell. She tried dish soap and scrubbing, but results were minimal. Following the baking soda paste method outlined here, she applied the mixture and let it sit for 15 minutes before scrubbing with a nylon brush. After rinsing and a vinegar wipe, the stickiness disappeared. She then laid the mat in direct sunlight for two hours, which significantly reduced yellowing. Six months later, with monthly deep cleans, the mat performs like new. Her experience highlights how proactive care—not replacement—is often the better solution.
Checklist: Your Monthly Deep Clean Routine
- ☐ Remove all loose debris from the mat
- ☐ Soak in warm, soapy water for 10–15 minutes
- ☐ Scrub both sides with a soft sponge
- ☐ Apply baking soda paste to stained areas
- ☐ Rinse completely under lukewarm water
- ☐ Wipe with vinegar solution to deodorize (optional)
- ☐ Air dry flat or hung—never folded
- ☐ Inspect for damage or wear before storing
- ☐ Store in a cool, dry place away from direct sunlight
“Proper cleaning isn’t just about looks—it directly affects how evenly your cookies bake and whether your macarons release cleanly.” — Rafael Kim, Pastry Instructor at Pacific Culinary Institute
Frequently Asked Questions
Can I put my silicone baking mat in the dishwasher?
Only if the manufacturer explicitly states it’s dishwasher-safe. Most high-quality mats tolerate top-rack placement, but repeated cycles can cause warping or surface dulling. Hand washing is always the safer, longer-lasting option.
Why does my mat still smell after washing?
Odors usually stem from absorbed oils or proteins trapped in micro-scratches. Try soaking in a vinegar-water solution (1:1) for 30 minutes, followed by a hydrogen peroxide soak. If the smell persists, consider replacing the mat, as deep contamination may be irreversible.
How often should I deep clean my silicone baking mat?
Every 4–6 uses or once a month under regular use. Increase frequency if baking with sticky sugars, greasy meats, or pungent ingredients like cheese or fish.
Preventing Future Buildup
Prevention is key to minimizing future deep cleaning effort. Always wipe the mat with a damp cloth immediately after cooling. Avoid cutting directly on the surface with knives, which creates grooves where gunk accumulates. When baking messy items like roasted vegetables or marinated meats, consider lining the mat with a light coating of cooking spray or placing a foil barrier underneath—though never cover the entire mat with foil, as it restricts airflow and causes uneven heating.
Additionally, rotate between multiple mats if possible. This gives each one time to fully dry and rest, reducing stress on the material. Store them rolled in a linen cupboard or stood upright in a baking sheet organizer—never stacked under heavy pans.
Tip: Label your mats with masking tape and a marker (e.g., “Bread,” “Desserts”) to prevent flavor transfer and streamline cleanup.When to Replace Your Mat
No mat lasts forever. Signs it’s time to retire yours include deep scratches that trap food, persistent stickiness after cleaning, visible tears, or warping that prevents flat contact with the baking sheet. Some manufacturers recommend replacement after 2–3 years of frequent use, though proper care can extend life beyond that. Never use a damaged mat, as degraded silicone may leach chemicals under high heat.
Conclusion
Deep cleaning silicone baking mats is a simple yet crucial practice that preserves their function, hygiene, and longevity. With regular attention and the right techniques, these versatile tools can remain reliable kitchen companions for years. By integrating a structured cleaning routine, avoiding common mistakes, and recognizing when intervention is needed, you ensure consistent baking results and reduce waste. Treat your mats not just as accessories, but as investments in your culinary success.
💬 Have a cleaning hack that worked wonders on your silicone mat? Share your experience in the comments and help fellow bakers keep their gear in top shape!