False eyelashes can elevate your makeup look from simple to stunning in minutes. But if you've ever struggled with excess glue, uneven application, or lashes that lift at the corners, you're not alone. The key to flawless falsies lies not just in technique—but in preparation and precision. This guide walks you through every essential step to apply false eyelashes smoothly, cleanly, and confidently—without glue clumps, misalignment, or last-minute panic.
Why Glue Mishaps Happen (And How to Prevent Them)
The most common reason false eyelashes go wrong is improper adhesive use. Whether it's applying too much glue, skipping the tacky stage, or using expired formula, these small oversights lead to big problems. Glue that’s still wet causes sliding; dried-out glue won’t adhere. Even high-quality lashes fail when paired with poor adhesive habits.
Another frequent issue is mismatched lash styles. Dramatic strip lashes on narrow eyes often pop up at the outer corners because they extend beyond the natural lash line. Choosing the right size and shape for your eye structure prevents strain and lifting.
Tip: Always trim your lashes to fit your eye span—even if they’re labeled \"one size fits all.\"Essential Tools and Products You’ll Need
Success starts before you even open the lash box. Gather everything ahead of time so you’re not fumbling mid-application. Here’s what belongs on your vanity:
- False eyelashes – Choose a style suited to your eye shape and desired effect.
- Lash adhesive – Opt for a latex-free formula if you have sensitive eyes. Clear or black glue works depending on preference.
- Tweezers or lash applicator – Precision tools help place lashes exactly where needed.
- Scissors – For trimming lashes to fit your eye width.
- Concealer or eyeshadow brush – To gently blend adhesive edges after application.
- Setting spray or micellar water – For quick cleanup if mistakes occur.
“Applying falsies isn’t about speed—it’s about control. Take your time, and treat each step like part of a ritual.” — Lena Torres, Celebrity Makeup Artist
Step-by-Step Guide: Applying False Eyelashes Without Glue Mistakes
Follow this timeline-tested method to achieve seamless, long-lasting results every time.
- Prep Your Natural Lashes
Begin with clean, makeup-free lashes. Remove any mascara residue or oils. Curl your natural lashes and apply a light coat of waterproof mascara to anchor the false set. Avoid heavy coatings—they create bulk and interfere with adhesion. - Measure and Trim the Lash Band
Hold the lash strip against your lash line. If the ends extend past your outer corner, snip them with small scissors. Always cut from the outer edge inward to preserve the layered effect near the center. Repeat for both eyes.
Tip: When in doubt, trim conservatively. You can always remove more, but you can’t add back what’s been cut.
- Shape the Lash Strip
Gently bend the lash band into a “C” shape between your fingers. This mimics the curve of your eyelid and ensures better contact along the entire lash line. Press lightly across the middle and ends to loosen stiffness. - Apply Adhesive Correctly
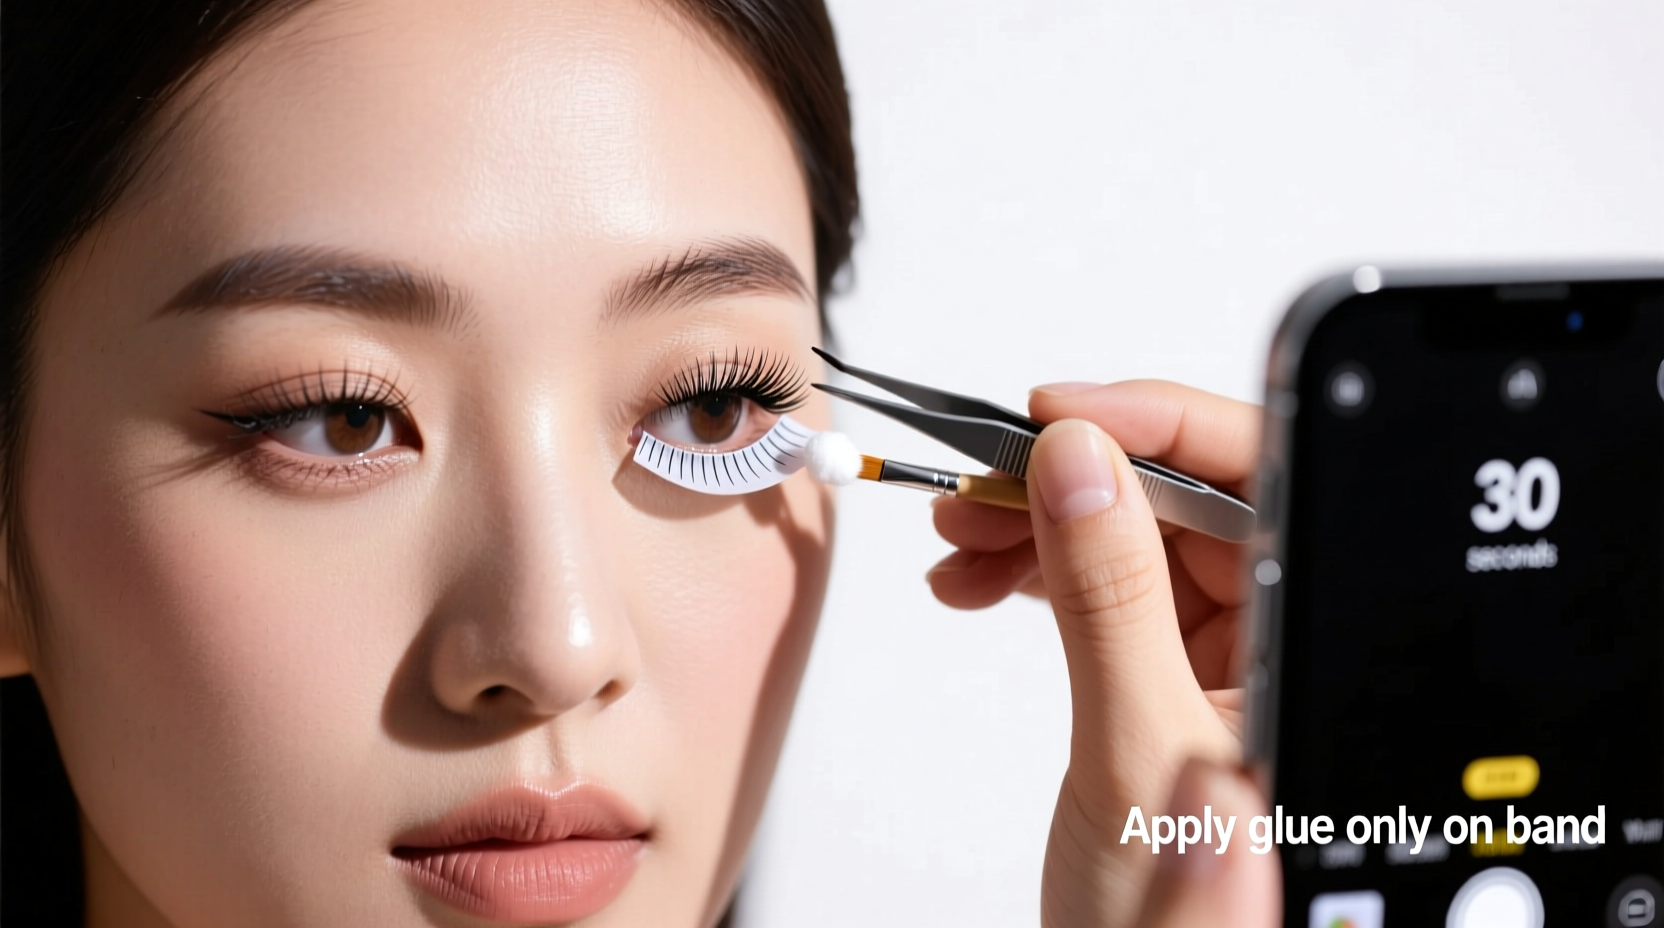
Squeeze a thin line of glue along the lash band—no thicker than a thread. Use the wand tip or a toothpick to spread evenly. Now wait 30–45 seconds. This is crucial: let the glue become tacky. It should feel slightly sticky but not wet when touched. Skipping this step causes slippage and reapplication. - Position Using the Inner Corner First
With tweezers or an applicator, place the inner third of the lash as close to your natural lash line as possible. Focus on securing the inner and center sections first. Once anchored, the outer tail will naturally follow the eye’s curve. - Press and Adjust in Sections
Don’t drop the whole lash at once. After placing the inner segment, release the tool, press down gently with your finger or a cotton swab, then move outward in thirds. This staged approach prevents shifting and allows micro-corrections. - Blend with Natural Lashes
Once secured, use your lash curler (lightly) to meld false and real lashes together. Then apply one more coat of waterproof mascara to lock them in and eliminate separation. - Touch Up the Adhesive Line
If visible glue shows at the corners or center, dip a small concealer brush in makeup remover and carefully erase excess. Alternatively, use black eyeshadow and a fine liner brush to camouflage any gaps or white adhesive.
Do’s and Don’ts: A Quick Reference Table
| Do’s | Don’ts |
|---|---|
| Wait 30+ seconds after applying glue before placing lashes | Apply lashes immediately after gluing |
| Trim lashes to match your eye length | Assume all lashes fit every eye shape |
| Bend the lash band for better contouring | Force stiff lashes onto curved lids |
| Use tweezers for precise placement | Use fingers, which reduce visibility and control |
| Seal edges with shadow or liner | Leave white glue exposed at the lash line |
A Real-World Example: From Frustration to Flawless
Sophia, a 28-year-old marketing executive, used to avoid false lashes entirely. “Every time I tried them, the glue would bubble, or one side would lift by lunchtime,” she said. She followed this method during her sister’s wedding prep. After trimming her dramatic wispy lashes to fit her almond-shaped eyes, she waited a full minute after applying black lash glue. Using tweezers, she placed the inner corner first and pressed in segments. The result? Her photographer complimented her “airbrushed-looking eyes.” For the first time, her lashes stayed put through tears, dancing, and late-night celebrations.
Her turning point wasn’t better lashes—it was patience. “I realized I’d been rushing the glue step. Waiting made all the difference.”
Pro Tips for Long-Lasting, Clean Application
Even with perfect technique, small adjustments can make your lashes last longer and look more natural.
- Store glue properly: Keep it capped tightly and store upright in a cool, dark place. Exposure to air or heat degrades adhesive quickly.
- Revive old glue: If your adhesive thickens, add one drop of saline solution (for contacts) and shake gently. Do not use water—it breeds bacteria.
- Use magnification: Apply lashes in front of a well-lit magnifying mirror. Seeing every millimeter reduces errors.
- Practice dry runs: Before using glue, practice positioning the lash strip with tweezers. Get comfortable with angles and depth.
Frequently Asked Questions
Can I reuse false eyelashes, and will glue residue affect future applications?
Yes, most strip lashes can be reused 5–10 times with proper care. After removal, gently peel off old adhesive and clean the band with micellar water. Let dry completely before storing. Residue left on the band reduces stickiness, so thorough cleaning is essential for reliable reapplication.
What should I do if my eyes water during application?
Watering is common, especially if glue fumes irritate your eyes. Switch to a low-odor, latex-free adhesive. Also, avoid letting glue dry too close to your eye—apply only to the lash band. Keep your eyes closed during placement and work in a well-ventilated area.
How do I remove lashes without damaging my natural lashes or skin?
Start at the outer corner and gently lift the lash strip upward and away from your lash line. Never pull downward—that tugs on natural lashes. Use a cotton pad soaked in oil-free makeup remover to dissolve leftover glue. Follow with a nourishing lash serum to maintain natural lash health.
Final Checklist: Your Glue-Free Mishap Prevention Routine
- ✔️ Cleanse and prep eyelids and natural lashes
- ✔️ Measure and trim false lashes to fit your eye width
- ✔️ Mold the lash band into a natural curve
- ✔️ Apply a thin, even layer of fresh adhesive
- ✔️ Wait 30–45 seconds for glue to become tacky
- ✔️ Place inner corner first, then secure center and outer edge
- ✔️ Press down in sections using a tool or fingertip
- ✔️ Blend with mascara and conceal any visible glue
- ✔️ Store used lashes in their case for future wear
Master the Art of Flawless Falsies
Applying false eyelashes without glue mishaps isn’t magic—it’s method. With the right tools, timing, and attention to detail, anyone can achieve a seamless, fluttery finish that lasts from morning meetings to evening events. The secret isn’t expensive products; it’s consistency in process. Once you internalize the rhythm of measuring, waiting, and placing in stages, false lashes become less of a challenge and more of a confidence booster.
💬 Ready to transform your lash game? Try this technique tonight and share your before-and-after story in the comments—we love seeing your glow-ups!