Creating custom t-shirts is a popular way to express individuality, promote a brand, or craft personalized gifts. Whether you're designing band merch, family reunion shirts, or artwork for a cause, choosing the right medium makes all the difference. Two of the most accessible tools for DIY fabric customization are fabric markers and fabric paint. While both allow you to add color and design to cotton, polyester blends, and other textiles, they differ significantly in application, precision, durability, and finish.
Understanding these differences helps ensure your project turns out exactly as intended—vibrant, long-lasting, and professionally finished. This guide dives deep into the strengths and limitations of each option, backed by real-world testing, expert insights, and practical advice from experienced crafters and textile artists.
How Fabric Markers Work
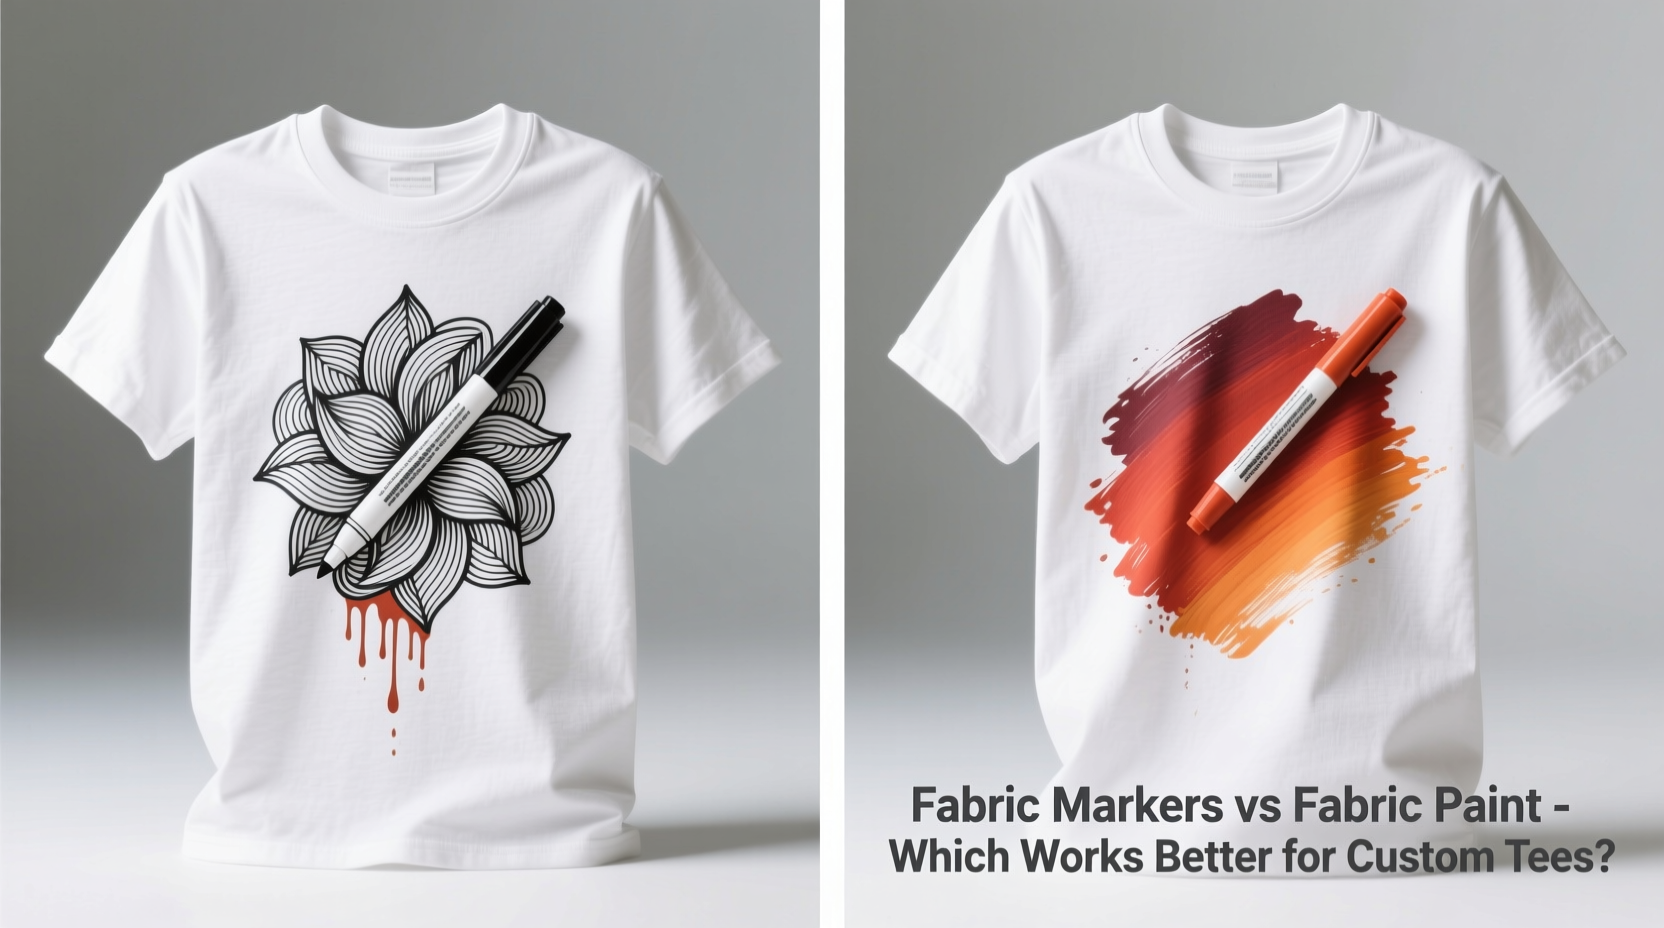
Fabric markers function much like permanent markers but are specially formulated for use on textiles. The ink penetrates fabric fibers and bonds with them when heat-set, typically using an iron or dryer. Available in fine-tip, chisel-tip, and brush-tip varieties, fabric markers offer a high degree of control, making them ideal for detailed illustrations, lettering, and line work.
Most fabric markers use water-based pigments that remain flexible after drying, reducing cracking during wear and washing. Brands like Tulip, Crayola, and Jacquard offer kits with a wide range of colors, including metallics and neon shades. Some even include air-dry formulas that don’t require heat setting, though these tend to be less durable over time.
Tip: Test your fabric marker on a scrap piece or inside seam before starting your main design to check bleed and opacity.The biggest advantage of fabric markers is their ease of use. They require no mixing, minimal cleanup, and are perfect for beginners or children. Because they draw directly onto the surface, they allow for freehand creativity without stencils—though stencils can still enhance precision if needed.
How Fabric Paint Works
Fabric paint is a thicker, pigment-rich medium designed to adhere to textiles. It’s applied with brushes, sponges, stamps, or screen-printing tools. Unlike markers, fabric paint sits slightly on top of the fabric rather than soaking in deeply, creating a bolder, more opaque layer of color. This gives it excellent coverage, especially on dark fabrics, and allows for blending, shading, and textured effects.
Once applied, fabric paint must dry completely and then be heat-set—usually by ironing—to lock the pigment into the fibers. High-quality brands such as DecoArt SoSoft, Tulip Soft, and Pebeo Setacolor are known for remaining soft to the touch and resisting stiffness or flaking after curing.
Fabric paint excels in large-area coverage, gradient techniques, and multi-layered designs. It’s also the preferred choice for screen printing at home due to its viscosity and adhesion properties. However, it requires more preparation (mixing, masking, drying time) and cleanup (brushes need immediate washing).
“Fabric paint gives artists the ability to create gallery-worthy textile art, while markers are better suited for quick personalization and crisp linework.” — Lena Torres, Textile Artist & Educator
Comparing Performance: Key Factors
To determine which tool works better for custom tees, consider several performance factors: precision, durability, wash resistance, texture, and versatility.
| Feature | Fabric Markers | Fabric Paint |
|---|---|---|
| Precision | Excellent – ideal for fine lines and handwriting | Moderate – depends on brush size and hand control |
| Coverage | Limited – best for outlines and small fills | Superior – covers large areas evenly |
| Durability (after washing) | Good – may fade slightly after 10+ washes | Excellent – lasts years if properly set |
| Texture Feel | Smooth – nearly invisible once dry | Can be stiff if applied too thickly |
| Versatility | Moderate – limited to drawing-style applications | High – supports stenciling, stamping, gradients |
| Cleanup | Minimal – cap markers and done | Requires soap and water immediately |
| Suitability for Dark Fabrics | Poor – most markers aren’t opaque enough | Excellent – opaque formulas available |
This comparison shows that neither option is universally superior. Instead, the best choice depends on your specific project goals.
When to Use Fabric Markers
Fabric markers shine in projects requiring detail, portability, and simplicity. They’re particularly effective for:
- Hand-lettering names, quotes, or slogans
- Adding facial features or intricate details to illustrated characters
- Kid-friendly crafts and classroom activities
- Touch-ups on existing painted designs
- Quick customization at events (e.g., personalized festival shirts)
If you're working on a light-colored cotton tee and want clean, script-like writing or cartoon-style drawings, fabric markers deliver professional results with minimal effort. Their portability also makes them great for on-the-go creativity—no palettes, no spills.
Tip: Place cardboard inside the shirt to prevent bleed-through when using markers.When to Use Fabric Paint
Fabric paint is the go-to for bold, artistic, or commercial-grade designs. It's ideal when you need:
- Full-color illustrations with shading and depth
- Screen-printed logos or repeating patterns
- Designs on black or navy garments
- Projects involving multiple people (easier to manage in groups with stencils)
- Long-term wear and frequent washing (e.g., work uniforms or sports teams)
Because fabric paint can be mixed and layered, it supports advanced techniques like ombré effects, stippling, and wet-blending. When used with stencils or masking tape, it produces sharp edges and consistent results across multiple shirts—a major advantage for bulk customization.
For example, a local coffee shop wanted five matching barista aprons with a detailed coffee bean illustration. Using fabric paint with a fine brush and stencil ensured uniformity and rich color saturation. Attempting the same design with markers would have taken longer and resulted in inconsistent fill density.
Mini Case Study: Custom Band Tees on a Budget
A garage rock band needed 25 custom t-shirts for their summer tour. With limited funds, they opted for a DIY approach. Their logo featured bold block letters and a flame graphic. Initially, they tried fabric markers, but found the red and orange shades lacked opacity on black shirts and required multiple passes, causing bleeding.
They switched to fabric paint with plastic squeeze bottles and hand-cut stencils. Within two days, they produced all 25 shirts with crisp, vibrant designs. After heat-setting with an industrial iron, the shirts survived repeated machine washes without fading. The total cost was under $60, including blank tees.
This real-world example underscores fabric paint’s superiority for high-impact, repeatable designs—especially on dark fabrics.
Step-by-Step Guide to Applying Each Medium
Using Fabric Markers
- Wash and dry the t-shirt to remove sizing chemicals that can interfere with ink adhesion.
- Insert a piece of cardboard inside the shirt to prevent bleed-through.
- Sketch your design lightly in pencil, or use a printed template placed underneath.
- Shake the marker well, then test on scrap fabric.
- Draw your design steadily, applying even pressure. Let lines dry between adjacent colors to avoid smudging.
- Allow the design to air dry for at least 24 hours.
- Heat-set using a dry iron on high (cotton setting) for 3–5 minutes per area, protecting the design with parchment paper.
- Wait 72 hours before washing, and launder inside out in cold water.
Using Fabric Paint
- Pre-wash and dry the garment.
- Place cardboard inside to prevent paint seepage.
- Secure stencils with repositionable spray adhesive or tape if needed.
- Stir paint thoroughly; thin slightly with fabric medium if desired for smoother flow.
- Apply paint with a flat or sponge brush using dabbing motions for even coverage.
- Let dry completely (4–6 hours minimum), then cure with an iron for 2–3 minutes per section.
- Wait 72 hours before first wash; machine wash inside out in cold water with mild detergent.
Common Mistakes to Avoid
- Skipping the pre-wash: Residues on new garments repel ink and paint.
- Not heat-setting properly: This is critical for longevity. Skipping it leads to rapid fading.
- Overloading the brush or marker: Causes bleeding and blurry lines.
- Washing too soon: Wait at least 72 hours after application to allow full bonding.
- Using regular acrylic paint: It will crack and peel. Always use paint labeled specifically for fabric.
Frequently Asked Questions
Can I mix fabric markers and fabric paint on the same shirt?
Yes, combining both mediums can yield impressive results. Use fabric paint for large background areas or base layers, then add fine details or outlines with fabric markers. Just ensure each layer is fully dry before adding the next.
Which lasts longer—fabric markers or fabric paint?
Fabric paint generally lasts longer, especially with frequent washing. High-quality fabric paint can endure dozens of washes without significant fading if properly cured. Fabric markers are durable but may begin to fade after 10–15 washes, particularly with heavy agitation or hot water.
Do fabric markers work on polyester blends?
They work best on natural fibers like cotton and linen. On polyester or synthetic blends, adhesion is weaker, and results may be patchy. For mixed fabrics, fabric paint with a textile medium additive offers better grip and longevity.
Checklist: Choosing the Right Tool for Your Project
- ✅ Are you doing detailed line work or hand-lettering? → Choose fabric markers.
- ✅ Is the shirt black or dark-colored? → Choose fabric paint (opaque formula).
- ✅ Do you need to make multiple identical shirts? → Choose fabric paint + stencil.
- ✅ Is this a child-led craft project? → Choose fabric markers for safety and simplicity.
- ✅ Do you want soft texture with no stiffness? → Use soft fabric paint or markers.
- ✅ Are you creating artwork with shading or gradients? → Choose fabric paint.
Final Verdict: Which Works Better?
There’s no one-size-fits-all answer. If you value speed, precision, and simplicity, fabric markers are the better choice. They’re beginner-friendly, low-mess, and perfect for personalizing shirts with names, dates, or small illustrations.
However, for professional-looking, durable, and visually impactful designs—especially on dark garments or in bulk—fabric paint is the superior option. Its versatility, opacity, and wash resistance make it the standard among serious crafters and small businesses.
Many experienced creators actually use both: fabric paint for base layers and bold elements, fabric markers for final detailing and touch-ups. This hybrid approach leverages the strengths of each medium.
Conclusion
Whether you're making a one-of-a-kind gift or launching a small apparel line, choosing between fabric markers and fabric paint comes down to your design needs and expectations for durability. Both tools empower creativity, but understanding their unique capabilities ensures your custom tees look great today and years from now.
💬 Ready to start your next custom tee project? Grab a blank shirt, pick your medium, and let your imagination run. Share your creations online and inspire others to try fabric art!