Making paper at home isn’t just a nostalgic craft—it’s a sustainable practice that transforms waste into something functional and beautiful. With rising interest in eco-friendly living and artisanal goods, homemade paper has found renewed relevance. Whether you're repurposing old documents, creating custom stationery, or exploring texture-based art, the process of handcrafting paper offers control over thickness, color, fiber blend, and finish. This guide explores proven techniques to produce high-quality paper from recycled and natural materials, using accessible tools and creative enhancements.
Gathering Materials and Setting Up Your Workspace
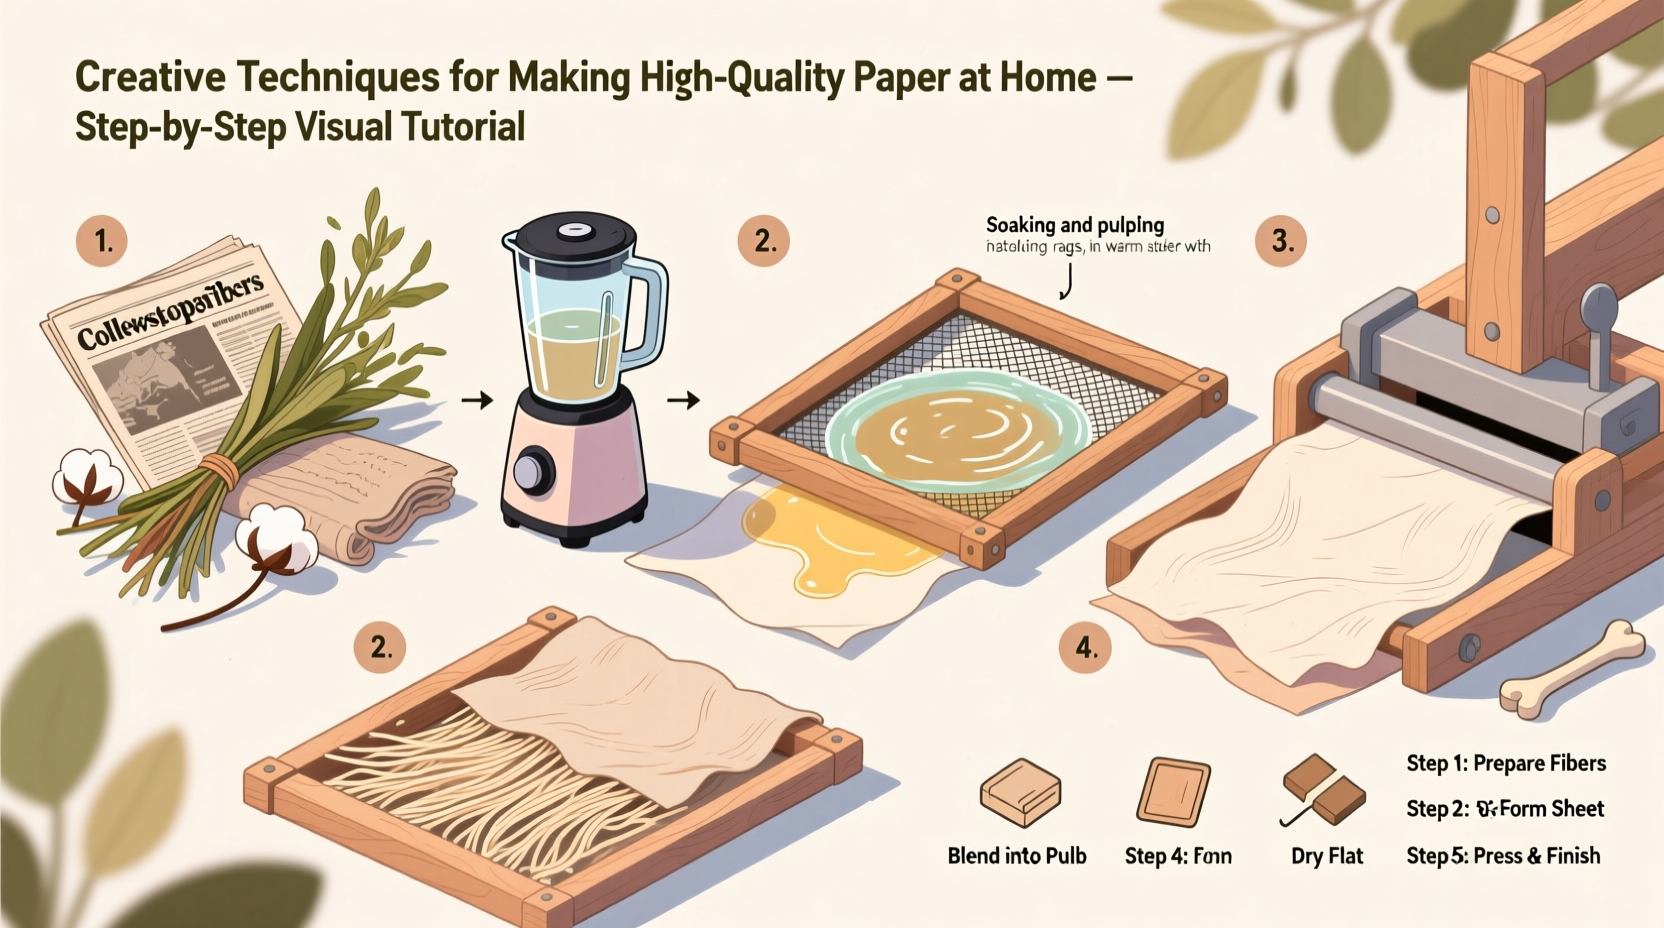
The foundation of quality handmade paper lies in selecting the right raw materials and preparing an efficient workspace. Unlike industrial paper mills, home production relies on small-scale tools and careful handling to achieve consistency.
Start by collecting clean, fiber-rich sources such as:
- Used printer paper (avoid glossy or coated stock)
- Old newspapers or magazines (best for textured or decorative sheets)
- Cotton rags, linen scraps, or denim (adds strength and softness)
- Natural fibers like bamboo, hemp, or flax (for premium-grade results)
You’ll also need basic equipment: a blender (dedicated to papermaking), a large plastic tub, a wooden deckle and frame (or DIY alternative), a sponge, felt sheets or blotting cloth, and a pressing surface like a wooden board or stack of heavy books.
Tip: Soak fibrous materials overnight before blending to reduce processing time and improve pulp consistency.The Pulp Preparation Process
Pulp quality directly affects the final paper's durability and texture. Begin by tearing paper into small pieces and soaking them in warm water for several hours. The longer the soak, especially for tougher fibers like cotton or denim, the smoother the resulting pulp.
After soaking, blend the material in batches. Use a ratio of roughly one part dry paper to four parts water. Blend until the mixture resembles thin oatmeal. For stronger paper, mix in 20–30% cotton rag pulp. To add visual interest, incorporate flower petals, herbs, or colored thread during blending.
“Handmade paper gains character not despite its imperfections, but because of them. The subtle variations in thickness and embedded fibers are signs of authenticity.” — Lena Patel, Artisan Papermaker and Educator
Once blended, transfer the pulp to a large tub and dilute it with additional water—about 10 parts water to 1 part pulp. This suspension allows for even sheet formation when scooping.
Forming Sheets: Traditional vs. Creative Techniques
The most common method uses a deckle and screen—a wooden frame fitted with mesh fabric—to lift pulp from the vat. Submerge the deckle evenly, then lift slowly, allowing water to drain. The remaining layer is your wet sheet of paper.
For higher quality and uniformity, consider these advanced approaches:
- Double-screen pressing: Place a second screen on top of the wet sheet and press gently to extract excess water and compact fibers.
- Layering different pulps: Combine fine printer paper pulp with coarser plant fibers for gradient textures.
- Embedding elements: Add dried leaves, seed paper inclusions, or silk threads between layers for artistic effect.
- Stenciling: Use perforated templates over the deckle to create patterned sheets.
| Fiber Type | Texture | Strength | Best For |
|---|---|---|---|
| Printer Paper | Smooth | Moderate | Writing, printing |
| Cotton Rags | Soft, slightly textured | High | Stationery, art |
| Newspaper | Rough | Low | Decorative use |
| Hemp/Bamboo | Firm, fibrous | Very High | Durable cards, journals |
Drying and Finishing Methods for Professional Results
Peel the wet sheet from the screen onto a felt or cotton cloth. Stack multiple sheets with cloths in between to prevent sticking. Press the stack under heavy books or a wooden clamp for 12–24 hours to remove moisture and bond fibers.
Final drying can be done in several ways:
- Air-dry flat: Slow but preserves flatness; ideal for delicate sheets.
- Iron drying: Place a dry cloth over the sheet and iron on medium heat. This compresses fibers and yields a smooth finish.
- Line drying: Hang sheets like laundry for a rustic, wrinkled look (best for decorative paper).
For added durability, apply a thin wash of gelatin sizing (1 tsp food-grade gelatin in 1 cup hot water, cooled). Brush lightly on the surface and let dry. This reduces ink bleed and increases resistance to moisture.
Mini Case Study: A Small-Batch Stationery Business
Sophie Nguyen, a designer in Portland, began making paper at home using discarded office memos and tea-stained coffee filters. She experimented with blending in lavender stems and onion skins for natural color. After refining her pressing technique and investing in a simple hydraulic press, she launched “Fiber & Folk,” selling handmade notebooks and wedding invitations.
Her key insight? Consistency in pulp dilution and pressing pressure made her product feel professional. By labeling each batch with fiber content and drying method, she built trust with customers seeking transparency in craftsmanship.
Checklist: Steps to Make High-Quality Paper at Home
- Collect and sort fiber sources (paper, rags, plant matter)
- Soak materials for 4–12 hours
- Blend into smooth pulp in batches
- Combine pulp with water in a vat (1:10 ratio)
- Use a deckle to form sheets
- Press sheets between felts with weight for 12+ hours
- Dry flat, iron, or hang depending on desired finish
- Optional: Size with gelatin for improved durability
- Trim edges and store in a dry, flat container
Common Pitfalls and How to Avoid Them
Even experienced makers encounter issues. Knowing how to troubleshoot improves outcomes:
- Paper tears easily when wet: Increase fiber content or add long-fiber materials like cotton linters.
- Uneven thickness: Stir pulp thoroughly before each dip and lift the deckle straight out of the vat.
- Sticking to the screen: Use nylon mesh instead of metal, or lightly spray with cooking oil before use.
- Yellowing over time: Avoid chlorine bleach; use oxygen-based whiteners or lemon juice with sunlight exposure.
FAQ
Can I make printable paper at home?
Yes, but it requires extra care. Use only pure cellulose fibers like printer paper or cotton, ensure uniform thickness, and size the surface with gelatin. Test on your printer with low-value sheets first to avoid jams.
How long does homemade paper last?
Properly dried and stored paper can last decades. Acid-free fibers (like cotton) and neutral pH water extend longevity. Store away from humidity and direct sunlight to prevent degradation.
Is it possible to recycle inked paper?
Yes, though dark inks may tint the pulp gray. For cleaner results, use de-inking methods: add 1 tablespoon of cornstarch per liter of pulp, stir well, and let sit for 15 minutes before forming sheets—the starch binds ink particles, which sink.
Conclusion: Turn Waste Into Worth
Making high-quality paper at home blends practicality with creativity. It transforms everyday waste into personalized, durable material—perfect for gifts, journals, or mindful art projects. By mastering pulp preparation, sheet formation, and finishing techniques, you gain more than paper; you cultivate a deeper appreciation for material origins and sustainable design.
🚀 Start today with a single sheet. Gather scraps, blend your first pulp, and feel the texture of sustainability in your hands. Share your creations, refine your process, and join a growing community of mindful makers.