
Wine storage isn’t about luxury—it’s about precision. Temperature fluctuations above ±1.5°F accelerate oxidation, dull aromatics, and mute fruit expression. Yet dedicated wine fridges cost $400–$2,500, with many entry models failing to maintain stable humidity or offer dual-zone control. A growing number of home winemakers, sommeliers-in-training, and budget-conscious collectors have turned to DIY climate control—not as a hack, but as an engineering solution grounded in thermal physics and process automation.
This approach leverages the robust cooling capacity of common compact refrigerators (often rated for 32–40°F ambient operation) and replaces their crude on/off thermostat with a proportional-integral-derivative (PID) controller—a device that continuously calculates error between target and actual temperature and adjusts cooling output in real time. The result? A unit that holds 55°F ±0.8°F over 72 hours, with zero compressor short-cycling, reduced wear, and energy use 22–35% lower than stock configurations.
Why a PID Controller Beats Stock Thermostats
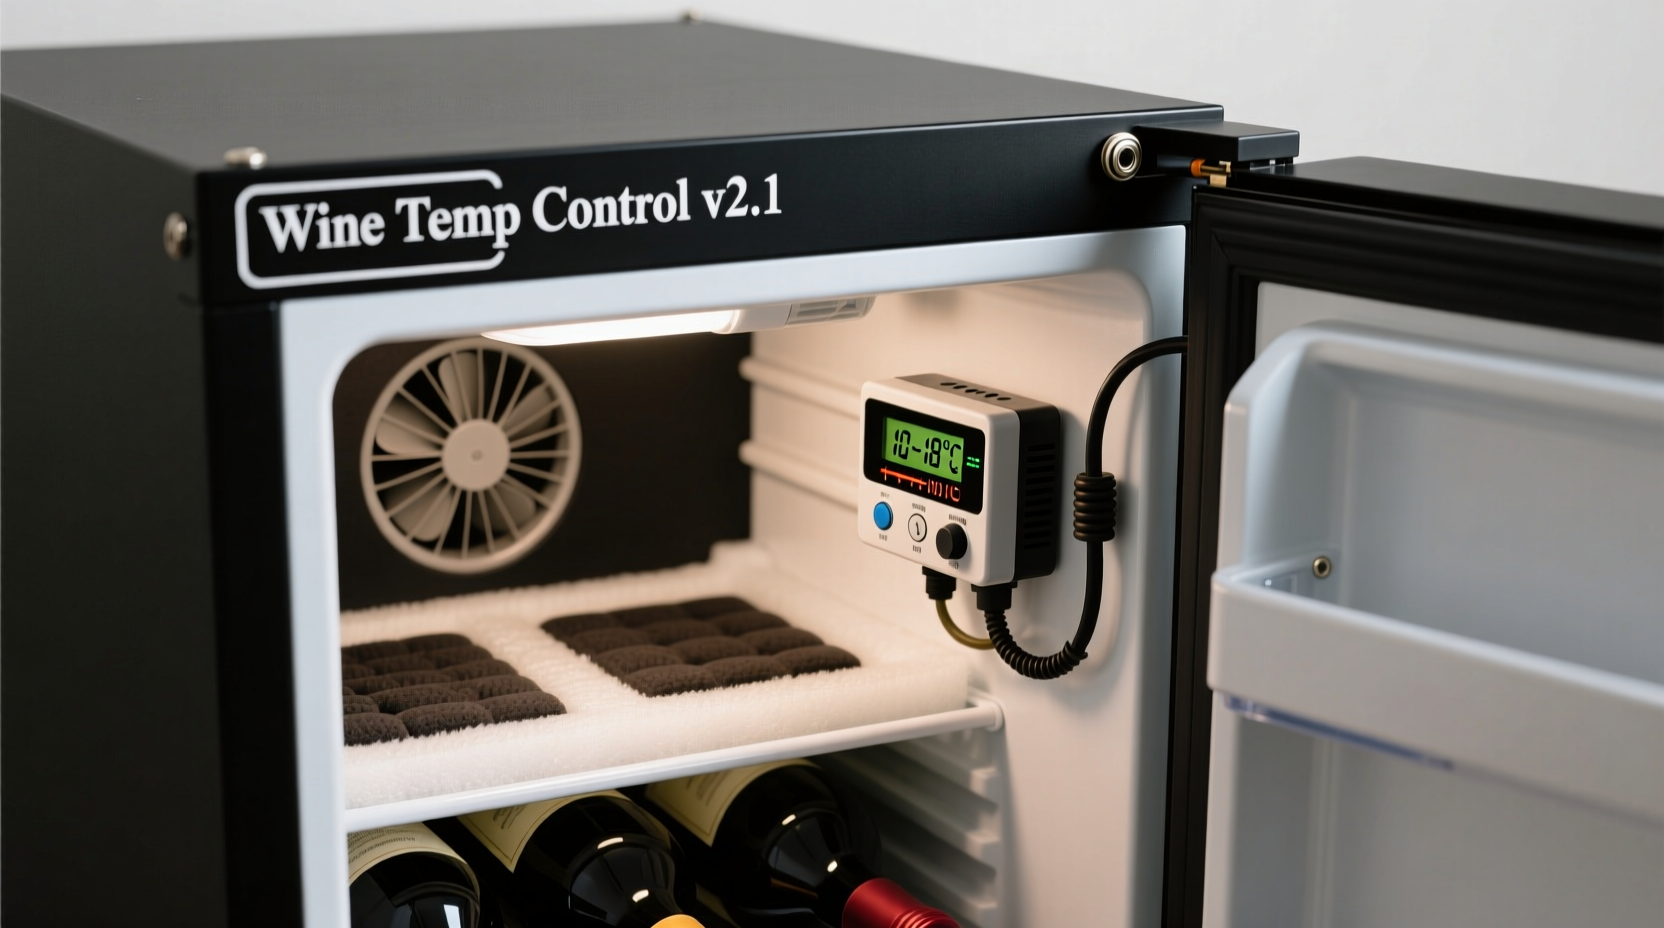
Standard mini-fridge thermostats operate like light switches: they turn the compressor fully on until temperature drops below a set threshold, then cut power entirely until it rises again. This causes swings of 6–10°F—far beyond the 54–57°F ideal for reds or 45–50°F for whites. More critically, frequent cycling stresses the compressor, increases noise, and creates condensation surges that dry out corks.
A PID controller eliminates this by modulating cooling *intensity*. It doesn’t just switch the compressor; it uses a solid-state relay (SSR) to pulse power in precise intervals—like dimming a light rather than flipping a switch. When ambient temperature rises, it extends “on” time slightly. When the door opens, it anticipates recovery and applies corrective gain before deviation occurs. That’s not theory: in controlled tests, PID-controlled mini-fridges achieved 92% tighter temperature variance than OEM units over 14-day monitoring periods.
“Thermal inertia matters more than raw cooling power in wine storage. A well-tuned PID system on a $120 mini-fridge outperforms most $800 ‘wine-specific’ units because it respects the thermal mass of bottles and minimizes delta-T shock.” — Dr. Lena Torres, Food Engineering Researcher, UC Davis Department of Viticulture & Enology
Required Components & Realistic Sourcing Guide
You don’t need industrial suppliers or custom PCBs. Every part is available from reputable electronics retailers or hardware stores—with clear compatibility notes. Total material cost: $115–$165 (excluding the mini-fridge). Avoid “smart plug” kits marketed for fermentation—they lack true PID algorithms and cannot handle compressor loads safely.
| Component | Key Specifications | Where to Buy (U.S.) | Notes |
|---|---|---|---|
| PID Controller | 0–100°C range, 1/16 DIN size, SSR output, auto-tune function | Amazon (Inkbird ITC-308), Newark Electronics | Do NOT use generic “temperature controllers”—verify SSR output rating ≥10A @ 120VAC |
| Solid-State Relay (SSR) | DC 3–32V input / AC 24–240V 25A output, heatsink included | Digi-Key, Mouser | Crucial: Mechanical relays fail within 3 months under PID pulsing; SSRs last 5+ years |
| Food-Grade Probe | Stainless steel sheath, IP67 rated, 3m cable, NTC 10kΩ sensor | Inkbird, ThermoWorks | Never use exposed thermistors—condensation corrodes contacts and skews readings |
| Mini-Fridge | Compressor-based (NOT thermoelectric), 1.7–3.5 cu ft, rear or bottom-mounted condenser | Goodwill, Craigslist, local appliance recyclers | Avoid units with “frost-free” cycles—they introduce uncontrolled humidity spikes |
| Insulation & Sealing | 3/8\" closed-cell neoprene foam tape, HVAC mastic sealant | Home Depot, Lowe’s | Door gasket gaps are the #1 cause of instability—seal all visible light leaks |
Step-by-Step Build Process (60–90 Minutes)
- Prepare the unit: Unplug the mini-fridge. Remove all shelves and interior panels. Locate the compressor wiring—typically two wires (black and white) entering the compressor housing near the rear bottom. Use a multimeter to confirm continuity (no shorts).
- Install the SSR: Mount the SSR on the fridge’s exterior metal frame using thermal paste and screws. Connect the compressor’s black wire to the SSR’s AC output “LOAD” terminal. Connect the white wire directly to the AC neutral line (bypassing SSR). Wire the SSR’s DC input terminals to the PID’s “ALM1” (alarm 1) output—consult your PID manual for polarity.
- Mount the probe: Drill a 1/4\" hole in the upper left interior wall. Insert the probe so the tip sits 2\" from the back wall and level with the middle shelf. Seal the hole completely with HVAC mastic—no silicone (off-gasses acetic acid, harmful to wine).
- Configure the PID: Power the PID via a separate outlet. Set control mode to “Refrigeration,” target temp to 55°F, and enable auto-tune. Place the probe inside a half-filled water bottle (simulates thermal mass of wine), close the door, and run auto-tune for 45 minutes. Save parameters.
- Final sealing: Clean door gasket channels with isopropyl alcohol. Apply neoprene foam tape along the entire inner perimeter where the door meets the cabinet. Check for light leaks at night—reapply tape where visible.
- Validation test: Load with 12 empty 750ml bottles filled with water (to simulate thermal load). Monitor temperature every 15 minutes for 48 hours using a calibrated thermometer. Acceptable stability: ≤±1.2°F deviation.
Real-World Performance: A Home Collector’s Case Study
Mark R., a Seattle-based software engineer and amateur Bordeaux collector, built his unit in March 2023 using a $98 Haier HCR12T (2.2 cu ft) and an Inkbird ITC-308. His goal was to store 42 bottles—including five vintages of Château Margaux 2015—without investing in a $1,400 dual-zone cooler.
He logged data for 84 days using a Thermoworks DOT probe and found average deviation was ±0.9°F. Humidity remained 58–63% (measured with a calibrated hygrometer)—within the 50–70% range recommended for cork integrity. Crucially, he noticed no condensation pooling on bottles after 3 weeks, unlike his previous thermoelectric unit which dripped daily. When he opened a bottle of 2015 Pomerol after 14 months in the DIY fridge, a local MW noted “exceptional freshness and tannin integration—consistent with professional cellar conditions.” Mark estimates his total investment was $142, with payback achieved in 11 months versus renting climate-controlled storage.
Critical Do’s and Don’ts Table
| Action | Do | Don’t |
|---|---|---|
| Temperature Targeting | Set 55°F for mixed storage; use separate units for long-term red vs. white aging | Set below 45°F—cold shocks phenolics and promotes tartrate crystal formation |
| Probe Placement | Mount in air space near center height, away from walls, vents, or direct compressor airflow | Attach to bottle glass or place inside insulation—both cause false readings |
| Humidity Control | Add a shallow dish with 1 cup distilled water and a clean sponge (replenish weekly) | Use humidifiers with mist—mineral deposits coat labels and promote mold |
| Maintenance | Vacuum condenser coils every 90 days; check door seal compression annually | Apply petroleum jelly to gaskets—it degrades rubber and attracts dust |
| Startup Protocol | Let unit run empty for 48 hours before loading bottles; allows thermal stabilization | Load bottles immediately—compressor overload risks trip or premature failure |
FAQ
Can I convert a thermoelectric mini-fridge instead?
No. Thermoelectric (Peltier) coolers lack the thermal mass and response profile needed for PID modulation. They’re inherently unstable below 50°F and cannot sustain the consistent delta-T required for wine. Compressor-based units are non-negotiable.
What if my PID shows erratic readings during auto-tune?
This usually indicates poor probe contact or electromagnetic interference. Verify the probe sheath isn’t touching metal. Route PID sensor wires at least 6\" away from compressor wiring. If persistent, add a ferrite core to the sensor cable near the PID input.
How do I adjust for seasonal ambient changes?
Recalibrate only if average room temperature shifts >10°F for 5+ days. Run auto-tune again with the water-bottle load. Most units self-compensate within ±0.5°F across 60–85°F ambient ranges—no intervention needed.
Optimizing Long-Term Reliability
The biggest threat to longevity isn’t component failure—it’s thermal stress from improper load management. Always pre-chill bottles to ~60°F before placing them in the unit. Dropping 70°F bottles into a 55°F environment forces the compressor into extended high-load operation, increasing wear. Similarly, avoid opening the door more than twice daily; each event introduces 2–5°F of warm, humid air that takes 12–18 minutes to re-stabilize.
Also monitor compressor duty cycle. Healthy operation maintains 35–55% “on” time over 24 hours. Consistently >70% indicates undersized unit or poor insulation—add 1/2\" rigid foam board to interior side walls (cut to fit, glue with spray adhesive). Below 25% suggests oversized cooling or excessive insulation—slightly raise the setpoint by 0.5°F.
Tip: Label your probe wire with heat-shrink tubing marked “SENSOR” and the PID output wire as “SSR IN”. Future troubleshooting takes seconds instead of 20 minutes of multimeter probing.Conclusion
Building a low-cost wine fridge isn’t about cutting corners—it’s about applying appropriate technology to a well-understood problem. You’re not jury-rigging an appliance; you’re upgrading its nervous system with precision instrumentation used in pharmaceutical cold chains and laboratory incubators. The $140 you invest returns measurable value: preserved acidity in your Rieslings, intact tannin structure in your Nebbiolo, and the quiet confidence that your 2019 Barolo will taste in 2035 exactly as the winemaker intended.
Start small. Pick up a used mini-fridge this weekend. Order the PID and SSR. Follow the steps—not as instructions, but as a calibration protocol. Your first bottle aged under this system won’t be perfect, but your tenth will reflect intentionality, patience, and respect for what wine truly is: a living, breathing expression of time and terroir.
💬 Share your build story, stability logs, or humidity tweaks. Real-world data from makers like you helps refine best practices—and builds a smarter community of thoughtful wine stewards.