Keychains are more than just functional tools—they’re small accessories that travel with you every day, often reflecting personality, mood, or even memories. While mass-produced versions are convenient, they lack individuality. A growing trend in personalization involves transforming ordinary keychains into wearable art using beads, rhinestones, and thoughtful design. With minimal supplies and a bit of creativity, anyone can craft a one-of-a-kind piece that stands out.
Whether you're making a gift, expressing your style, or simply enjoying a hands-on craft, customizing keychains offers an accessible entry point into DIY jewelry design. The best part? You don’t need advanced skills—just patience, imagination, and the right materials.
Why Personalize Your Keychain?
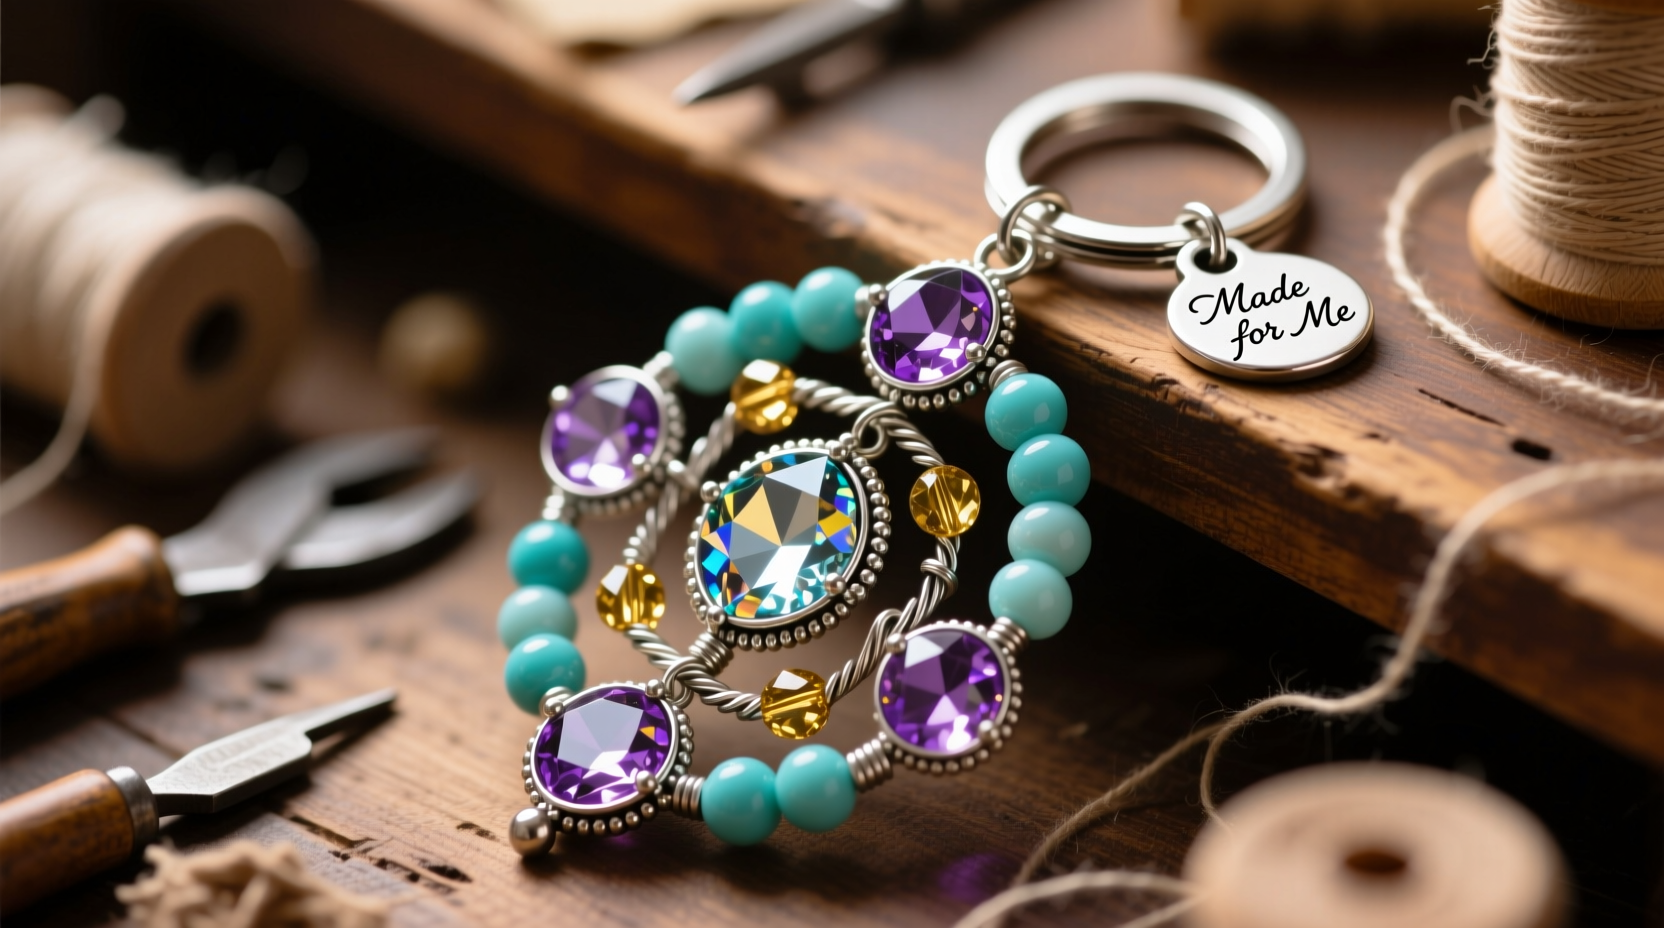
Personalization turns an everyday object into something meaningful. A beaded keychain can symbolize a favorite color palette, spell out a name, represent zodiac signs, or commemorate special events like graduations or anniversaries. Unlike generic metal rings, a handcrafted keychain becomes a conversation starter and a subtle extension of identity.
Beyond aesthetics, personalized keychains offer practical benefits. Distinctive designs make keys easier to identify in crowded bags or during rush-hour commutes. They also serve as thoughtful, low-cost gifts that carry emotional weight without requiring a large investment.
Tip: Use UV resin to seal rhinestone arrangements and prevent loosening over time.Materials You’ll Need
Creating a standout keychain starts with gathering the right components. Most items are affordable and widely available at craft stores or online retailers.
- Base keychain: Choose from lobster clasps, split rings, or decorative metal loops.
- Beads: Glass, acrylic, wood, or metal beads in various sizes and finishes.
- Rhinestones: Flat-back or sew-on stones in different cuts and colors.
- Adhesive: E6000 or GS Hypo Cement for strong bonding.
- Thread or wire: Beading thread (like FireLine) or flexible beading wire for stringing.
- Tools: Round-nose pliers, flat-nose pliers, wire cutters, tweezers.
- Optional: Charms, letter beads, jump rings, clear nail polish or resin for sealing.
For beginners, starting with pre-strung bead kits or basic keychain blanks simplifies the process while still allowing room for customization.
Step-by-Step Guide to Designing Your Keychain
- Select a theme or concept: Decide whether your design will be monochromatic, alphabetical, symbolic (e.g., heart-shaped), or themed (sports team, fandom).
- Choose your base: Pick a durable keyring that matches your vision—antique brass for vintage flair, silver for modern minimalism.
- Plan the layout: Arrange beads and rhinestones on a soft surface before gluing or stringing to test spacing and balance.
- String or glue elements: For linear designs, thread beads onto wire and secure with crimp beads. For flat surfaces, use adhesive to attach rhinestones in patterns.
- Add focal points: Centerpieces like a large charm or initial bead draw attention and anchor the design.
- Seal and protect: Apply a thin layer of clear resin or nail polish over glued areas to reinforce durability.
- Attach securely: Double-check all connections, especially jump rings, to ensure nothing loosens under daily use.
This process allows flexibility—swap steps depending on whether you're building a dangling strand or a compact mosaic-style faceplate.
Creative Design Ideas to Inspire You
Originality lies not just in materials but in how they’re arranged. Consider these imaginative approaches:
- Name or Initial Keychains: Spell out names using alphabet beads, accented with matching rhinestones.
- Color-Coded by Season: Create rotating keychains—one pastel for spring, bold neons for summer, deep tones for fall.
- Zodiac & Birthstone Themes: Use birthstone-colored beads and constellation charms for astrologically inspired designs.
- Mini Memory Tokens: Embed tiny photo locket beads or enamel charms representing hobbies (music notes, cameras).
- Geometric Patterns: Alternate bead sizes and shapes (cube, round, tube) to form chevrons or spirals.
- Glamour Accents: Cover a metal disc base with tightly packed rhinestones in gradient layouts for a jeweled effect.
“Personalized accessories resonate because they tell micro-stories. A single keychain can capture someone’s essence in miniature.” — Lila Monroe, Jewelry Designer & Craft Educator
Do’s and Don’ts of Bead-and-Rhinestone Keychains
| Do’s | Don’ts |
|---|---|
| Use high-quality adhesive designed for crafts. | Don’t skimp on glue—weak bonds lead to lost stones. |
| Balance weight so the keychain doesn’t tilt. | Don’t overload one side; uneven distribution stresses attachments. |
| Test fit keys before final assembly. | Don’t forget clearance—bulky designs may not fit in pockets or bags. |
| Store unused beads in labeled containers. | Don’t leave small parts loose where they can be lost or swallowed. |
| Allow 24 hours drying time after gluing. | Don’t handle glued pieces too soon—premature movement breaks bonds. |
Real Example: A Custom Graduation Gift
Sophie wanted to give her sister a meaningful graduation present. Instead of another generic card, she created a keychain using navy blue and gold beads—the school colors. She added a small engraved \"Class of '24\" charm and lined up six small rhinestones to represent each year of high school. The centerpiece was a gold initial “M” for her sister’s first name. After sealing the design with UV resin, it became both durable and dazzling. At the party, multiple guests asked where she’d bought it—proof that handmade can look professional when done with care.
Checklist: Building a Durable, Eye-Catching Keychain
- ☐ Define your design theme or message
- ☐ Gather all materials and tools before starting
- ☐ Test-fit beads and charms on the ring
- ☐ Lay out the full design on a tray or mat
- ☐ Secure threaded sections with crimp beads or knots
- ☐ Apply adhesive evenly when gluing rhinestones
- ☐ Allow adequate curing time for adhesives
- ☐ Inspect all connections for strength
- ☐ Seal exposed glue or thread for longevity
- ☐ Label or package if giving as a gift
Frequently Asked Questions
Can I wash my beaded keychain?
Avoid submerging it in water, especially if glue is used. Spot clean gently with a damp cloth. Prolonged moisture weakens adhesives and may tarnish metal components.
How long do homemade keychains last?
With quality materials and proper sealing, they can last years. Rhinestones stay intact longer when protected with resin, and knotted threads resist fraying better than glued ones.
What’s the best way to attach rhinestones to metal?
Use a two-part epoxy or E6000 glue for maximum hold. Clean the surface with rubbing alcohol first to remove oils and improve adhesion.
Make It Yours—and Make It Last
Personalizing a keychain isn't just about decoration—it's about ownership, expression, and intention. Each bead chosen, each stone placed, adds a layer of meaning to an object you touch daily. Whether you prefer understated elegance or bold sparkle, the options are limited only by imagination.
Start small: try a single-color pattern or a simple initial. As confidence grows, experiment with mixed textures, layered strands, or even interchangeable modular designs. These little creations may seem minor, but they reflect who you are—or who you want to celebrate.
🚀 Grab your beads today and turn a plain keyring into a signature piece. Share your creation online with #MyBeadedKeychain and inspire others to craft with purpose!