Square clocks—whether wall-mounted, mantel, or vintage—are more than functional timepieces; they often serve as design statements in homes and offices. However, their unique shape and mechanical complexity require special attention when opening and maintaining them. Unlike round clocks, the structural layout of a square case can make access to internal mechanisms less intuitive, increasing the risk of damage if handled improperly. This guide provides a detailed, practical approach to safely disassembling, cleaning, inspecting, and reassembling your square clock while preserving its accuracy and longevity.
Understanding Your Square Clock
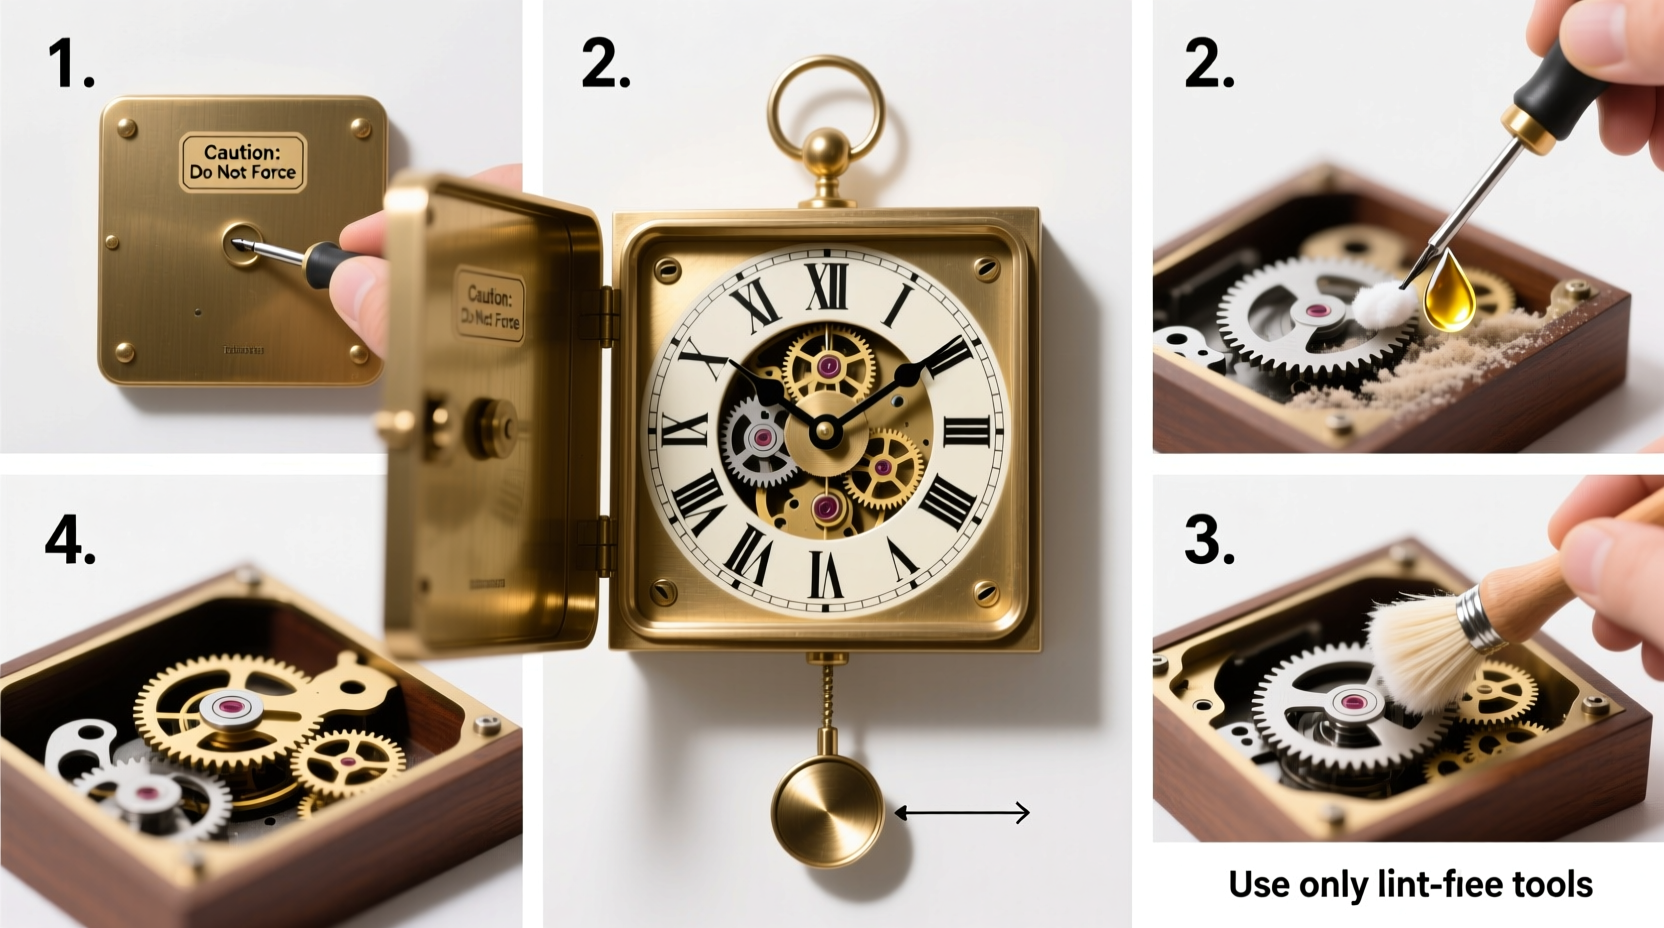
Before attempting any maintenance, it’s essential to understand what type of square clock you’re working with. Most fall into one of three categories: mechanical (wind-up), quartz (battery-powered), or hybrid models with mechanical movements powered by electricity. The maintenance process varies significantly between these types.
- Mechanical clocks rely on gears, springs, and pendulums. They require regular winding and are sensitive to dust and misalignment.
- Quartz clocks use a battery and electronic oscillator regulated by a quartz crystal. These are simpler to maintain but still need periodic cleaning and inspection.
- Hybrid or electro-mechanical clocks combine elements of both and may have delicate circuitry that demands extra caution.
The square housing often means tighter internal spacing and non-standard mounting points, especially in vintage or artisan models. Always identify your clock’s movement type before proceeding.
Tip: Take clear photos from multiple angles before disassembly. This visual reference helps during reassembly, especially when dealing with small screws or spring-loaded components.Essential Tools and Safety Precautions
Opening a clock isn’t just about prying off the back panel—it requires precision tools and a methodical mindset. Using improper equipment can strip screws, damage dials, or disrupt gear alignment.
| Tool | Purpose | Avoid Using |
|---|---|---|
| Jeweler’s screwdrivers (Phillips & flathead) | Remove small, delicate screws without slippage | Standard screwdrivers or knives |
| Tweezers (non-magnetic) | Handle tiny parts like hands or pins | Fingers or metal tweezers near magnets |
| Soft brush (natural bristle) | Clean dust from gears and face | Cotton swabs with excessive pressure |
| Lint-free cloth | Wipe glass and casing | Paper towels or rough fabrics |
| Plastic tray or organizer | Store screws and parts by section | Leaving parts loose on a table |
Work in a clean, well-lit space free from drafts. Static electricity and airborne particles can interfere with delicate mechanisms. Ground yourself by touching a metal surface before handling internal components, particularly in quartz models.
“Clocks are not just machines—they’re micro-engineered systems where every millimeter matters. Rushing leads to irreversible mistakes.” — Daniel Reeves, Master Horologist, American Watchmakers-Clockmakers Institute
Step-by-Step Guide to Safely Open and Inspect a Square Clock
- Power down the clock: For quartz models, remove the battery. For mechanical clocks, let the mainspring unwind completely by stopping the pendulum or allowing the weights to descend fully.
- Secure the hands: Use soft tape or a hand-setting tool to gently hold the hour and minute hands in place if you plan to remove the dial or movement. This prevents bending or detachment.
- Remove the back panel: Most square clocks have either snap-on backs, screw-secured plates, or latches at the corners. Examine the edges carefully. If screws are present, loosen them in a crisscross pattern to avoid warping the case.
- Inspect the movement: Once open, look for signs of wear—rust on gears, dried lubricant, cracked circuit boards (in quartz), or bent pinions. Do not touch the balance wheel or hairspring unless trained.
- Document connections: In hybrid or electric models, note wire placements or plug orientations before disconnecting anything.
- Lift the movement carefully: If removal is necessary, support it evenly. Many square cases have offset mounting posts that require slight tilting to release.
Resist the urge to “fix” something that isn’t broken. Misdiagnosing a slow tick as a gear issue when it’s actually a weak battery leads to unnecessary complications.
Tip: Label each screw and component compartment with masking tape and a marker. A 3mm Phillips screw from the chime module looks identical to one from the time train—but replacing them incorrectly causes malfunction.Key Maintenance Practices for Longevity
Regular maintenance prevents major repairs and keeps your square clock accurate. Frequency depends on usage and environment:
- Every 6 months: Clean exterior, check battery (if applicable), verify hand clearance.
- Every 3–5 years: Full internal cleaning and oiling for mechanical models.
- Immediately: If the clock stops, makes grinding noises, or shows inconsistent timekeeping.
Cleaning the Interior
Dust accumulation is the enemy of smooth operation. Use a soft brush to gently remove debris from gears and plates. Never blow with your mouth—moisture accelerates corrosion. For stubborn grime, use a lint-free cloth dampened slightly with isopropyl alcohol (90%+), applied only to non-metallic areas.
Lubrication (Mechanical Clocks Only)
Apply a single drop of synthetic clock oil to pivot points and gear arbors. Over-lubrication attracts dust and forms gummy residues. Avoid oiling escapement components unless you have proper training.
Reassembly Checklist
- ✅ All screws accounted for and correctly placed
- ✅ Hands are aligned and not touching each other or the dial
- ✅ Movement is securely mounted and level
- ✅ Battery replaced (if applicable) with correct polarity
- ✅ Back panel sealed tightly without gaps
“Proper reassembly is half the job. A perfectly cleaned movement will fail if the hands are misaligned or the case stresses the plate.” — Lila Chen, Restoration Specialist, National Clock Museum
Real Example: Restoring a 1940s Square Mantel Clock
A collector in Portland acquired a vintage square mantel clock with a brass bezel and glass front. It had stopped working after being stored in an attic for years. Following this guide, she first removed the hands and back panel using jeweler’s tools. Inside, she found oxidized gears and a dried-up mainspring. After documenting each screw location, she cleaned the movement with a soft brush and applied specialized clock oil to pivot points. She replaced the old felt washers under the weight pulleys and realigned the hands with a setting tool. Upon reassembly, the clock resumed ticking accurately and has run consistently for over eight months with biannual dusting.
This case underscores the importance of patience and precision—even seemingly minor details like washer condition affect performance.
Common Mistakes to Avoid
- Using household cleaners: Window sprays or polishes can seep into seams and damage finishes or mechanisms.
- Forcing stuck parts: If a screw won’t budge, apply a tiny amount of penetrating oil and wait 10 minutes rather than risking breakage.
- Ignoring magnetism: Magnetic tools can magnetize gears, causing erratic timekeeping. Use demagnetized instruments.
- Skipping hand alignment: Hands that rub against each other or the dial cause drag and stoppage.
FAQ
Can I open a square clock without prior experience?
Yes, for basic cleaning and battery replacement, provided you work slowly and document each step. However, deep maintenance on mechanical movements is best left to professionals unless you’ve received training.
Why does my square clock lose time after I clean it?
This often results from over-handling the balance wheel or incorrect reassembly. The hairspring is extremely sensitive—touching it alters its oscillation rate. Also, ensure the clock is level after reassembly, as tilt affects timekeeping in mechanical models.
How do I know if my clock needs professional servicing?
If the movement appears damaged, the escapement is noisy, or the clock stops within hours of starting, seek a certified horologist. Internal gear wear or pivot damage requires specialized tools and knowledge.
Final Thoughts
Maintaining a square clock blends craftsmanship with care. Its angular design may complicate access, but with the right tools and disciplined approach, you can preserve its function and beauty for decades. Whether it’s a family heirloom or a modern accent piece, treating it with respect ensures it continues marking time accurately and elegantly.
💬 Have a square clock you’ve successfully maintained? Share your story or tips in the comments—your experience could help others keep their timepieces ticking smoothly.