Homemade ice cream has long been associated with ice cream makers, rock salt, and hours of churning. But recent kitchen innovations have challenged that idea. The Ninja Creami burst onto the scene with bold claims: rich, creamy, restaurant-quality soft serve made entirely from frozen bases—with no churning required. Meanwhile, many home cooks swear they’ve achieved similar results using just a high-powered regular blender. So what’s the real story? Can you actually make good ice cream in a standard blender, or is the Ninja Creami worth the investment?
This isn’t just about convenience—it’s about texture, flavor control, ingredient quality, and how much effort you’re willing to put in. Let’s break down the capabilities of both machines, explore the science behind frozen desserts, and determine whether your current blender can truly compete with a dedicated frozen dessert maker.
The Science Behind Smooth Ice Cream
Creating smooth, scoopable ice cream hinges on two key factors: fat content and air incorporation (also known as overrun). Traditional churned ice cream works by slowly freezing a liquid base while continuously agitating it, which prevents large ice crystals from forming and introduces tiny air bubbles for a light, creamy mouthfeel.
Without agitation, frozen liquids form dense blocks of ice. That’s why simply freezing sweetened milk and blending it later often results in icy, grainy textures—unless you have precise control over temperature, consistency, and blade power.
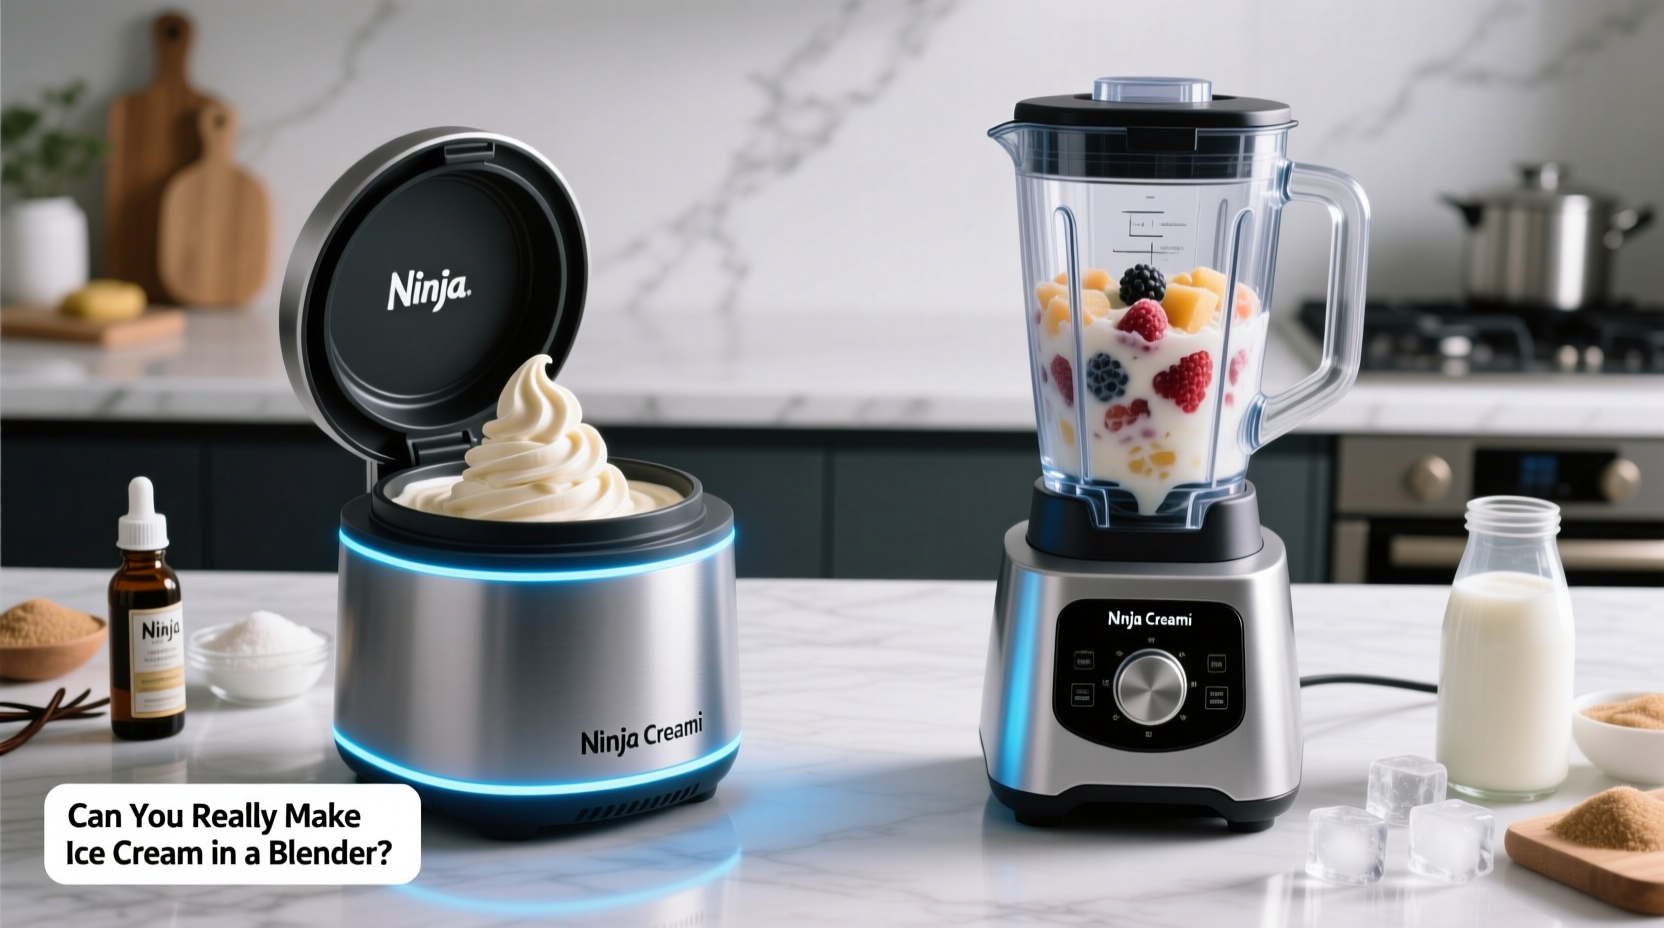
The Ninja Creami operates on a different principle. It uses pre-frozen bases (typically poured into special pucks) and applies slow, controlled pulsing with a uniquely designed blade to “whip” the mixture into a soft-serve consistency without melting it. This process mimics churning but at sub-zero temperatures, preserving structure while improving texture.
Regular blenders, even high-end models like Vitamix or Blendtec, are built for room-temperature or warm blending. Their blades spin too fast and generate heat, which can partially melt frozen ingredients during processing. While possible to blend frozen mixtures, achieving consistent results requires careful technique and timing.
Tip: For better blending results with frozen ingredients, let them sit at room temperature for 5–7 minutes before processing to reduce strain on the motor.Ninja Creami: How It Works and What It Delivers
The Ninja Creami is not a blender. It’s a specialized frozen dessert system designed specifically for transforming frozen bases into creamy treats. You prepare a liquid mixture—milk, cream, sweetener, flavorings—pour it into a proprietary puck container, freeze it for at least 24 hours, then insert it into the Creami unit.
Using one of several preset programs (e.g., “Ice Cream,” “Sorbet,” “Milkshake”), the machine scrapes and pulverizes the frozen block layer by layer, creating a texture remarkably close to soft-serve gelato. The result is denser than store-bought ice cream but smoother than anything most people achieve with a standard blender.
Because the Ninja Creami maintains ultra-cold temperatures throughout processing, there’s minimal melting and re-freezing, which helps prevent iciness. Additionally, its slow-pulse technology avoids overheating the mixture—a common issue when using blenders on frozen foods.
“Dedicated appliances like the Ninja Creami excel because they’re engineered for thermal stability and controlled mechanical action at sub-zero temps.” — Dr. Lena Torres, Food Scientist & Kitchen Appliance Analyst
Can a Regular Blender Make Real Ice Cream?
Yes—but with caveats.
High-performance blenders (those with motors of 1000 watts or more) can produce surprisingly good results if used correctly. The method typically involves freezing a custard-like base in an ice cube tray or loaf pan, then breaking it up and blending in short bursts until smooth. Adding a small amount of liquid (like milk or cream) helps the blades move, but too much will make the final product runny.
However, limitations exist:
- Heat buildup: Fast-spinning blades create friction, warming the mixture and causing partial melting. When returned to the freezer, this leads to larger ice crystals and a grainier texture over time.
- Inconsistent scraping: Most blenders don’t fully reach the sides or bottom, leaving pockets of unmixed frozen chunks.
- Limited batch size: Blending large volumes of frozen material risks burning out the motor or producing uneven results.
That said, resourceful users have developed workarounds. One popular technique involves blending in stages—processing half the frozen base, scraping down the sides, then repeating—and finishing with a quick chill in the freezer to re-solidify the texture.
Step-by-Step: Making Ice Cream in a Regular Blender
- Prepare a thick ice cream base using milk, heavy cream, sugar, and optional egg yolks (for custard-style).
- Pour into a shallow container and freeze for 6–8 hours or overnight.
- Break the frozen block into 1–2 inch chunks.
- Add chunks to the blender, along with 1–2 tablespoons of cream or milk to aid blending.
- Use short pulses (1–2 seconds) to begin breaking up the ice. Pause frequently to scrape down the sides.
- Once mostly broken down, blend in 5-second intervals until smooth and creamy.
- Transfer to a container and freeze for 30–60 minutes to firm up before serving.
Head-to-Head Comparison: Ninja Creami vs Regular Blender
| Feature | Ninja Creami | Regular Blender |
|---|---|---|
| Primary Function | Dedicated frozen dessert maker | Multipurpose blending (smoothies, soups, sauces) |
| Texture Quality | Consistently smooth, soft-serve-like | Variable; often icy or grainy |
| Freezing Required? | Yes (24+ hours per batch) | Yes (6–8 hours minimum) |
| Processing Temp | Sub-zero (no melting) | Room temp blades cause partial melting |
| Batch Size | Single serving (32 oz max) | Varies (up to 64 oz depending on model) |
| Cleanup | Easy (removable parts, dishwasher-safe) | More involved (frozen residue sticks to jar) |
| Cost | $100–$150 (plus extra pucks) | $50–$500 (if already owned) |
| Learning Curve | Low (preset programs) | Moderate (requires trial and error) |
Real-World Example: Sarah’s Summer Experiment
Sarah, a home cook from Portland, wanted to make dairy-free ice cream for her vegan family. She didn’t own a Ninja Creami but had a 1200-watt Vitamix. Over three weekends, she tested both methods using coconut milk, maple syrup, and vanilla.
First, she tried the blender method: freezing the mixture in a loaf pan, then blending in stages. The initial result was creamy but slightly chewy due to coconut fat separation. After adjusting the recipe with a bit of tapioca starch and reducing blending time, she improved the texture significantly.
Then, she borrowed a friend’s Ninja Creami. Using the same base, she poured it into a puck, froze it, and ran the “Ice Cream” cycle. The outcome was noticeably smoother, with a luxurious mouthfeel closer to premium gelato. Cleanup was faster, and portion control was easier.
Verdict? “The Creami made better ice cream with less effort,” she said. “But my blender got me 80% of the way there—for free.”
When a Blender Might Be Enough
If you're making ice cream occasionally and already own a powerful blender, you may not need a Ninja Creami. It’s especially viable if:
- You’re okay with slightly less creamy results.
- You enjoy tweaking recipes and techniques.
- You prioritize kitchen efficiency (one appliance, multiple uses).
- Budget is a concern—the Creami is an added expense.
On the other hand, the Ninja Creami shines for frequent users, families with dietary restrictions (gluten-free, keto, vegan), or anyone who values consistency and ease. Its ability to handle low-sugar, low-fat, and alternative milk bases without sacrificing texture makes it a favorite among health-conscious dessert lovers.
Checklist: Can Your Blender Handle Ice Cream?
Before attempting homemade frozen desserts in your blender, ask yourself:
- ✅ Is your blender motor 1000 watts or higher?
- ✅ Does it have a “pulse” function for controlled blending?
- ✅ Can you manually scrape down the sides during processing?
- ✅ Are you willing to experiment with base thickness and thaw time?
- ✅ Do you have space to pre-freeze portions in advance?
If you answered yes to all, you likely have what it takes to make decent blender-based ice cream. If not, the Ninja Creami—or a traditional ice cream maker—might be a smarter long-term choice.
Frequently Asked Questions
Can I use any blender for frozen desserts?
No—not all blenders can handle frozen solids effectively. Lower-powered models (under 800 watts) risk motor burnout or produce uneven blends. High-performance blenders like Vitamix, Blendtec, or Ninja Professional series are recommended for best results.
Does the Ninja Creami require special ingredients?
No. You can use any ice cream base—dairy, nut milks, protein-enriched, sugar-free, etc. However, thicker bases (with cream, avocado, or banana) tend to yield creamier results. Some users add xanthan gum (¼ tsp per batch) to stabilize texture.
Is the Ninja Creami worth it if I already have a good blender?
It depends on frequency and expectations. If you want restaurant-quality soft serve weekly with minimal effort, yes. If you only make ice cream a few times a year and enjoy the process, your blender will suffice with some patience.
Final Thoughts: Choose Based on Your Lifestyle
The truth is, you *can* make ice cream in a regular blender—but “can” doesn’t always mean “should.” The Ninja Creami isn’t magic, but it is purpose-built. It solves the core problems of texture degradation and inconsistent blending that plague DIY blender methods.
For hobbyists and occasional treat-makers, refining your blender technique offers a cost-effective path. But for those who crave reliable, creamy results every time—especially with non-traditional bases—the Ninja Creami delivers where general-purpose tools fall short.
Ultimately, the best tool is the one that fits your routine. Whether you’re repurposing a countertop powerhouse or investing in a single-task wonder, the ability to craft fresh, customizable frozen desserts at home is within reach.
🚀 Ready to try it? Start with a simple vanilla base in your blender this weekend. If you love the result, great—you’ve saved money. If it falls short, you’ll know exactly what the Ninja Creami offers. Either way, you’re one step closer to perfect homemade ice cream.