A well-organized bathroom enhances daily routines, reduces stress, and makes even the smallest spaces feel functional and inviting. Yet, many homeowners struggle with clutter, limited square footage, or outdated layouts that hinder efficient storage. The good news? With thoughtful planning and creative thinking, every inch of your bathroom can be optimized. From hidden niches to multi-functional fixtures, modern design offers a wealth of innovative storage solutions that blend practicality with style.
Assess Your Space and Storage Needs
Before installing shelves or purchasing organizers, take time to evaluate how you use your bathroom. Are you storing daily essentials, skincare products, cleaning supplies, or towels? Is it shared by multiple people? Understanding usage patterns helps determine what kind of storage is most effective.
Begin by clearing out cabinets and drawers. Sort items into categories: daily use, occasional use, and expired or unused products. This audit reveals not only what you own but also where redundancies exist. Once decluttered, measure available vertical and horizontal space—especially above toilets, beside vanities, and within shower areas.
Tip: Use adhesive labels on containers to quickly identify contents without opening each one.Maximize Vertical Space with Smart Shelving
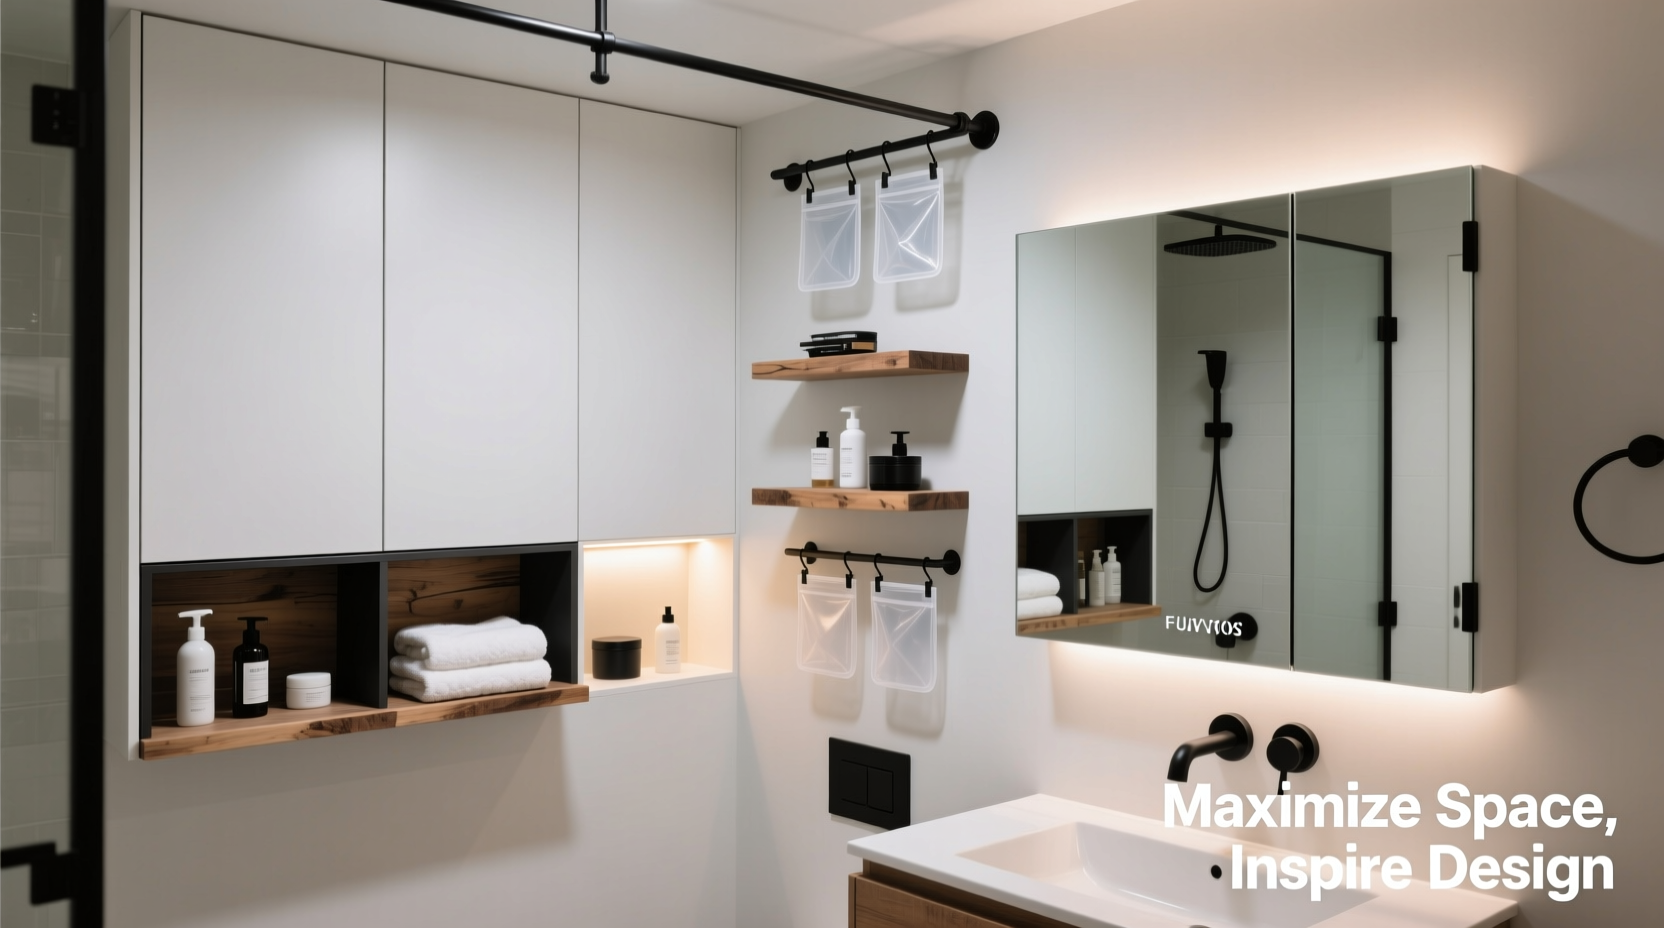
Floor space is often limited, but walls offer untapped potential. Installing floating shelves above countertops or beside mirrors adds accessible storage without blocking light or making the room feel cramped. Choose moisture-resistant materials like teak, stainless steel, or powder-coated metal for longevity.
For tall, narrow bathrooms, consider floor-to-ceiling shelving units that fit in corners or alongside the toilet. These can house baskets, rolled towels, or decorative jars—all while drawing the eye upward and creating an illusion of height.
Open shelving works best when styled intentionally. Group similar items together—such as matching soap dispensers, glass jars for cotton balls, or folded hand towels—and maintain visual harmony. If clutter is a concern, opt for closed-back cabinets or add small doors to select sections.
Leverage Unused Areas: Toilets, Doors, and Corners
Some of the most overlooked zones are also the most valuable. The area above the toilet tank, for instance, is ideal for a medicine cabinet extension or a narrow shelf unit designed specifically for this space. Wall-mounted caddies with multiple tiers keep toiletries visible yet contained.
Bathroom doors are another underused asset. Over-the-door organizers with clear pockets hold hair tools, travel-sized bottles, or cleaning wipes. Magnetic strips on the back of the door can secure bobby pins, tweezers, or nail clippers.
Corners, often left empty due to awkward angles, benefit from rotating lazy Susans or triangular corner shelves. In showers, corner caddies prevent bottles from crowding ledges. For vanity areas, custom corner drawers pull out smoothly and make full use of otherwise wasted depth.
“Every bathroom has dead zones—spaces that don’t serve a purpose until you rethink them. Innovation starts with seeing potential where others see limitation.” — Lena Torres, Interior Designer & Small-Space Specialist
Integrate Multi-Functional Furniture and Fixtures
Today’s bathroom furniture does more than store—it transforms. Consider a vanity with deep drawers instead of shallow cabinets; soft-close mechanisms ensure quiet operation and durability. Some models include built-in charging stations, LED lighting, or pull-out trays for organizing makeup and grooming tools.
Bench seating over underfloor storage is perfect for master baths or larger en suites. Lift-up lids reveal space for extra linens or seasonal items. Even modest footstools can double as concealed bins for washcloths or guest amenities.
In compact half-baths, wall-mounted sinks free up floor area beneath for slim rolling carts or woven baskets. These mobile units can be tucked away during gatherings or pulled out for convenience.
| Solution | Best For | Installation Level |
|---|---|---|
| Floating Shelves | Medium to large bathrooms | Easy (DIY) |
| Over-the-Door Organizers | Small bathrooms, rentals | Very Easy (No tools) |
| Corner Shower Caddy | Tiled or framed walls | Moderate (Drilling) |
| Vanity with Drawers | Primary bathrooms | Professional (Plumbing required) |
| Medicine Cabinet with Shelves | All sizes | Moderate (Wall mounting) |
Hidden and Built-In Storage Ideas
For a seamless, high-end look, incorporate built-in storage during renovations. Recessed niches in shower walls eliminate the need for external caddies and create a clean aesthetic. Line them with waterproof tile and add teak shelves for warmth and grip.
Behind-mirror storage is both discreet and highly functional. Modern mirrored cabinets feature internal LED lighting, adjustable shelves, and anti-fog technology. Some even include Bluetooth speakers or digital clocks.
If renovating, consider installing a niche above the doorway or within partition walls. These recessed cubbies can display decorative objects or hold folded towels. For renters or those avoiding construction, simulated niches using shallow shelving and strategic lighting can mimic the effect.
Tip: Use silicone caulk instead of standard adhesive when mounting accessories in wet zones—it resists mold and holds better in humid conditions.Real-Life Example: Transforming a Powder Room
Sarah, a graphic designer in Chicago, faced constant frustration in her 5x7-foot powder room. Essentials spilled off a tiny countertop, and guests often knocked over bottles. She reimagined the space using three key upgrades:
- Replaced a basic mirror with a frameless medicine cabinet offering dual-depth storage.
- Added a floating walnut shelf above the toilet for spare rolls and artisan soaps.
- Installed a slim, lidded bin on casters behind the door for hair tools and cleaning cloths.
The result was immediate: counter clutter vanished, daily access improved, and the room felt more intentional. “It’s amazing how much difference two feet of new storage made,” she said. “Now everything has a home.”
Step-by-Step Guide to Redesigning Your Bathroom Storage
Follow this timeline to implement changes efficiently:
- Week 1: Declutter and Assess – Empty all cabinets, discard expired items, and categorize what remains.
- Week 2: Measure and Plan – Sketch a layout noting dimensions and traffic flow. Identify top problem zones.
- Week 3: Research and Purchase – Select solutions based on budget and function. Prioritize moisture-resistant materials.
- Week 4: Install and Organize – Begin with non-permanent options (over-door, adhesive hooks), then move to mounted units.
- Ongoing: Maintain and Adjust – Reassess every few months. Swap containers, reposition items, and refine systems.
Frequently Asked Questions
How can I add storage without remodeling?
You don’t need a renovation to improve storage. Use over-the-door organizers, stackable bins, tension rods under sinks for spray bottles, and magnetic strips for metal tools. Floating shelves and adhesive baskets are also renter-friendly options.
What’s the best way to organize under the sink?
Use tiered pull-out trays or stackable bins to separate cleaning supplies from personal care items. Wrap pipes with insulating foam sleeves to protect containers from condensation. Label everything clearly for quick identification.
Are open shelves practical in humid bathrooms?
Yes, if properly maintained. Choose materials resistant to warping and mildew, such as stainless steel or sealed wood. Avoid leaving damp towels or porous items on shelves long-term. Wipe down surfaces weekly to prevent moisture buildup.
Final Thoughts: Turn Constraints into Creative Opportunities
Bathroom storage doesn’t have to mean bulky cabinets or cluttered counters. By embracing innovation—from smart shelving to hidden compartments—you transform limitations into opportunities for elegance and efficiency. Whether you live in a studio apartment or a family home, thoughtful organization improves both function and peace of mind.
💬 Ready to reimagine your bathroom? Start with one small change today—install a shelf, purge expired products, or label your containers. Share your before-and-after ideas or ask questions in the comments below!