Every holiday season, commercial property managers, lighting contractors, and facility maintenance teams face the same high-stakes challenge: verifying that rooftop Christmas light displays are intact, properly secured, and electrically sound—without sending personnel onto icy, steep, or structurally compromised roofs. Traditional inspection methods carry significant fall risk, weather delays, and operational downtime. Drone-based visual inspection has emerged not as a novelty, but as a proven, OSHA-aligned alternative—when applied with discipline, preparation, and technical rigor. This article details exactly how to deploy drones for safe, reliable, and actionable rooftop light inspections—not just what to fly, but how to interpret what you see, comply with regulations, and translate footage into preventive maintenance decisions.
Why Drone Inspection Is Safer—and More Effective—Than Manual Rooftop Checks
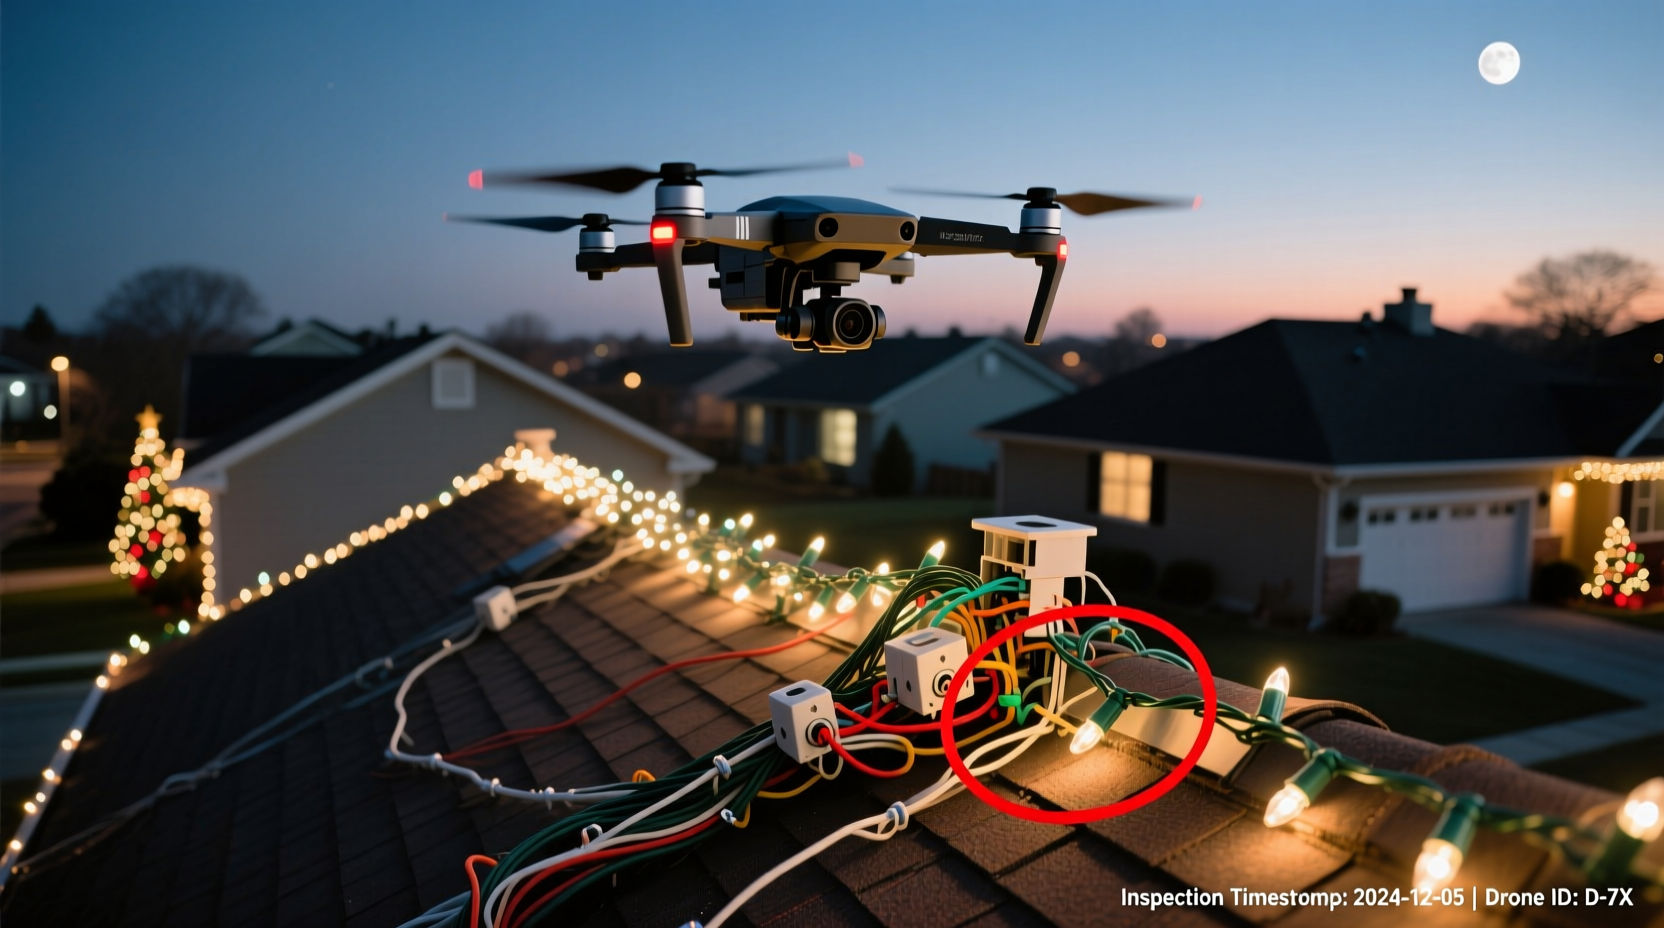
According to the U.S. Bureau of Labor Statistics, falls from elevation remain the leading cause of fatal injuries in construction and maintenance work—accounting for over 36% of all occupational fatalities in 2023. Rooftop light inspections often occur in December, when ice accumulation, wind gusts exceeding 25 mph, and low-light conditions compound hazard exposure. A drone eliminates physical access entirely while delivering higher-resolution imagery than ground-based binoculars or telephoto lenses. More critically, it enables systematic coverage: every linear foot of conduit, every mounting bracket, every splice box, and every transformer can be documented in sequence—not just the “easy-to-reach” zones inspectors tend to prioritize under time pressure.
Drones also support temporal analysis. By capturing baseline footage before installation activation—and follow-up shots after the first freeze-thaw cycle—you establish a visual record that reveals subtle shifts: bracket loosening from thermal expansion, micro-fractures in PVC conduit, or insulation wear near HVAC exhaust vents. This isn’t surveillance—it’s predictive maintenance grounded in observable evidence.
Essential Pre-Flight Preparation: Legal, Technical, and Environmental
Skipping pre-flight planning is the single most common cause of failed drone inspections. Safety begins long before takeoff—with documentation, site assessment, and equipment validation.
Tip: Always conduct a “dry run” flight at least one day before the scheduled inspection—using identical weather conditions and battery charge levels—to validate GPS lock, camera focus, and controller responsiveness.Three pillars anchor effective preparation:
- Regulatory Compliance: In the U.S., commercial drone operations require Part 107 certification from the FAA. Operators must maintain a current remote pilot certificate, register their drone, and adhere to airspace restrictions. Use the FAA’s B4UFLY app or AirMap to verify controlled airspace status within 5 miles of the site. If operating near an airport (within 5 miles), submit a LAANC (Low Altitude Authorization and Notification Capability) request at least 24 hours in advance—even for rooftops below 400 feet AGL.
- Site-Specific Risk Assessment: Walk the perimeter—not the roof—and document obstacles: nearby power lines, adjacent buildings, rooftop HVAC units, parapet height, and prevailing wind direction. Note any reflective surfaces (glass façades, metal roofing) that may disrupt visual positioning systems (VPS). For flat roofs, identify natural landing zones (e.g., gravel pads) away from light arrays; for sloped roofs, plan vertical takeoff/landing only.
- Weather Thresholds: Never fly if wind exceeds 15 mph (check on-site anemometer readings—not forecasts), visibility is below 1,000 meters, or precipitation is present. Cold temperatures below 0°C (32°F) reduce lithium-polymer battery capacity by up to 40%. Pre-warm batteries indoors to 20–25°C and keep spares insulated in a thermal pouch during operation.
Equipment Selection and Camera Settings for Light-Specific Clarity
Not all drones are suited for this task. Consumer-grade models with fixed-focus cameras struggle with fine detail at distance, while enterprise platforms offer features critical for electrical infrastructure verification.
| Feature | Minimum Requirement | Why It Matters |
|---|---|---|
| Camera Resolution | 4K at 30 fps, with 12MP+ still capture | Enables pixel-level inspection of wire gauge, connector corrosion, and LED diode integrity—even at 15m standoff distance. |
| Zoom Capability | 3x digital zoom with lossless interpolation or 2x optical zoom | Allows close examination of junction boxes without flying dangerously close to live wiring or fragile fixtures. |
| Gimbal Stabilization | 3-axis mechanical gimbal | Eliminates vibration blur during hover—critical when assessing subtle sway in hanging light strands or loose mounting hardware. |
| Battery Life | ≥22 minutes per battery (real-world, not manufacturer claims) | Accounts for pre-flight checks, ascent/descent, and 10+ minutes of methodical grid-based coverage per roof section. |
| Low-Light Performance | ISO range ≤3200 with minimal noise, f/2.8 or wider aperture | Permits safe early-morning or late-afternoon flights when ambient light is softer and shadows reveal surface irregularities. |
Set your camera manually: shutter speed at 1/500 sec (to freeze motion), ISO at 100–400, and white balance to “Cloudy” for consistent color rendering across varying daylight. Shoot in D-Log or HLG profile if available—this preserves highlight and shadow detail for post-processing contrast adjustments, especially useful when reviewing brightly lit strings against dark roofing membranes.
Step-by-Step Inspection Flight Protocol
This standardized sequence ensures comprehensive coverage while minimizing operator fatigue and environmental variables. Follow it precisely—even on familiar sites.
- Pre-Flight Checklist (10 minutes): Verify firmware updates, calibrate IMU and compass, confirm SD card formatting, test emergency stop function, and log battery serial numbers and charge state.
- Takeoff & Initial Hover (2 minutes): Launch from a clear, level area at least 15 feet from the building base. Ascend vertically to 20 feet AGL, then hover for 30 seconds to confirm stable GPS lock and gimbal centering.
- Perimeter Scan (5 minutes): Fly counterclockwise at constant 30-foot altitude, maintaining 10-foot lateral distance from the building edge. Capture overlapping 60°-wide video swaths to create a full 360° orthomosaic reference.
- Grid-Based Roof Coverage (12–18 minutes): Divide the roof into 20 × 20 ft quadrants. For each, position the drone at 15 feet AGL directly above the center, rotate 360° slowly while recording, then descend to 8 feet for a focused 10-second still capture of mounting hardware, conduit runs, and transformer enclosures.
- Detail Pass (8 minutes): Target known trouble zones (e.g., previous year’s splice failures, areas near roof drains, or sections exposed to direct afternoon sun). Use digital zoom to isolate connectors, check for discoloration (indicating overheating), and verify gasket integrity on weatherproof housings.
- Landing & Post-Flight (5 minutes): Return to launch point using RTH (Return-to-Home) function. Power down, download footage immediately to a secure workstation, and label files with date, roof zone, and battery ID.
Real-World Case Study: Preventing a Holiday Catastrophe at a Downtown Retail Plaza
In December 2023, the facilities team at the 12-story Evergreen Plaza in Portland, OR, scheduled drone inspection of its 42,000-light rooftop display—installed across three interconnected roofs with varying slopes and multiple HVAC penthouses. During the grid-based pass, the drone’s 4K footage revealed a previously undetected issue: at the southeast corner, 17 linear feet of 16-gauge copper wire had been routed directly over a 120°C exhaust duct without thermal shielding. Thermal imaging overlay (captured via optional FLIR One Pro attachment) showed localized conductor temperatures exceeding 75°C—well above the 60°C safe operating limit for standard THHN insulation.
The team halted activation, rerouted the circuit through a newly installed insulated conduit chase, and re-inspected with the drone 48 hours later. Without the aerial perspective—and specifically, the ability to pause, zoom, and compare thermal data against visual context—the overheating condition would have gone unnoticed until either a circuit breaker tripped mid-event or, worse, insulation degradation led to arcing. As project lead Maria Chen noted afterward: “We caught it because we saw *exactly where* the heat was—not just ‘somewhere on the roof.’ That precision saved us $18,000 in emergency repairs and kept our holiday lighting contract intact.”
Expert Insight: Integrating Drone Data Into Maintenance Workflows
“Drone footage is only as valuable as the system interpreting it. We train our technicians to annotate every frame using timestamped markers: ‘Bracket #7B – missing washer,’ ‘Conduit bend radius < 4x diameter,’ ‘Splice box gasket cracked at 3 o’clock position.’ That turns raw video into auditable, trackable work orders—not just pretty pictures.” — Derek Ruiz, Director of Asset Integrity, Lumina Facilities Group
Ruiz’s team uses open-source annotation tools like CVAT (Computer Vision Annotation Tool) to tag anomalies directly on video frames. Each tag auto-generates a maintenance ticket with geotag, timestamp, severity rating (low/medium/high), and recommended action—syncing to their CMMS (Computerized Maintenance Management System). This bridges the gap between observation and execution, ensuring no finding slips through administrative cracks.
FAQ: Critical Questions Answered
Can I legally fly a drone over my own commercial property?
Yes—but ownership does not override federal airspace law. You still require Part 107 certification for commercial use (including internal facility inspections), must comply with all operational rules (e.g., line-of-sight, 400-foot ceiling), and cannot operate in restricted airspace without authorization—even over private land.
How do I distinguish normal condensation from actual water intrusion in drone footage?
Condensation appears as uniform, transient fogging on lens surfaces or as diffuse, soft-edged moisture halos around light fixtures—often dissipating within minutes as ambient temperature rises. True water intrusion shows as persistent, sharply defined pooling along seams, dark streaks tracing downward from penetrations, or mineral deposits forming at drip points. When in doubt, combine thermal imaging (cool spots indicate evaporative cooling from active leaks) with visual magnification.
What’s the minimum resolution needed to spot a broken LED bulb in a dense string?
A 4K frame captured at 10 feet AGL provides ~0.3mm/pixel resolution—sufficient to identify individual 5mm LEDs and detect filament breaks, darkened phosphor coatings, or cracked lenses. At 20 feet, resolution drops to ~0.6mm/pixel, making bulb-level diagnosis unreliable. Always maintain ≤15 feet AGL for detailed fixture verification.
Conclusion: From Footage to Foreseeability
Using drone footage to inspect rooftop Christmas lights isn’t about replacing human expertise—it’s about extending it. It transforms reactive problem-solving (“The lights went out—let’s send someone up”) into proactive stewardship (“We observed bracket fatigue at Zone 4B—schedule reinforcement before load testing”). Every frame captured is data that informs next year’s design, validates contractor workmanship, and demonstrates due diligence to insurers and liability counsel. More importantly, it protects lives: no technician needs to step onto a snow-dusted membrane at dawn, no supervisor needs to weigh production deadlines against fall protection protocols. The technology exists. The regulatory path is clear. The safety imperative is non-negotiable.
Start small: choose one manageable roof this season. Follow the pre-flight checklist religiously. Review footage with a second set of eyes. Log every anomaly—not just the urgent ones, but the subtle patterns that signal long-term wear. Then scale deliberately. Because the most powerful feature of any drone isn’t its camera or battery—it’s the quiet confidence it gives you to say, “We know—because we saw it.”
💬 Have you used drones for seasonal lighting inspections? Share your hard-won lessons, equipment recommendations, or near-miss recoveries in the comments—we’ll compile top insights into a free downloadable checklist for next year’s crew.