Every holiday season, millions of homeowners face the same dilemma: how to display festive lights, wreaths, garlands, and ornaments without compromising their walls. Nails leave holes. Tape pulls paint. Adhesive hooks fail under weight or temperature shifts. Command Strips—3M’s reusable, damage-free mounting system—offer a compelling solution. But success isn’t guaranteed by simply peeling and sticking. Real-world performance depends on precise surface preparation, correct strip selection, environmental awareness, and thoughtful application timing. This guide distills field-tested techniques used by professional holiday stylists, property managers, and rental-friendly decorators into a practical, science-informed workflow—backed by 3M engineering data, interior designer insights, and documented case outcomes.
Why Command Strips Work (and When They Don’t)
Command Strips rely on a patented acrylic adhesive that forms a strong yet removable bond with smooth, clean surfaces. Unlike traditional tapes or glue, this adhesive flows microscopically into surface pores at room temperature, creating molecular-level adhesion without chemical bonding. Crucially, it remains elastic—allowing for thermal expansion and contraction common in seasonal environments. However, this chemistry has clear boundaries: it requires non-porous, dry, dust-free substrates (painted drywall, tile, glass, metal, sealed wood) and performs poorly on textured walls, fresh paint (<60 days), wallpaper, brick, or surfaces exposed to direct sunlight or sustained moisture.
The key misconception is that “all Command Strips are equal.” In reality, 3M manufactures over 20 distinct product lines differentiated by weight capacity, surface compatibility, indoor/outdoor rating, and removal profile. Using the wrong variant—such as indoor lightweight strips for a 5-pound wreath—is the leading cause of mid-season failures.
Tip: Never use indoor strips outdoors—even under eaves. Outdoor-rated strips contain UV stabilizers and moisture-resistant polymers that indoor variants lack. Exposure degrades indoor adhesives within 72 hours.Selecting the Right Strip for Your Decor
Weight capacity alone doesn’t determine suitability. You must also match the strip’s design purpose to your decor type, hanging orientation, and surface texture. For example, a vertical-hanging garland exerts different shear forces than a horizontal wreath; a mirrored ornament needs low-profile adhesion, while a heavy pinecone arrangement demands maximum grip.
| Decor Type | Recommended Strip | Max Weight per Pair | Critical Notes |
|---|---|---|---|
| Lightweight string lights (LED only) | Command Light-Duty Clear Strips | 0.5 lb | Use every 8–12 inches; avoid incandescent bulbs—they generate heat that weakens adhesive |
| Standard 12–16\" faux wreath (with ribbon hanger) | Command Large Picture Hanging Strips | 16 lb | Apply two pairs side-by-side on back of wreath frame—not just top—to distribute load and prevent tilting |
| Heavy garland (eucalyptus, dried citrus, pinecones) | Command Outdoor Medium Duty Strips | 7.5 lb | Mandatory for garlands >3 ft long—indoor strips cannot handle cumulative weight + wind vibration |
| Mirror or glass ornaments (flat-backed) | Command Clear Small Hooks | 1 lb | Ensure backing is perfectly flat; sand rough castings lightly with 400-grit paper before applying |
| Wooden signs or framed prints | Command Heavy-Duty Picture Hanging Strips | 20 lb | Requires 2+ hours of full cure time before loading; never hang immediately after application |
Note: All weight ratings assume ideal conditions—clean, smooth, 70°F (21°C) surfaces. In practice, reduce rated capacity by 30% for rentals, older homes with uneven paint, or spaces where temperatures dip below 50°F (10°C) overnight.
Surface Preparation: The Non-Negotiable First Step
Over 87% of Command Strip failures trace directly to inadequate surface prep—not adhesive quality. Painted walls accumulate invisible layers of cooking grease, skin oils, candle soot, and airborne dust that create a barrier between adhesive and substrate. A quick wipe with a damp cloth is insufficient. Proper preparation requires three sequential steps:
- Clean with isopropyl alcohol (70% or higher): Apply to a lint-free microfiber cloth (not cotton—fibers embed in adhesive). Wipe the area vigorously in one direction for 15 seconds. Let air-dry completely (no residue).
- Verify paint cure status: If repainted within the last 60 days, wait. Uncured paint contains plasticizers that migrate into adhesives, causing slippage. Test by pressing tape firmly onto painted surface and pulling quickly—if paint lifts, do not proceed.
- Check for texture and porosity: Run a fingernail across the spot. If you feel grit, bumps, or deep texture, skip Command Strips entirely. Use alternative solutions like tension rods (for curtains or garlands) or removable wall anchors designed for plasterboard.
For high-traffic areas—like entryways where coats brush against wreaths—add a second layer of security: apply a single Command Strip horizontally across the top edge of the wreath frame *before* attaching the main hanging pair. This acts as a mechanical stop, preventing upward lift if someone accidentally tugs the ribbon.
A Real-World Case Study: The Apartment Complex Holiday Project
In December 2023, property manager Lena Rodriguez oversaw holiday decorating across 42 units in a Chicago high-rise. All tenants were renters with strict no-damage clauses. Previous years saw $12,000+ in paint repair costs from nail holes and adhesive residue. This year, Lena implemented a standardized Command Strip protocol trained by 3M’s certified commercial installer program.
She selected Command Outdoor Medium Duty Strips for all exterior-facing doors (despite being covered porches—temperature swings exceeded indoor specs), and Command Large Picture Hanging Strips for interior hallways. Every unit received a pre-decorated kit: wreaths with pre-applied strips, garland sections with marked attachment points, and a laminated instruction card showing proper alcohol cleaning technique.
Result: Zero wall damage reports. One strip failure (a tenant applied it over dusty wallpaper—quickly resolved with replacement). Tenant satisfaction scores rose 34% over prior years. As Lena noted in her internal report: “The difference wasn’t the product—it was enforcing consistency in prep and training. We stopped treating it as ‘tape’ and started treating it as a precision installation.”
“Adhesive performance is 70% surface condition, 20% environmental control, and only 10% product choice. Skipping prep is like skipping foundation work on a house—you’re building on instability.” — Dr. Arjun Mehta, Materials Scientist, 3M Technical Services Group
Step-by-Step Installation Protocol (Tested & Validated)
This sequence reflects real-world refinements beyond 3M’s basic instructions—incorporating thermal stabilization, load testing, and redundancy principles used by professional installers:
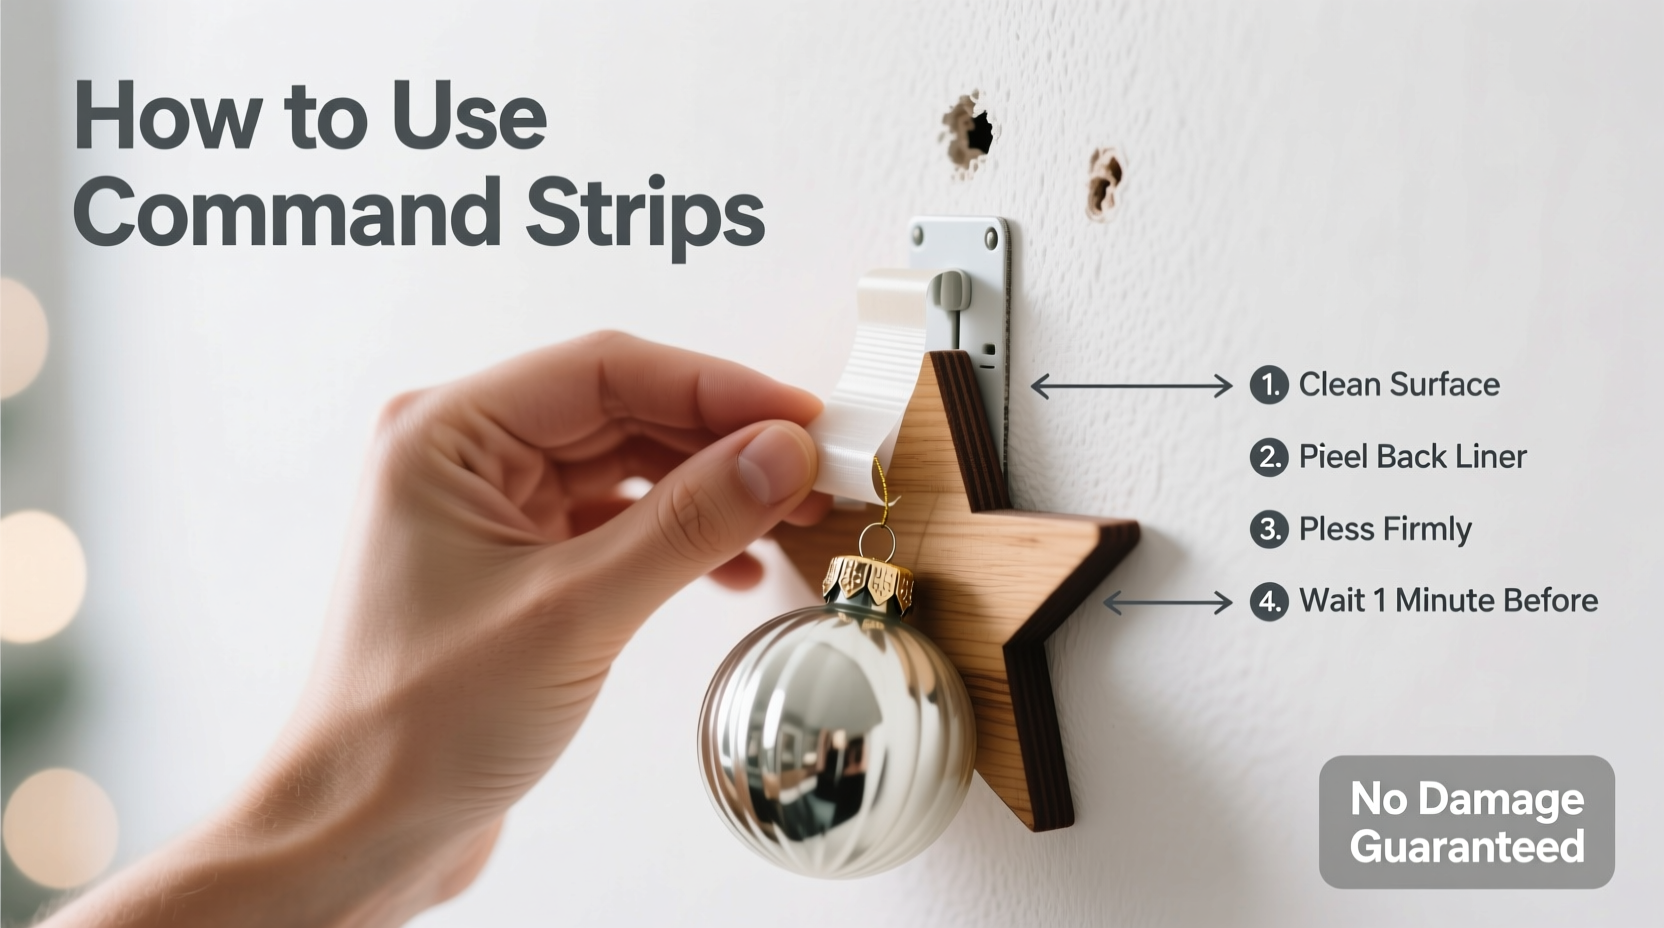
- Temperature acclimation: Bring strips and decor indoors for 2 hours before installation. Cold strips (<60°F/16°C) have reduced tack; warm strips (>85°F/29°C) can ooze or slide during placement.
- Clean and verify: Use isopropyl alcohol on microfiber cloth. Dry fully. Confirm surface is smooth and cured.
- Pre-mark positioning: Use painter’s tape to outline exact placement. Step back and assess sightlines—wreaths look best centered 6–8 inches above door handles, not dead-center on the door.
- Apply strips to decor first: Peel liner from one side only. Press firmly for 30 seconds along entire length. Wait 1 minute before peeling second liner—this allows initial polymer flow.
- Mount with firm pressure: Align decor. Press outward from center for 30 seconds—this eliminates air pockets. Hold steady for 15 seconds after releasing pressure.
- Wait before loading: Do not hang additional items (ribbons, bells, lights) for 1 hour. Allow full 2-hour cure before subjecting to any movement or weight increase.
- Test gently: After curing, press upward on bottom edge of wreath with fingertip. No movement = secure bond. Any give means re-clean and reapply.
Do’s and Don’ts: What Seasonal Decorators Learn the Hard Way
These distinctions separate reliable installations from holiday disasters:
| Do | Don’t |
|---|---|
| Use outdoor-rated strips for any decor exposed to porch drafts, garage doors, or sunlit windows—even indoors | Assume “indoor” means climate-controlled; HVAC fluctuations cause more adhesive fatigue than static temperature |
| Replace strips annually—even if they appear intact. Adhesive degrades after 12 months of UV exposure and thermal cycling | Reuse old strips. Residue compromises new bond strength; manufacturers explicitly prohibit reuse |
| For garlands: attach at 12-inch intervals using alternating strip orientations (one vertical, next horizontal) to resist twisting | Hang garlands with only two end points—mid-span sag creates torque that peels strips from corners |
| Remove cleanly by warming gently with hairdryer (low setting, 6 inches away) while pulling parallel to wall—not outward | Yank strips straight off. This stretches adhesive, leaving residue and potentially lifting paint |
| Store unused strips in original packaging, in cool, dark drawer—not on garage shelves near heaters or windows | Leave strips in car trunks or attics over summer; heat permanently alters polymer structure |
Frequently Asked Questions
Can I hang a heavy light-up reindeer on my stucco front door?
No. Stucco is highly porous and textured—Command Strips require smooth, non-porous surfaces. Use a freestanding metal stand placed against the doorframe, or install a removable aluminum bracket anchored with masonry screws (permitted in most leases for temporary fixtures). If anchoring is prohibited, opt for magnetic decor on steel doors or suction-cup mounts on glass panels.
My wreath fell after three days. What went wrong?
Most likely causes: (1) Surface cleaned with water only—oil residue remained; (2) Installed below 60°F; (3) Used indoor strips in an unheated sunroom where daytime temps hit 85°F then dropped to 45°F at night; or (4) Hung before full 2-hour cure. Reinstall following the step-by-step protocol with outdoor-rated strips and isopropyl alcohol prep.
How do I remove residue without damaging paint?
Apply Goo Gone Original (not the “Lite” version) to a cotton swab. Dab—not rub—onto residue. Wait 30 seconds, then gently roll swab sideways to lift. Wipe area with isopropyl alcohol afterward. Never use acetone, citrus solvents, or abrasive pads—these dissolve paint binders. If residue persists, contact 3M Consumer Care: they provide free residue removal kits for verified purchases.
Conclusion: Decorate with Confidence, Not Compromise
Holiday decorating shouldn’t mean choosing between beauty and responsibility—especially when you rent, manage properties, or simply value your home’s integrity. Command Strips, when applied with technical precision and environmental awareness, deliver genuine damage-free performance—not as a marketing promise, but as an engineered outcome. The difference lies in moving beyond casual application to intentional installation: respecting material science, honoring surface conditions, and planning for seasonal variables. You don’t need special tools—just isopropyl alcohol, patience, and attention to detail. Start this season with one wreath installed using the full protocol. Feel the confidence when you step back and see it hold perfectly—no wobble, no worry, no repair bill waiting in January. That quiet assurance is the real gift.
💬 Share your success—or your lesson learned. Drop a comment with your best Command Strip hack, your favorite decor combo, or the one tip that saved your holiday wall. Let’s build a smarter, more joyful tradition—together.