Living in a small apartment doesn’t mean giving up on hospitality, ritual, or the quiet joy of crafting a thoughtful drink at home. A well-designed bar cart can serve as both a functional hub for beverage prep and a curated expression of personal style—even in studios or one-bedroom units where every inch counts. The key isn’t downsizing your standards; it’s elevating your strategy. This guide distills real-world experience from interior stylists, urban designers, and compact-living advocates into actionable principles that prioritize utility *first*, aesthetics *second*, and harmony *always*. No “Pinterest-perfect but impractical” suggestions—just honest, tested solutions for making your bar cart work hard and look intentional in tight quarters.
1. Prioritize Verticality and Modular Flexibility
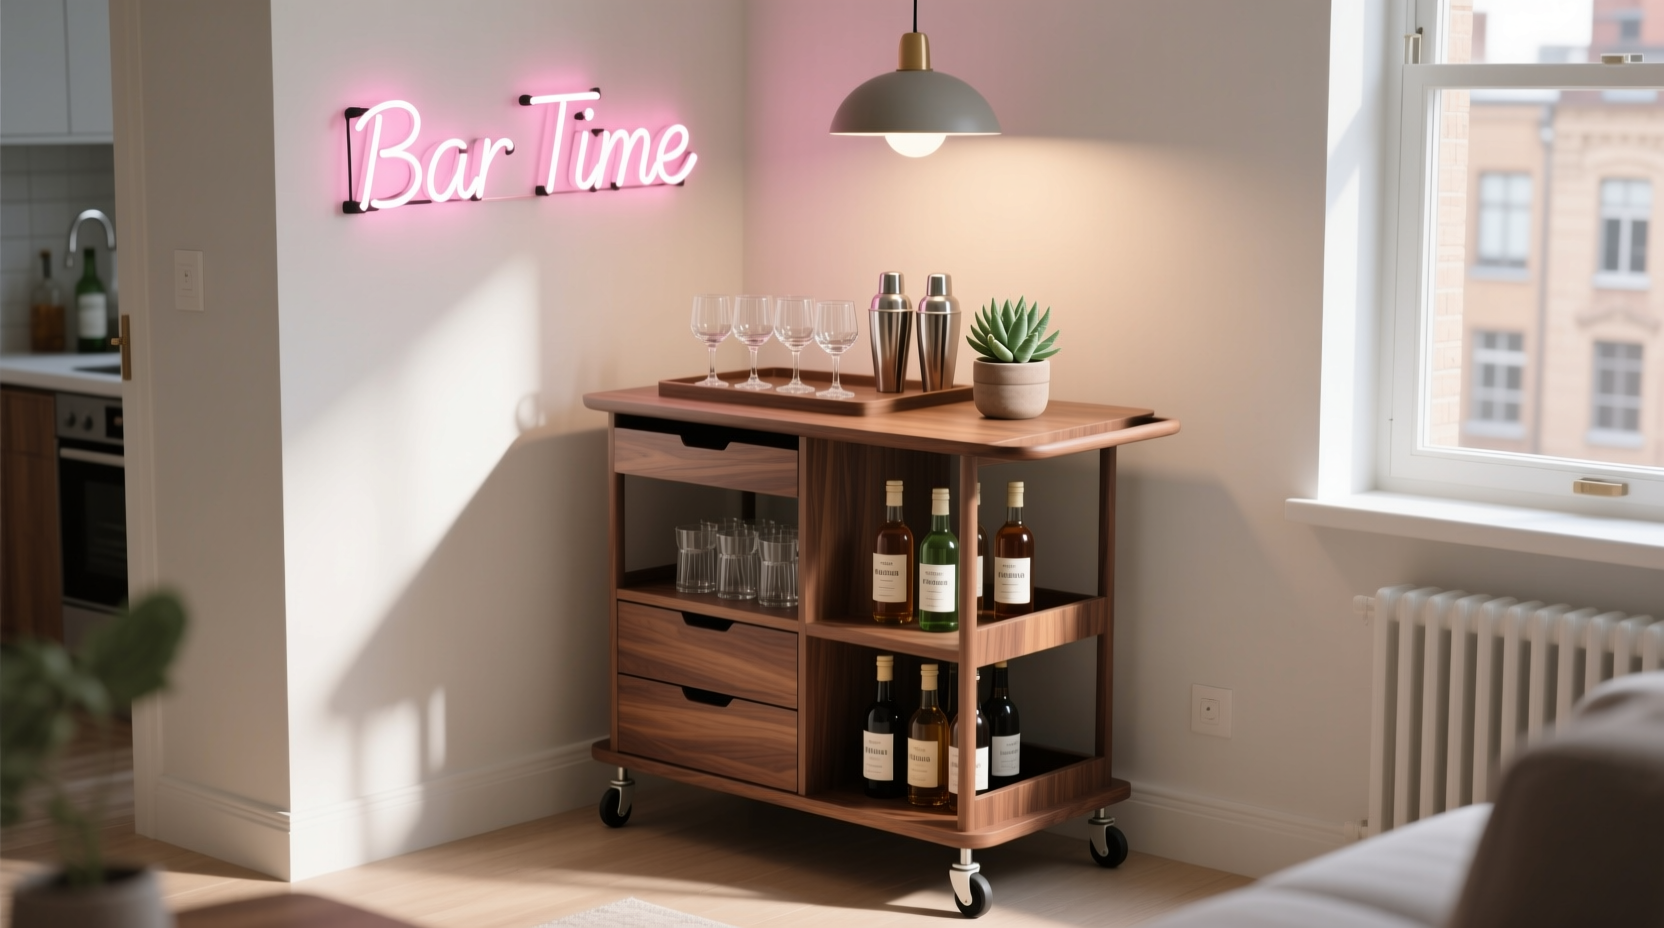
In small spaces, horizontal surface area is scarce—but vertical real estate is often underutilized. Instead of treating your bar cart as a single-tiered shelf, treat it as a three-dimensional system. Look for carts with adjustable shelves, removable trays, or stackable components that let you shift height and depth based on need. A two-tier cart with 10 inches of clearance between levels accommodates standard wine bottles upright *and* cocktail shakers sideways—no bending, no stacking hazards. For ultra-narrow entries or galley kitchens, consider a wall-mounted fold-down bar ledge paired with a slim rolling cart (under 16 inches deep) that tucks beside a sofa or under a console table when not in use.
Modularity also means choosing pieces that multitask. A brass tray isn’t just for glassware—it doubles as a serving platter for charcuterie or a catch-all for mail and keys during the morning rush. A set of nesting acrylic tumblers stores flat, taking up less than half the footprint of traditional stemware. And a compact, dual-compartment ice bucket (one side for ice, one for chilled garnishes like olives or citrus wheels) eliminates the need for separate containers.
Tip: Measure your narrowest doorway *and* the tightest turn in your floor plan before purchasing. Many “compact” carts exceed 22 inches in width—and won’t fit through a standard 28-inch interior doorframe.2. Curate, Don’t Collect: The 12-Bottle Rule
Most small-apartment bar carts fail not from poor styling, but from overstocking. A full liquor cabinet may hold 40+ bottles—but a functional, accessible cart should hold only what you’ll actually use within a 3–4 week window. That’s where the 12-Bottle Rule comes in: limit yourself to 12 core items that cover 95% of your drinking habits. These include base spirits, modifiers, essentials, and one wildcard for experimentation.
| Category | Quantity | Examples | Rationale |
|---|---|---|---|
| Base Spirits | 3 | Vodka, gin, bourbon (or tequila for margarita lovers) | Covers martinis, old fashioneds, Moscow mules, negronis, and highballs |
| Modifiers & Liqueurs | 4 | Dry vermouth, sweet vermouth, orange bitters, simple syrup (in a 12 oz bottle) | Enables classic cocktails without cluttering with rare amari or obscure cordials |
| Non-Alcoholic Staples | 3 | Tonic water, ginger beer, quality club soda (all in slim cans or 8 oz glass bottles) | Reduces fridge dependency; slim cans stack neatly in tiered organizers |
| Wildcard | 2 | A seasonal aperitif (e.g., Aperol in summer) + one local craft spirit | Keeps rotation fresh without permanent storage commitment |
This approach isn’t about restriction—it’s about intentionality. Each bottle earns its place by enabling multiple drinks, fitting cleanly on your cart’s shelves, and being used regularly enough to stay fresh. Vermouth, for example, degrades after 6–8 weeks once opened; keeping only one dry and one sweet ensures both get rotated before losing flavor integrity.
3. Smart Storage Solutions for Tiny Footprints
Function collapses when tools are inaccessible or unstable. In cramped spaces, drawerless carts demand clever containment. Start with gravity-based organization: heavier items (bottles, shakers, jiggers) go on the bottom shelf; lighter, frequently grabbed items (glasses, citrus, garnishes) go on top. Use non-slip silicone shelf liners—not just for safety, but to dampen clinking noise in thin-walled buildings.
Then layer in purpose-built accessories:
- Stackable acrylic pour spouts with built-in drip rings eliminate messy drips and allow precise pouring without needing a separate jigger for every measure.
- Magnetic bar tool strips mounted vertically on the cart’s back panel hold strainers, zesters, and peelers—freeing up shelf space while keeping tools visible and within reach.
- Fold-flat citrus reamers and collapsible jiggers store inside hollowed-out wooden coasters or under a removable tray lid—no dedicated drawer required.
- Under-shelf wire baskets (3–4 inches deep) mount beneath each level to hold napkins, stirrers, or mini-bottles of bitters—keeping them tidy but instantly accessible.
One common oversight? Glassware selection. Standard rocks glasses take up more space than necessary. Opt instead for stackable, weighted lowball glasses (like the Libbey Signature or Riedel Ouverture) that nest securely and resist tipping. For stemware, choose tulip-shaped coupe glasses—they’re stable, elegant, and stack 4–5 high without wobbling.
4. Real-World Case Study: Maya’s Studio Bar Cart in Brooklyn
Maya lives in a 420-square-foot studio in Williamsburg, NYC. Her original bar cart—a vintage chrome piece with fixed shelves—became a bottleneck: bottles leaned precariously, shakers rolled off edges, and her favorite coupe glasses had to be stored in a kitchen cabinet 12 feet away. She redesigned with three constraints: no drilling into walls, under $200 budget, and zero additional floor footprint.
Her solution: she replaced the fixed shelves with two adjustable tempered-glass tiers (secured with rubber grommets), added a magnetic strip for tools, installed under-shelf baskets for napkins and citrus, and swapped all glassware for stackable coups and lowballs. She limited her inventory to exactly 12 items using the rule above—and stored vermouth and bitters in the fridge’s door, retrieving them only when prepping drinks. She also added a small, battery-powered LED puck light under the top shelf for ambient evening ambiance without wiring.
The result? A cart that fits snugly beside her sofa, holds everything needed for four guests, cleans in under 90 seconds, and doubles as a coffee station in mornings (with a removable pour-over setup). “It stopped being ‘the bar’ and became ‘part of the room,’” she says. “No more apologizing for clutter—I invite people to make their own drinks now.”
5. Expert Insight: Designing for Flow, Not Just Form
“People mistake small-space design for minimalism—but it’s really about choreography. Every item on a bar cart should have a clear entry point, usage path, and return destination. If reaching for a bottle requires shifting three others, that’s a workflow failure—not a style choice.” — Lena Torres, Urban Interior Designer & Author of Compact Living, Complete Living
Torres emphasizes that function isn’t compromised by aesthetics—it’s amplified by them. A cohesive color palette (e.g., matte black hardware, amber glassware, cream linen napkins) creates visual calm, which psychologically expands tight spaces. Likewise, consistent material language—brass accents paired with warm wood, or stainless steel with frosted glass—reduces visual noise, making the cart feel integrated rather than tacked-on.
She also stresses the importance of “micro-zones”: assigning specific areas of the cart to distinct actions. For example, the front third of the top shelf is always reserved for active mixing (shaker, jigger, citrus); the back third holds garnishes and tools; the bottom shelf is strictly for storage and chilling. This zoning prevents decision fatigue and speeds up service—critical when hosting in confined quarters.
6. Step-by-Step: Building Your Functional Bar Cart in Under 90 Minutes
- Clear & Assess (10 min): Remove everything from your cart. Wipe down all surfaces. Measure shelf heights, depths, and clearances.
- Sort & Edit (15 min): Lay out all bottles, tools, and glassware. Apply the 12-Bottle Rule. Discard anything expired, unused in 6+ months, or physically unstable (chipped rims, warped lids).
- Zone & Assign (20 min): Map zones: “Mix Zone” (top front), “Garnish Zone” (top back), “Store Zone” (bottom shelf), “Tool Zone” (side/magnetic strip). Label zones with removable washi tape if helpful.
- Install Supports (25 min): Add shelf liners, under-shelf baskets, magnetic strips, and non-slip pads. Test stability with weight.
- Style with Purpose (20 min): Place bottles label-forward, grouped by category. Arrange glassware by frequency of use—not symmetry. Tuck linens into a woven basket; coil stirrers vertically in a ceramic cup. Finish with one living element: a potted dwarf mint or kaffir lime plant in a matching vessel.
7. FAQ
Can I use a bookshelf or side table instead of a traditional bar cart?
Yes—if it has mobility (casters) or is positioned within 3 feet of your primary seating zone. Fixed furniture works only if you commit to a “bar zone” with dedicated lighting, power access for a blender or chiller, and consistent curation. A true cart wins for flexibility: roll it out for guests, tuck it away for movie night, or repurpose it as a breakfast station.
How do I keep my cart looking styled without constant upkeep?
Adopt the “5-Minute Reset”: after every use, return bottles to labeled spots, wipe spills immediately, and fluff linens. Keep a microfiber cloth and small spray bottle of vinegar-water solution (1:1) clipped to the cart’s side. Avoid open shelving for perishables—store syrups and fresh juices in the fridge and bring them out only when needed.
What’s the best way to handle ice in a tiny kitchen?
Ditch the bulky ice bucket. Use insulated, stackable silicone ice molds (makes 12 cubes per tray) stored in the freezer’s door. Fill a compact, double-walled stainless steel bucket (holds 2 quarts) only when entertaining—and empty it back into the freezer bag after use. For daily drinks, keep a single 16-oz insulated tumbler filled with ice cubes in the freezer; drop it straight into your glass.
Conclusion
A home bar cart in a small apartment isn’t a luxury—it’s an act of spatial intelligence and daily self-respect. It signals that you value moments of pause, connection, and craftsmanship, even when square footage is limited. Function and beauty aren’t opposing forces here; they’re interdependent. When your cart holds only what serves you, when tools return to their designated homes without thought, and when the first pour of the evening feels effortless—not like a logistical puzzle—you’ve succeeded. That’s not minimalism. That’s mastery of your environment.
Start small: pick one shelf, edit down to six essential items, add one smart organizer, and notice how much calmer your space feels. Then build outward—not in volume, but in intention. Your bar cart shouldn’t dominate your apartment. It should belong to it.
💬 Your turn. Share one functional swap you’ve made in your small-space bar setup—we’ll feature the most inventive tip in next month’s urban living roundup. Drop it in the comments below.