
Pothos (Epipremnum aureum) is one of the most forgiving houseplants, prized for its trailing vines, heart-shaped leaves, and ability to thrive in low light. But beyond being easy to care for, it’s also incredibly simple to multiply. Propagating pothos in water is a beginner-friendly method that requires minimal tools and delivers reliable results. Whether you want more plants for your home, wish to gift cuttings to friends, or simply enjoy watching roots develop, water propagation offers a clear, satisfying window into plant growth.
This guide walks through every stage of the process—from selecting the right stem to transplanting rooted cuttings—while highlighting best practices, troubleshooting tips, and real-world insights from indoor gardening experts.
Selecting the Right Cutting
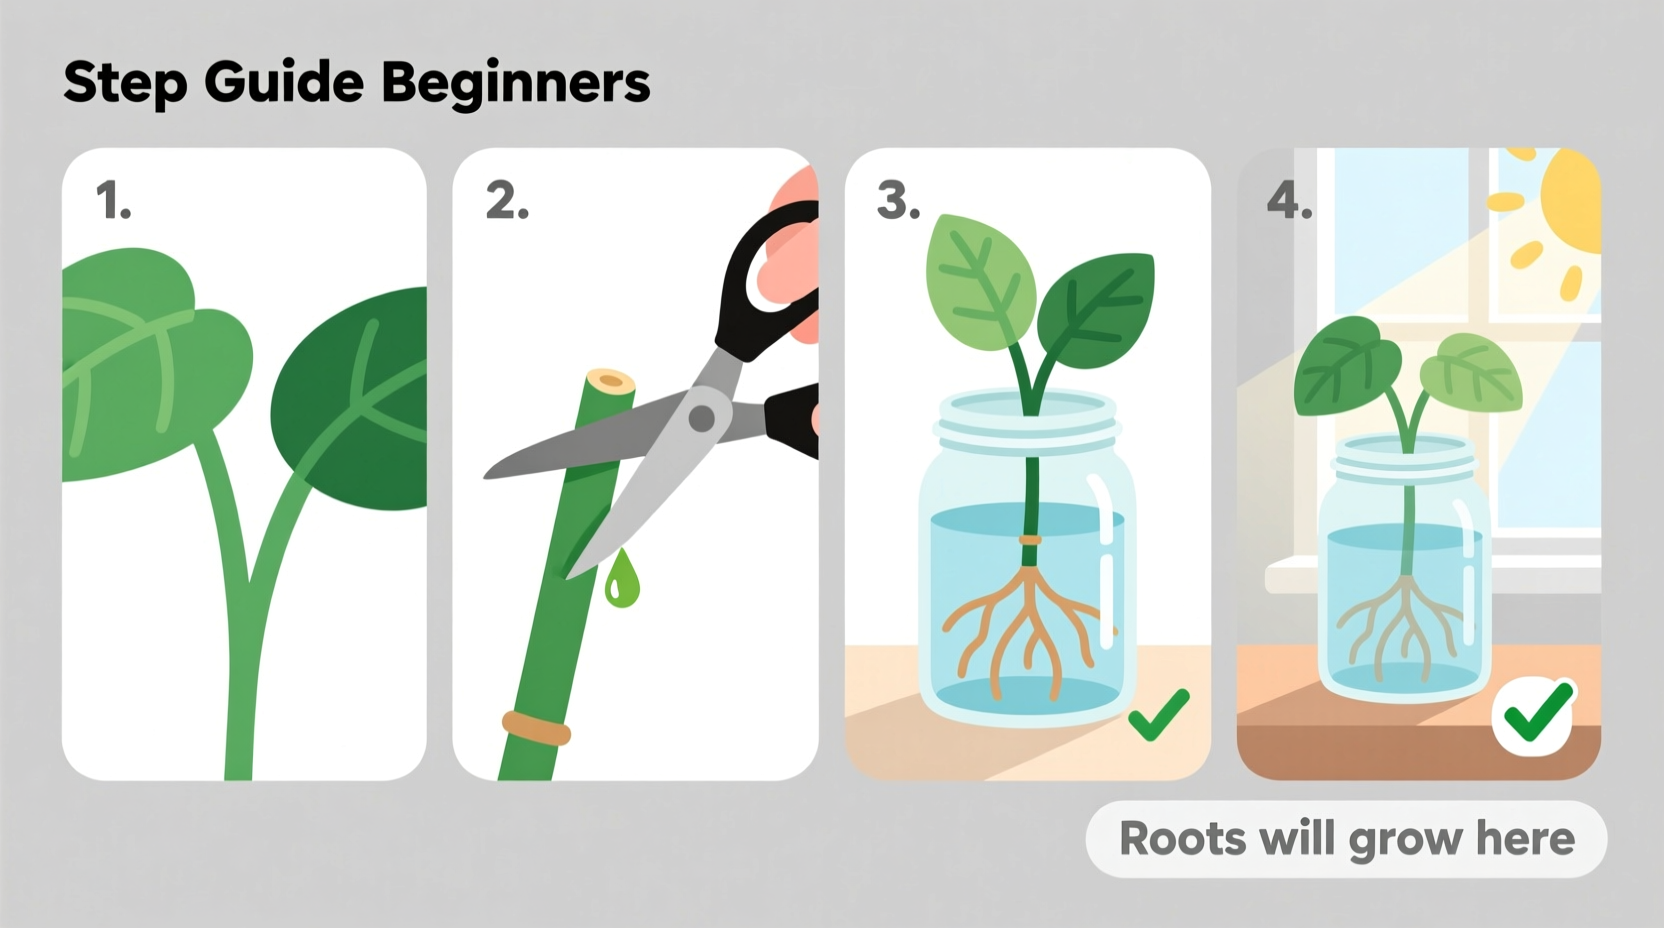
The success of water propagation begins with choosing a healthy parent plant and making precise cuts. A strong cutting has the nutrients and structure needed to initiate root development without rotting or wilting.
Look for stems with vibrant green leaves and no signs of yellowing, spotting, or pests. The ideal cutting should include at least two to three nodes—small brown bumps along the stem where roots and new leaves emerge. Nodes are essential; without them, roots won’t form.
“Propagation isn’t just about cutting and placing in water—it’s about giving the plant what it needs to regenerate. The node is non-negotiable.” — Dr. Lena Torres, Botanist & Urban Horticulture Consultant
Avoid using stems that are overly woody or have long stretches between leaves (a sign of low-light stress). Instead, choose younger, flexible growth near the tip of the vine. Each cutting should be 4–6 inches long, with two to four leaves remaining after trimming.
Tip: Use clean, sharp scissors or pruning shears to prevent crushing the stem, which can inhibit water uptake and increase the risk of infection.Step-by-Step Water Propagation Process
Once you’ve selected and cut your stems, follow this timeline-based method to ensure optimal conditions for root development.
- Cut below a node: Make a diagonal cut just below a node to maximize surface area for water absorption.
- Remove lower leaves: Strip off any leaves that would sit below the waterline. Submerged foliage will decay and promote bacterial growth.
- Place in clean water: Use a transparent glass or jar filled with room-temperature tap water. Ensure at least one node is submerged, while leaves remain above water.
- Choose the right location: Set the container in bright, indirect light—near an east- or north-facing window is ideal. Avoid direct sunlight, which can overheat the water and encourage algae.
- Wait and observe: Roots typically begin to emerge within 7–10 days. Some varieties may take up to two weeks depending on temperature and light.
- Change water weekly: Replace the water every 5–7 days to keep it oxygenated and free of bacteria. Rinse the jar and the roots gently during each change.
- Wait for robust root growth: Allow roots to grow to at least 1–2 inches before considering transplanting to soil or continuing in water.
Do’s and Don’ts of Pothos Water Propagation
Mistakes are common when starting out, but many can be avoided with awareness. The following table outlines key behaviors to adopt—and those to avoid—for consistent success.
| Do’s | Don’ts |
|---|---|
| Do use clean containers to prevent mold and algae buildup. | Don’t leave stagnant water for more than 7 days without changing. |
| Do submerge at least one node fully in water. | Don’t submerge leaves—they’ll rot and contaminate the water. |
| Do place in bright, indirect light for steady growth. | Don’t expose to direct afternoon sun, which can scorch leaves and heat the water. |
| Do monitor for root health—white or cream-colored roots are healthy. | Don’t ignore slimy, dark roots—they indicate rot and need immediate trimming. |
| Do be patient—some cuttings take longer depending on environment. | Don’t tug on the cutting to check for roots; this damages delicate tissue. |
Troubleshooting Common Issues
Even with proper technique, problems can arise. Recognizing early warning signs helps save your cuttings before they fail.
- Cloudy water: Caused by bacterial growth. Change water immediately and rinse the jar and stem. Consider adding a small piece of activated charcoal (about the size of a pea) to inhibit microbes.
- Yellowing leaves: May signal stress or nutrient deficiency. One yellow leaf is normal; multiple indicate poor conditions—check light levels and water quality.
- No root development after 3 weeks: Verify the node is submerged and the cutting wasn’t taken from a weak part of the plant. Older, thicker stems may root slower.
- Algae forming on glass: Result of too much light or infrequent water changes. Move to a slightly less bright spot and scrub the jar thoroughly during water changes.
- Soft, mushy stem: Indicates rot. Trim above the damaged section (if possible) and re-root in fresh water, ensuring only healthy tissue remains.
Real Example: From Office Desk to Indoor Jungle
Sarah, a graphic designer in Portland, started with a single pothos on her office desk. After learning about water propagation from a colleague, she took three cuttings during a Friday afternoon lull. She used recycled glass bottles, placed them near a shaded window, and changed the water every Sunday.
Within two weeks, tiny white roots appeared. By week five, all three had dense root systems. Sarah transplanted two into pots with well-draining soil and kept one in water as a decorative feature on her bookshelf. Over the next year, she repeated the process, gifting rooted cuttings to coworkers and eventually filling her apartment with lush, cascading vines—all descendants of that original plant.
“It felt like magic,” she said. “I didn’t think I could keep a cactus alive, and now I’ve got six thriving pothos. It’s the easiest win in indoor gardening.”
Transplanting Rooted Cuttings to Soil
While pothos can live indefinitely in water, many growers prefer to transition them to soil for long-term growth and fuller foliage. The move should be gradual to reduce shock.
Wait until roots are 1–2 inches long and appear bushy rather than sparse. Prepare a small pot (4–6 inches) with drainage holes and fill it with a lightweight, aerated potting mix—avoid heavy garden soil. Create a hole in the center and gently place the rooted cutting inside, covering the roots completely while keeping leaves above the surface.
Water lightly after planting and keep the soil consistently moist (not soggy) for the first two weeks. Place the pot in the same type of light it received during propagation. You may notice slight drooping at first—that’s normal. New growth should appear within 3–4 weeks, signaling successful adaptation.
Tip: For a smoother transition, start acclimating the roots by mixing a small amount of moist potting soil into the water jar a few days before transplanting.Frequently Asked Questions
Can I propagate pothos in water indefinitely?
Yes. Pothos can live permanently in water as long as you maintain clean conditions and provide occasional liquid fertilizer (diluted to half strength every 4–6 weeks). However, plants in soil tend to grow larger and more vigorously over time.
Why aren’t my cuttings growing roots?
Lack of roots usually stems from one of three issues: no node was submerged, the cutting came from a dormant or unhealthy part of the plant, or the water is too cold. Ensure temperatures stay between 65–78°F (18–25°C), and verify that at least one node is underwater.
How many cuttings can I place in one jar?
You can group multiple cuttings in a large container, but ensure each has enough space for root development and access to fresh water. Overcrowding limits oxygen flow and increases disease risk. For best results, use individual jars or spaced arrangements in wide-mouth vases.
Essential Checklist for Success
Follow this concise checklist to ensure every propagation attempt gets off to a strong start:
- ✓ Choose a healthy pothos vine with vibrant leaves
- ✓ Cut 4–6 inch sections just below a node
- ✓ Remove lower leaves to prevent submersion
- ✓ Use clean glassware filled with room-temperature water
- ✓ Submerge at least one node completely
- ✓ Place in bright, indirect light
- ✓ Change water weekly
- ✓ Wait for roots to reach 1–2 inches before transplanting
- ✓ Monitor for algae, rot, or discoloration
- ✓ Be patient—rooting takes 1–3 weeks under ideal conditions
Conclusion: Start Growing Today
Propagating pothos in water is one of the most accessible entry points into plant care. It costs almost nothing, requires minimal tools, and delivers visible results within days. More than just a horticultural trick, it’s a rewarding practice that connects you to the quiet rhythm of plant life.
Every clipping holds the potential for new growth—not just in roots, but in confidence. Once you see that first white tendril emerge from a node, you’ll understand why so many plant lovers consider propagation a gateway to deeper gardening joy.
💬 Ready to multiply your greenery? Take a cutting today, follow these steps, and watch life unfold in a glass of water. Share your propagation journey with others—tag a friend who needs a low-effort win in their plant care routine!