Sublimation printing has long been associated with high-end craft studios and commercial production—requiring dedicated sublimation printers, industrial-grade heat presses, and precise temperature calibration. But what if you could create custom, photo-quality ornaments for your tree (or as heartfelt gifts) using gear already in your home office? The reality is that modern sublimation technology has become dramatically more accessible. With strategic substitutions, smart workflow adjustments, and a focus on low-cost, high-yield materials, anyone can produce vibrant, durable, personalized ornaments—without spending $800 on a heat press or $400 on a dedicated printer.
This isn’t about compromising quality—it’s about rethinking constraints. Thousands of hobbyists, teachers, and small-batch makers now use modified household tools and clever material pairings to achieve professional-looking results. What matters most isn’t the price tag on your equipment, but your understanding of substrate compatibility, ink transfer physics, and timing precision. Below, we break down exactly how to do it—step by step, tool by tool, mistake by avoidable mistake.
Why Sublimation Works Exceptionally Well for Ornaments
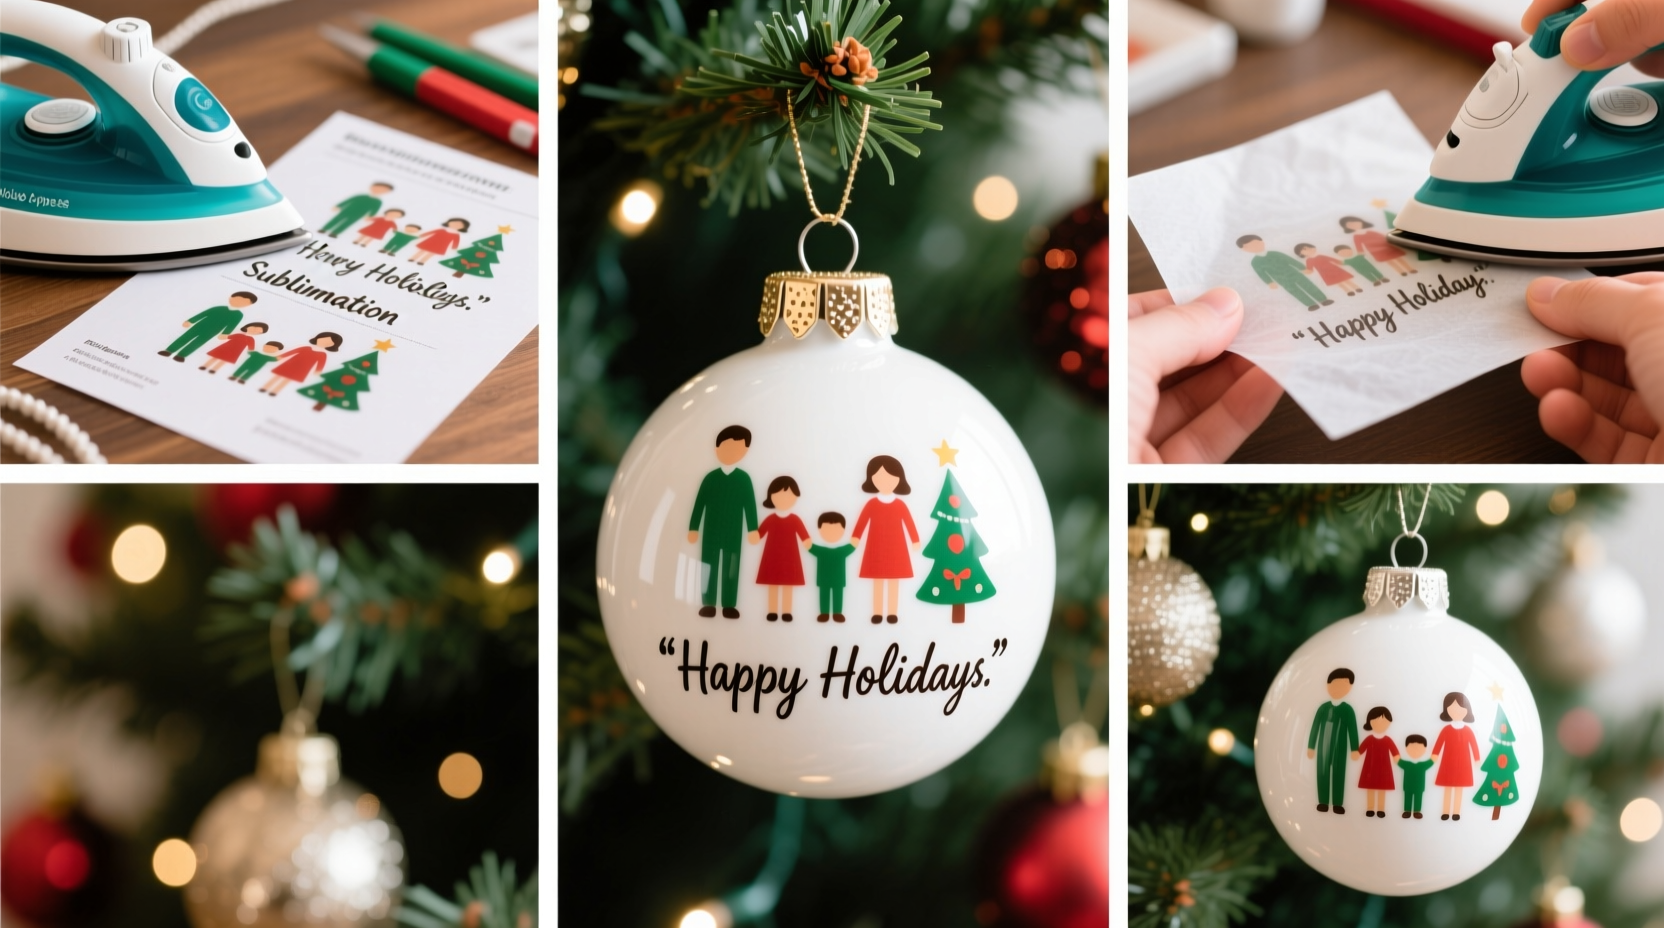
Unlike screen printing or vinyl application, sublimation embeds dye directly into polyester-coated surfaces at the molecular level. When heated to 380–400°F under pressure, solid sublimation ink transitions instantly to gas, penetrates the coating, and permanently bonds as it cools. This creates a result that’s scratch-resistant, wash-safe (if applicable), and completely seamless—no raised edges, no peeling, no fading under indoor light. For ornaments, this means:
- Photographic detail holds even on tiny 2.5-inch surfaces;
- Textured finishes (like glitter, matte, or metallic coatings) remain intact after transfer;
- No white ink layer is needed—even transparent backgrounds print cleanly on white or light-colored substrates;
- Each ornament becomes a unique heirloom: names, dates, pet portraits, or vintage family photos translate with startling fidelity.
Crucially, sublimation only works on polyester or polymer-coated items. That’s why choosing the right blank ornament is the single most important decision—and also where many beginners go wrong.
Selecting the Right Ornament Blanks (and What to Avoid)
Not all “sublimation-ready” ornaments are created equal. Many budget blanks sold online are mislabeled—coated with thin, inconsistent polymer layers that blister, ghost, or reject ink entirely under heat. To ensure success, prioritize these three criteria when selecting blanks:
- Polymer thickness: Look for ornaments labeled “dual-layer polymer coating” or “industrial-grade polyester resin.” These typically have a minimum 35-micron coating—thick enough to accept full ink saturation without bleeding.
- Surface flatness: Avoid deeply domed or faceted glass or ceramic ornaments. Heat must make uniform contact across the entire surface. Slightly convex plastic or aluminum blanks (e.g., 3-inch round acrylic discs with flat transfer zones) yield far more consistent results than spherical baubles.
- Edge sealing: Check product photos for visible coating coverage up to the rim. Uncoated edges will show white halos or incomplete transfers—especially problematic for monochrome or border-heavy designs.
| Blank Type | Pros | Cons | Best For |
|---|---|---|---|
| Aluminum disc (2.5–3\") | Lightweight, excellent heat conductivity, sharp edge definition | Can warp under prolonged heat; requires rigid backing during pressing | Photo portraits, monogrammed initials, minimalist typography |
| Hardboard with polymer coat | Sturdy, natural wood grain visible beneath ink, eco-friendly | Requires longer dwell time (90+ sec); prone to scorching if temp exceeds 390°F | Rustic themes, family names, holiday quotes |
| Acrylic dome (flat-bottomed) | Crystal-clear finish, refracts light beautifully, durable | Expensive per unit; needs precise pressure control to avoid cracking | Gift sets, keepsake ornaments, premium branding |
| Cheap “sublimation ceramic” | Low cost, glossy finish | Often uncoated or thinly coated—ink beads up or wipes off easily | Avoid unless verified via third-party review or supplier certification |
The Affordable Equipment Stack: What You *Really* Need
You don’t need a $1,200 clamshell press—but you do need reliable, repeatable heat and pressure. The solution lies in repurposing common tools with minor modifications:
- Heat source: A standard convection oven (not microwave) set to 390°F, calibrated with an oven thermometer. Ovens provide even ambient heat—ideal for batch processing multiple ornaments placed on a silicone mat-lined baking sheet. Preheat for 15 minutes before loading.
- Pressure system: A heavy-duty cast-iron skillet (10–12 inches) preheated alongside the oven. Once hot, place it directly over printed ornaments secured on a heat-resistant board—applying ~15–20 lbs of consistent downward force. This mimics the platen pressure of a heat press without mechanical complexity.
- Printer: A converted Epson EcoTank model (ET-2720, ET-2800, or ET-3760) refilled with Sawgrass SubliJet or Cosmos sublimation inks. Conversion kits cost under $45 and take <15 minutes. Do not use generic “sublimation ink” brands—many lack proper dye dispersion and clog printheads within weeks.
- Design software: Free tools like Photopea (browser-based Photoshop alternative) or Inkscape handle resizing, color correction, and mirror-flipping flawlessly. No subscription required.
What you *don’t* need: a Cricut EasyPress (insufficient max temp), a hair straightener (uneven pressure), or a toaster oven (poor temp stability). Those shortcuts consistently fail past the first five ornaments.
Step-by-Step Ornament Personalization Workflow
Follow this sequence precisely—not as suggestions, but as calibrated steps grounded in thermal transfer science. Deviations of even 5°F or 5 seconds significantly impact ink migration.
- Design & Print: Create artwork at 300 DPI, sized to match your ornament’s printable area. Mirror the image horizontally (essential for sublimation). Print on high-gloss sublimation paper using “Premium Glossy” or “Sublimation” media setting. Let ink dry fully for 3–5 minutes—touching wet ink causes smudging and haloing.
- Prep the Blank: Wipe the ornament’s coated surface with 91% isopropyl alcohol on a lint-free cloth. Let air-dry 60 seconds. Any oils or dust create micro-barriers to ink transfer.
- Secure the Transfer: Use low-tack painter’s tape (not masking tape) to affix the printed side face-down onto the ornament. Smooth outward from center with a credit card to eliminate air pockets—critical for edge-to-edge clarity.
- Apply Heat & Pressure: Place taped ornament on a preheated ceramic tile inside the 390°F oven. After 60 seconds, carefully lift the oven door, place the preheated skillet directly on top, and close the door. Maintain for exactly 75 seconds total dwell time (60 sec in oven + 15 sec under skillet).
- Cool & Reveal: Remove skillet and tile using oven mitts. Let ornament cool *undisturbed* on a wire rack for 90 seconds—do not peel paper early. Then gently lift one corner of the paper. If ink lifts, reapply skillet for 5 more seconds and cool again. If clean release occurs, discard paper and admire your result.
“The biggest myth is that ‘more heat = better transfer.’ In sublimation, excess temperature vaporizes dye before it anchors—causing faded midtones and blown-out highlights. Precision beats power every time.” — Dr. Lena Torres, Materials Scientist, SubliTech Labs
Real-World Example: Sarah’s School Fundraiser Success
Sarah, a 4th-grade teacher in Asheville, NC, needed 120 personalized ornaments for her school’s holiday bazaar—each featuring a student’s name and hand-drawn animal avatar. Her budget: $220. She purchased:
- 100 aluminum disc blanks ($0.89 each, bulk discount)
- Epson ET-2800 + conversion kit ($199 total)
- 100 sheets sublimation paper ($14)
- Isopropyl alcohol + lint-free cloths ($8)
Using free classroom art software, students designed their avatars digitally. Sarah batch-printed 20 designs per sheet, mirrored and scaled. She ran batches of 12 ornaments per oven cycle (on a large baking sheet), using her grandmother’s cast-iron skillet for pressure. Total production time: 4.5 hours over two evenings. Every ornament sold for $12—raising $1,440 for new library books. More importantly, parents praised the “gallery-quality” finish. “No one believed I didn’t use a pro studio,” she says. “The secret wasn’t fancy gear—it was knowing *exactly* when to apply pressure, and when to wait.”
Common Pitfalls—and How to Fix Them
Even with the right tools, subtle errors derail results. Here’s how to diagnose and resolve the most frequent issues:
- Faded or washed-out colors: Usually caused by insufficient dwell time *or* oven temperature below 385°F. Verify with a standalone oven thermometer—not the built-in dial.
- Ghosting (faint duplicate image): Occurs when paper shifts during heating. Always use low-tack tape—and never reuse sublimation paper. One-time use only.
- White edges or halos: Indicates poor tape adhesion or uneven pressure. Replace tape between every 5 ornaments; ensure skillet sits perfectly level.
- Ink beading or droplets: Sign of moisture on the blank surface. Re-clean with isopropyl alcohol and extend drying time to 90 seconds.
- Yellowish tint on light areas: Caused by overheating polymer coating. Reduce oven temp to 385°F and increase dwell time by 5 seconds instead.
FAQ
Can I use my home iron for this?
No. Household irons lack both precise temperature control (they cycle between 320–450°F unpredictably) and consistent, even pressure across curved surfaces. Results are highly inconsistent—often with scorched corners and faded centers. Oven + skillet remains the most reliable low-cost method.
Do I need special sublimation paper—or will regular inkjet paper work?
Regular inkjet paper fails catastrophically. Sublimation paper has a microporous coating that holds ink near the surface for instant vapor release. Standard paper absorbs ink too deeply, resulting in blurry, muddy transfers. Budget sublimation paper (like Hiipoo or Jetpro) performs nearly as well as premium brands for ornaments—just avoid “generic” unlabeled sheets.
How long do sublimated ornaments last?
When kept indoors away from direct UV exposure, professionally sublimated ornaments retain color integrity for 25+ years. Accelerated aging tests show less than 3% color shift after 10,000 hours of simulated indoor lighting. The bond is permanent—not a surface layer.
Conclusion
You don’t need a craft empire to create ornaments that feel like they came from a boutique studio. What you need is clarity—not capital. Understanding *why* sublimation works, choosing substrates with intention, and applying heat with disciplined timing transforms ordinary tools into precision instruments. Every ornament you make becomes more than decoration: it’s a tactile memory, a quiet declaration of care, a small act of making something singular in a mass-produced world.
Start with five blanks. Test one variable at a time—temperature, dwell time, tape technique. Keep notes. Compare results side by side. Within two sessions, you’ll recognize the subtle cues of perfect transfer: the crisp snap of paper release, the depth of saturated color, the absence of haze at the edges. That’s when personalization stops being a project—and becomes a tradition.
💬 Your turn: Try this workflow this weekend—and share your first successful ornament in the comments. Include what blank you used, your oven model, and one thing you’d tell your pre-sublimation self. Let’s build a real-world knowledge base—together.