Advent calendars don’t need to be mass-produced plastic contraptions filled with sugary treats or disposable trinkets. A growing number of families and crafters are choosing meaningful, tactile alternatives—ones that reflect intentionality, sustainability, and personal warmth. Using empty gift boxes—leftover from birthdays, holidays, or online orders—is not just resourceful; it’s deeply satisfying. These boxes already carry the quiet dignity of celebration: crisp folds, sturdy corners, and subtle textures that commercial kits rarely match. This method transforms waste into wonder, one numbered box at a time. More than decoration, it becomes a shared ritual—a physical countdown built on presence, not packaging.
Why Gift Boxes Make Exceptional Advent Calendar Components
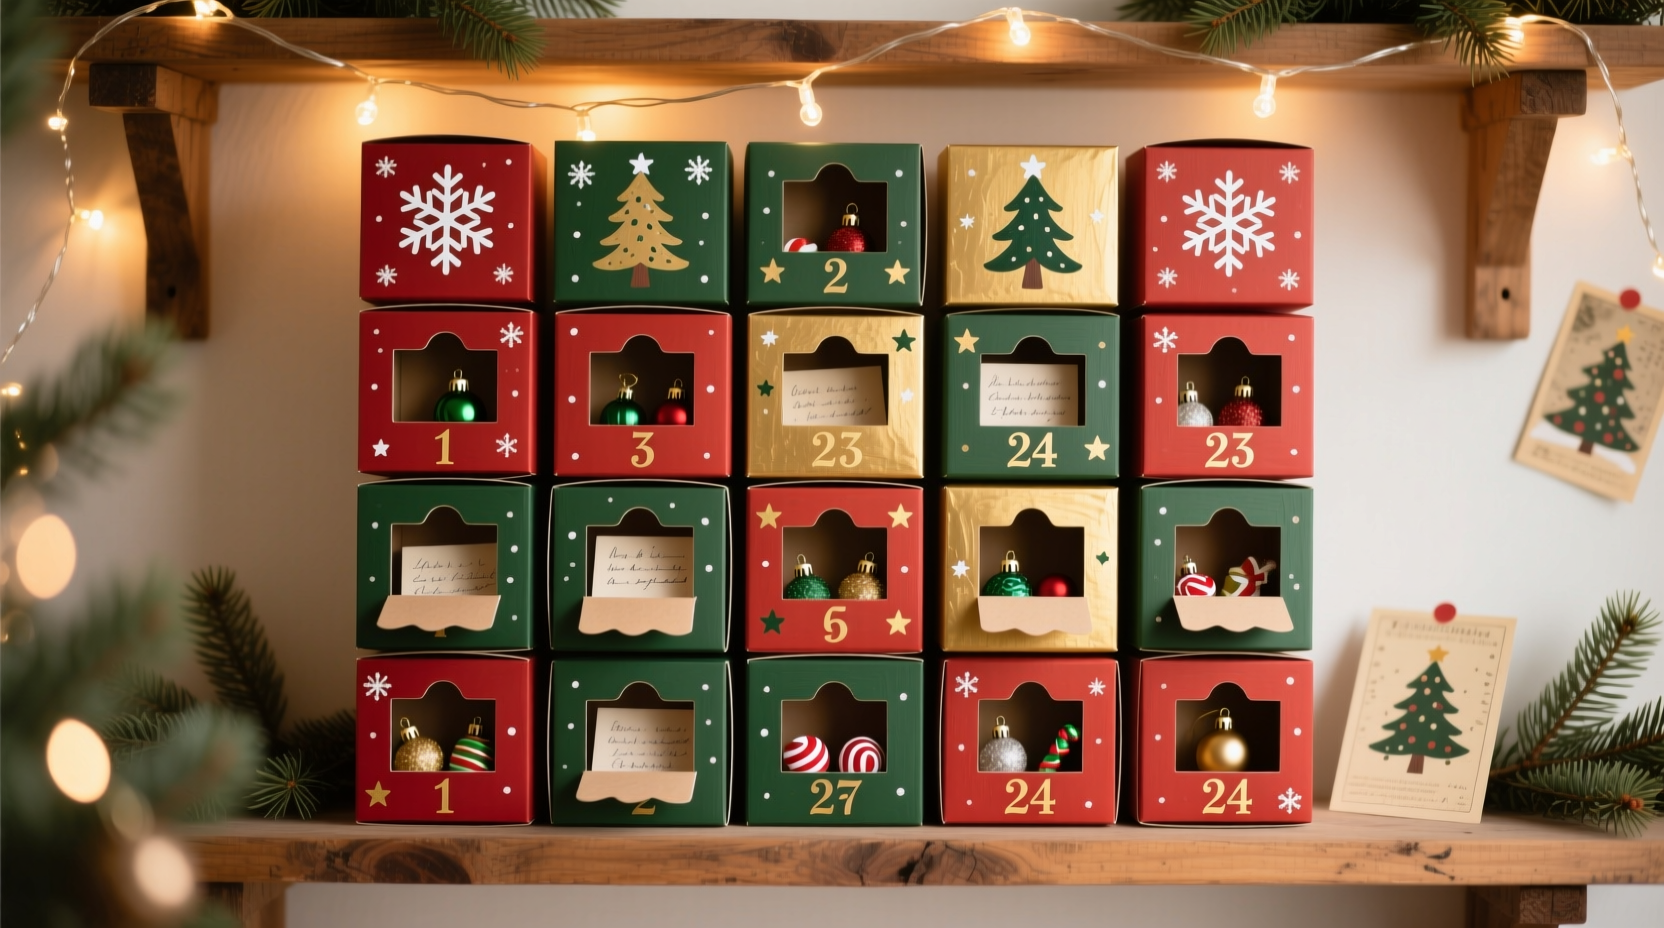
Most DIY advent guides default to paper bags, mason jars, or fabric pouches. While functional, these often lack structural integrity, visual cohesion, or longevity. Empty gift boxes offer distinct advantages: consistent dimensions (especially when sourced from the same retailer), inherent sturdiness for repeated use, built-in lids for surprise preservation, and surfaces primed for customization—whether with paint, washi tape, or hand-lettering. Unlike flimsy alternatives, they withstand handling by curious hands and can be reused year after year with minimal wear. Their modular nature also invites spatial creativity: arrange them in a staircase, a tree shape, or a cascading wall grid. Crucially, repurposing gift boxes aligns with circular design principles—reducing consumption while honoring materials already in circulation.
Tip: Save boxes from high-quality retailers like Muji, Paper Source, or local boutique shops—they often feature clean lines, matte finishes, and uniform sizing ideal for cohesive displays.Sourcing & Preparing Your Boxes: Quality Over Quantity
Not all empty gift boxes are equally suited for advent use. Prioritize boxes with intact corners, unwarped bases, and secure closures. Avoid those with excessive tape residue, deep creases, or water damage—even minor warping compromises stacking stability and visual harmony. Ideal candidates measure between 3” x 3” x 3” and 5” x 4” x 3”, offering enough interior volume for small gifts (a handwritten note, a tea bag, a mini ornament) while remaining manageable for wall mounting or tabletop arrangements.
Before assembly, perform three essential prep steps: First, remove all adhesive tape and labels using a gentle solvent like rubbing alcohol on a cotton swab—not abrasive scrubbing, which dulls finishes. Second, lightly sand any rough edges with 220-grit sandpaper to ensure smooth handling, especially for children. Third, wipe interiors with a dry microfiber cloth to eliminate dust and static that could interfere with adhesive applications later. If boxes have glossy coatings, test your chosen decorative medium (e.g., acrylic paint or permanent marker) on an inconspicuous corner first—some laminates resist adhesion.
Step-by-Step Assembly: From 24 Boxes to a Cohesive Countdown
Follow this proven sequence to build a durable, visually unified calendar. Allow 3–4 hours total, including drying time.
- Sort & Standardize: Group boxes by size and material (cardboard, kraft, matte white). Discard any with compromised structure. Aim for 24 identical or near-identical boxes—mixing too many styles undermines cohesion.
- Number with Precision: Use a fine-tip archival pen (like a Sakura Pigma Micron 01) or laser-printed number stickers. Apply numbers to the top center of each lid—not the front face—to preserve versatility in display orientation. Start with “1” on the smallest or most delicate box; reserve sturdier boxes for higher numbers (20–24), as they’ll hold heavier items.
- Reinforce Critical Joints: Apply a thin bead of acid-free PVA glue (e.g., Lineco Neutral pH Adhesive) along the inner seam where lid meets base. Press firmly for 30 seconds. This prevents accidental openings during handling and extends lifespan across multiple seasons.
- Line Interiors (Optional but Recommended): Cut squares of coordinating scrapbook paper or linen fabric to fit box bottoms. Adhere with double-sided tape. Lining adds polish, muffles noise when opening, and protects delicate contents like pressed flowers or handmade soaps.
- Assemble the Display Structure: Choose one of three proven configurations:
- Wall Grid: Mount 4×6 arrangement using removable adhesive strips (Command Picture Hanging Strips, Medium). Start from the bottom-left corner and work upward to ensure level alignment.
- Staircase Layout: Stack boxes on a wooden shelf or mantel, descending left-to-right in staggered tiers (e.g., 4 boxes on top tier, 5 on second, 6 on third, 9 on base). Secure each tier to the shelf with museum putty.
- Hanging Garland: Drill two tiny holes (1/16”) on opposite sides of each box base. Thread jute twine through, knotting securely inside. Hang in numerical order on a curtain rod or wall-mounted dowel.
Personalization That Resonates: Beyond Decoration
Decorating isn’t about covering boxes—it’s about encoding meaning. Resist the urge to over-decorate every surface. Instead, apply intentional, layered personalization:
- Material-Based Storytelling: Match embellishments to box origin. A box from a local florist? Wrap its lid with dried lavender stems and twine. One from a bookstore? Affix a tiny bookplate sticker with a favorite quote.
- Handwritten Elements: Write the date (“Dec 1”) and a brief intention (“Breathe deeply”) on the lid in your own handwriting. Legibility matters less than authenticity—children’s scribbled numbers carry equal weight.
- Tactile Contrast: Combine finishes: matte boxes with glossy number decals; kraft boxes with embossed foil accents; white boxes with raw-edge linen ribbons.
- Functional Integration: Attach small hooks to box lids for hanging ornaments, or embed magnets on bases for fridge display. One family sews tiny pockets onto lids to hold daily “gratitude tokens”—smooth stones or stamped metal discs.
“Repetition is the soul of ritual—but variation is its heartbeat. When 24 identical boxes become 24 distinct vessels for attention, you’re not counting days. You’re cultivating presence.” — Dr. Lena Torres, Ritual Design Researcher, Columbia University
What to Fill: Thoughtful Alternatives to Candy
The true magic lies not in the container, but in what it holds. Move beyond chocolate to experiences, connections, and quiet joys. Below is a curated selection of non-perishable, low-cost, high-meaning options—organized by theme and practicality:
| Category | Examples | Prep Notes |
|---|---|---|
| Acts of Kindness | “Leave a sticky note of encouragement on a coworker’s desk”; “Call Grandma and ask about her childhood Christmases” | Print on seed paper; recipients can plant it after reading. |
| Creative Prompts | “Sketch one thing that made you smile today”; “Write a haiku about winter light” | Include a tiny pencil and recycled paper scrap tucked inside. |
| Sensory Moments | A single cinnamon stick; a sachet of dried rose petals; a miniature vial of pine-scented oil | Use breathable fabric pouches inside boxes to diffuse scent gradually. |
| Family Traditions | “Bake gingerbread together”; “Watch ‘It’s a Wonderful Life’ with hot cocoa” | Write on cardstock cut to fit box interior—no loose items required. |
| Small Treasures | A vintage button; a polished river stone; a packet of heirloom seeds | Wrap in tissue paper printed with family photos for added sentiment. |
Mini Case Study: The Miller Family’s Zero-Waste Calendar
In Portland, Oregon, the Miller family began their gift-box advent tradition in 2021 after realizing they’d accumulated 37 unused boxes from online orders in just six months. They committed to zero new purchases: no stickers, no specialty paints, no pre-made kits. Instead, they used leftover watercolor paint, charcoal pencils, and fabric scraps from old clothing. Each child decorated six boxes—using nature rubbings (leaves, pinecones) for texture—and wrote prompts based on their family values: environmental stewardship, intergenerational storytelling, and mindful consumption. On December 1st, they opened Box #1 containing a reusable produce bag and the instruction: “Visit the farmers’ market and buy one item grown within 50 miles.” By December 24th, they’d collectively planted 12 native trees (each box held a seedling voucher) and compiled a digital “Gratitude Archive” of voice notes recorded daily. Their calendar wasn’t discarded—it was stored flat in a cedar chest, ready for next year’s refills. “It stopped being about waiting,” says parent Maya Miller, “and started being about noticing.”
Frequently Asked Questions
Can I use boxes with logos or branding?
Yes—especially if the logo resonates with your family’s story. A box from your child’s first pediatrician visit, a wedding gift shop, or a beloved local café adds narrative depth. Cover logos selectively with washi tape or paint only if they distract from your intended aesthetic; otherwise, let them stand as quiet markers of memory.
How do I prevent boxes from toppling in a wall grid?
Two methods prove reliable: First, apply a dab of hot glue to the back corners of each box before mounting—this creates micro-anchors without damaging walls. Second, alternate box orientations (some lids facing up, others sideways) to create interlocking stability. Test your layout on the floor first using painter’s tape to map positions.
What’s the best way to store the calendar for reuse?
Disassemble completely after Christmas. Store boxes flat (not stacked) in a climate-controlled closet inside acid-free archival boxes. Include silica gel packets to prevent moisture warping. Keep decorations separate in labeled muslin bags—this preserves both materials and creative flexibility for next year’s theme.
Conclusion: Build Something That Lasts Longer Than December
A gift-box advent calendar is more than a holiday project—it’s a quiet act of resistance against disposability, a tactile invitation to slow down, and a vessel for collective attention. Every box you repurpose carries forward the energy of past celebrations; every number you write anchors a future moment of shared pause. There’s profound dignity in transforming what others discard into something that gathers your family closer, day by deliberate day. You don’t need perfection—crooked numbers, mismatched papers, or a box that refuses to stay upright tell their own honest story. What matters is the intention woven into each fold, each choice, each open lid. Start small: gather twelve boxes this week. Number them. Place them on a shelf. Watch how anticipation begins to settle, gently, in the space between.
💬 Your turn to begin. Share your first box photo, your favorite non-candy fill idea, or a tip that surprised you—drop it in the comments. Let’s grow this tradition, one repurposed box at a time.