Christmas lights bring warmth, cheer, and festive ambiance to homes during the holiday season. But when a single LED bulb fails on a strand, it can disrupt the entire display—sometimes causing whole sections to go dark. Unlike traditional incandescent bulbs, LEDs are more energy-efficient and longer-lasting, but they also require a different approach when troubleshooting and repairing. The good news is that many issues with LED light strands can be fixed at home without replacing the entire set. With the right tools, knowledge, and safety precautions, you can extend the life of your lights, save money, and reduce seasonal waste.
Understanding How LED Christmas Lights Work
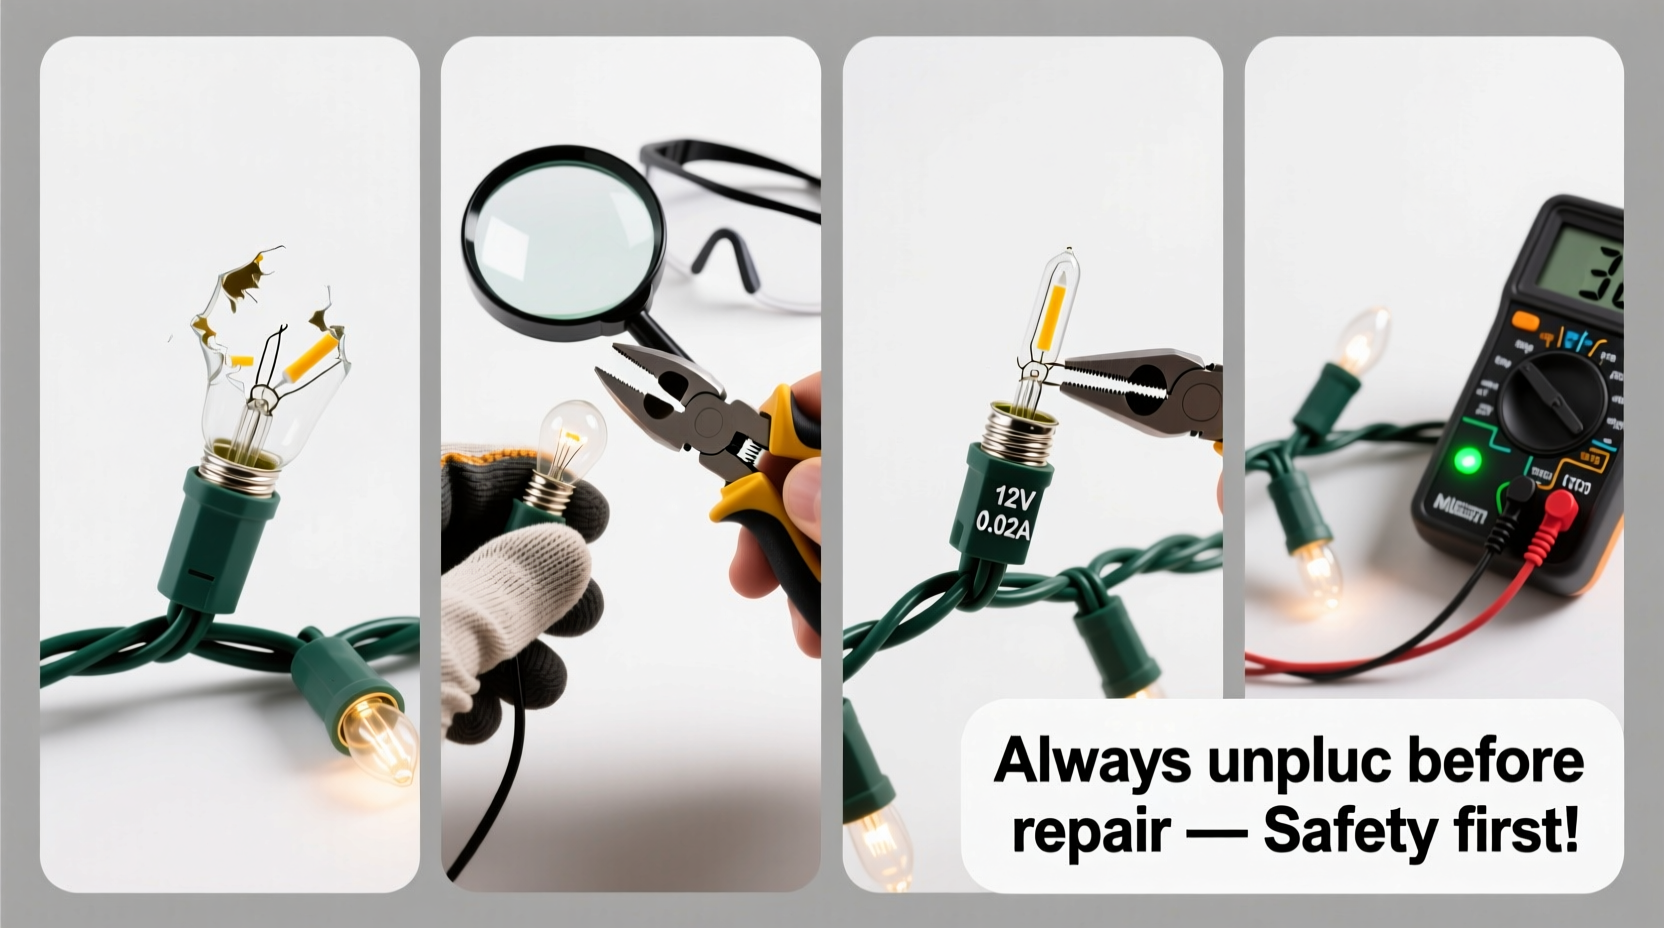
Before attempting any repairs, it’s important to understand the basic design of modern LED Christmas light strands. Most LED strings are wired in series or in a series-parallel configuration, meaning multiple LEDs are connected along a circuit. If one bulb fails or becomes loose, it can interrupt the flow of electricity through that segment. However, unlike older incandescent sets, where a single dead bulb could kill the whole string, many LED strands have built-in shunts or bypass circuits that allow current to continue flowing even if one LED burns out.
That said, physical damage, corrosion, water intrusion, or poor connections often cause problems that aren’t automatically compensated for by the design. Some LED strands use replaceable bulbs, while others feature non-replaceable (soldered) LEDs. Identifying which type you have is the first step toward an effective repair.
Tip: Look closely at the base of the suspect bulb—if it twists or pulls out easily, it's likely replaceable. If it appears fused into the socket or has visible solder joints, it may require advanced repair.Safety First: Precautions When Handling Electrical Holiday Decorations
Working with any electrical device—even low-voltage Christmas lights—requires caution. While most LED strands operate at safe voltages (often 12–24V AC/DC), they’re still connected to household power supplies via transformers or plug-in adapters. A momentary lapse in judgment can result in shocks, short circuits, or fire hazards.
“Never attempt repairs on live circuits. Always unplug the lights before inspecting or handling them.” — James Ralston, Residential Electrical Safety Inspector
Follow these critical safety practices:
- Unplug the strand before touching any components.
- Work in a dry environment—moisture increases conductivity and risk of shock.
- Use insulated tools such as plastic-handled pliers or tweezers.
- Avoid metal surfaces or conductive workspaces like kitchen counters with metal backsplashes.
- Do not use excessive force when removing bulbs; forcing can crack sockets or damage wiring.
- If the strand shows signs of melting, fraying, or charring, do not attempt repair—replace it entirely.
Step-by-Step Guide to Diagnose and Fix Broken LED Bulbs
Fixing a malfunctioning LED bulb isn’t always about replacement—it starts with accurate diagnosis. Follow this structured process to identify and resolve the issue safely.
- Unplug the strand and visually inspect it. Look for obvious signs of damage: cracked bulbs, discolored sockets, kinked wires, or moisture inside connectors.
- Plug in the strand temporarily to observe which sections are dark. Note whether entire segments fail or just isolated bulbs.
- Test continuity using a multimeter (if available). Set the meter to continuity mode or diode test. Touch probes to the two contacts inside the socket of a missing or suspected bad bulb. No beep or reading indicates a break in the circuit.
- Remove the suspect LED gently by twisting counterclockwise or pulling straight out, depending on the design.
- Examine the removed bulb under bright light. Check for dark spots on the LED chip (a sign of burnout), bent leads, or corrosion.
- Clean the socket with a dry cotton swab or compressed air. Corrosion or debris can prevent proper contact.
- Insert a known-good replacement bulb of the same voltage, size, and color. Ensure polarity matches if applicable (some LEDs are directional).
- Reconnect and test the strand. If the section now works, the problem was likely the bulb or connection.
If replacing the bulb doesn't solve the issue, the fault may lie elsewhere—such as in the wiring, controller, or power supply.
Tip: Keep spare bulbs from new light sets or purchase matching replacements online. Label them by voltage and size for future use.When Replacement Isn’t Enough: Advanced Troubleshooting
Sometimes, even after swapping out a bulb, the strand remains faulty. In these cases, deeper inspection is needed.
Faulty Wiring or Cold Solder Joints
Over time, repeated bending or exposure to temperature changes can weaken solder joints or create microfractures in thin wires. Use a magnifying glass to check for tiny breaks near the base of sockets. A cold solder joint may look dull or lumpy instead of shiny and smooth.
To repair:
- Cut power and strip a small amount of insulation from both sides of the break.
- Twist the exposed wires together tightly.
- Solder the connection using rosin-core solder and a low-wattage iron (15–30W).
- Seal the joint with heat-shrink tubing or electrical tape.
Controller or Power Adapter Failure
Many LED strands include built-in controllers for flashing patterns or color changes. These modules can fail independently of the bulbs. Similarly, damaged power adapters may deliver insufficient voltage.
To test the adapter:
- Check its output rating printed on the label (e.g., 24V DC, 1A).
- Set a multimeter to DC voltage mode.
- Insert probes into the adapter’s output jack.
- Compare the reading to the rated output. A deviation greater than 10% suggests failure.
If the adapter is faulty, replace it with one that matches voltage, current, and polarity exactly.
Bypassing a Dead Section (Last Resort)
In rare cases where a section cannot be repaired, you can isolate and bypass it. This involves cutting out the damaged portion and reconnecting the good ends—but only if the strand uses parallel wiring or has independent circuits. Incorrect splicing can overload remaining sections.
This method should only be attempted by individuals comfortable with basic electronics and aware of the risks.
Do’s and Don’ts of LED Light Repair
| Do | Don’t |
|---|---|
| Use gloves and eye protection when handling broken glass or sharp tools. | Attempt repairs while the strand is plugged in. |
| Label repaired sections with colored tape for future reference. | Mix bulb types or voltages within the same strand. |
| Store lights coiled loosely around a cardboard reel to avoid wire stress. | Submerge lights in water to “test” functionality. |
| Keep a repair kit with spare bulbs, fuses, and a multimeter. | Ignore persistent flickering—it may indicate deeper electrical issues. |
| Inspect lights annually before installation. | Use household glue or duct tape as permanent electrical fixes. |
Real Example: Restoring a Family Heirloom Strand
Sarah from Vermont inherited a set of blue-and-white LED icicle lights from her grandmother. Every year, she struggled with one dimming section until finally deciding to investigate. After unplugging the strand, she noticed one bulb had turned black at the base. Using needle-nose pliers, she carefully removed it and found corrosion inside the socket. She cleaned it with rubbing alcohol and inserted a spare bulb from a newer set of identical specifications. The entire section lit up again. Over the next few years, she began saving spare bulbs and now maintains all her holiday lighting with confidence. Her story illustrates how simple interventions can preserve sentimental decorations for generations.
FAQ: Common Questions About Fixing LED Christmas Lights
Can I replace an LED bulb with a different color?
Yes, physically—but doing so may affect the overall aesthetic. Electrically, as long as the voltage and base type match, it will function. However, mixing colors in a uniform strand is generally discouraged unless intentional.
Why do some LED bulbs burn out faster than others?
Even high-quality LEDs vary slightly in manufacturing. Those receiving slightly higher current due to circuit imbalances may degrade faster. Heat buildup in enclosed fixtures or tight clusters can also shorten lifespan.
Are there tools specifically designed for testing Christmas lights?
Yes. Devices like the \"Light Keeper Pro\" send pulses through the strand to clear shunt failures in incandescent bulbs, but they are less effective on LEDs. For LED diagnostics, a digital multimeter is far more reliable.
Checklist: How to Safely Fix Broken LED Bulbs on Christmas Light Strands
- Unplug the light strand from the power source.
- Visually inspect for damaged, darkened, or missing bulbs.
- Identify whether bulbs are replaceable or hardwired.
- Gather necessary tools: spare bulbs, multimeter, cotton swabs, insulated pliers.
- Carefully remove the suspect bulb without damaging the socket.
- Inspect the bulb for internal damage or discoloration.
- Clean the socket contacts with a dry or alcohol-dampened swab.
- Insert a compatible replacement bulb, ensuring correct fit and orientation.
- Reconnect and test the strand.
- If unresolved, check wiring, controller, or power adapter using a multimeter.
- Repair or replace faulty components as needed.
- Label and store the strand properly after successful repair.
Conclusion: Preserve Your Holiday Lights with Confidence
Fixing broken LED bulbs on Christmas light strands doesn’t require professional training—just patience, attention to detail, and respect for electrical safety. By understanding how your lights are constructed and following systematic troubleshooting steps, you can restore full functionality and enjoy a brighter holiday display. Each repair not only saves money but also reduces electronic waste and preserves cherished traditions. Whether you're maintaining a simple string of white lights or a complex animated display, taking the time to care for your decorations ensures they’ll shine brightly for many seasons to come.
💬 Have a success story or tip for fixing stubborn light strands? Share your experience in the comments—your insight could help another holiday enthusiast keep their lights glowing!