Decorating a staircase with Christmas lights can transform your home into a winter wonderland. The warm glow winding up the banister adds elegance and festive cheer, but improper installation risks damage to your railings, electrical hazards, or even accidents from loose wires. Done right, however, it becomes a centerpiece of your holiday décor—one that’s both beautiful and safe. This guide walks you through every phase of the process, from selecting the right lights to securing them properly, avoiding common pitfalls, and ensuring long-term safety throughout the season.
Choosing the Right Lights for Your Staircase
The first decision—what kind of lights to use—shapes everything that follows. Not all Christmas lights are suited for staircases, especially when installed on wood, metal, or delicate finishes. Consider bulb type, cord length, power source, and durability.
LED lights are ideal for stair railings. They emit less heat than incandescent bulbs, reducing fire risk, especially when in contact with wood or fabric drapes. They’re also more energy-efficient and last significantly longer—some rated for 50,000 hours. Choose mini LEDs for a subtle shimmer or C7/C9 bulbs for a bolder statement, depending on your railing thickness and home style.
Tip: Opt for pre-lit light strands with built-in fuses and shatterproof bulbs. These reduce the risk of short circuits and broken glass.Cord length matters. Measure your staircase’s total linear railing distance before buying. A typical two-story staircase has 20–30 feet of railing. Buy lights in excess—about 25% more than measured—to allow for wrapping, overlapping, and routing around newel posts. Also, ensure the plug end can reach an outlet without stretching or using multiple extension cords.
Essential Tools and Materials
Before hanging a single strand, gather the proper supplies. Using makeshift solutions like nails, tape, or staples may seem convenient but can damage railings or create tripping hazards. Invest in tools designed for secure, non-damaging installation.
“Using inappropriate fasteners is the leading cause of railing damage during holiday decorating.” — Marcus Reed, Home Safety Inspector & Holiday Lighting Consultant
- Christmas lights (preferably LED, UL-listed)
- Clear plastic railing clips (sold in packs at hardware stores)
- Measuring tape
- Extension cord (indoor-rated, grounded)
- Power strip with surge protection
- Ladder (stable, preferably step-and-go style for stairs)
- Gloves (to protect hands during handling)
- Scissors or wire cutters (for trimming zip ties if needed)
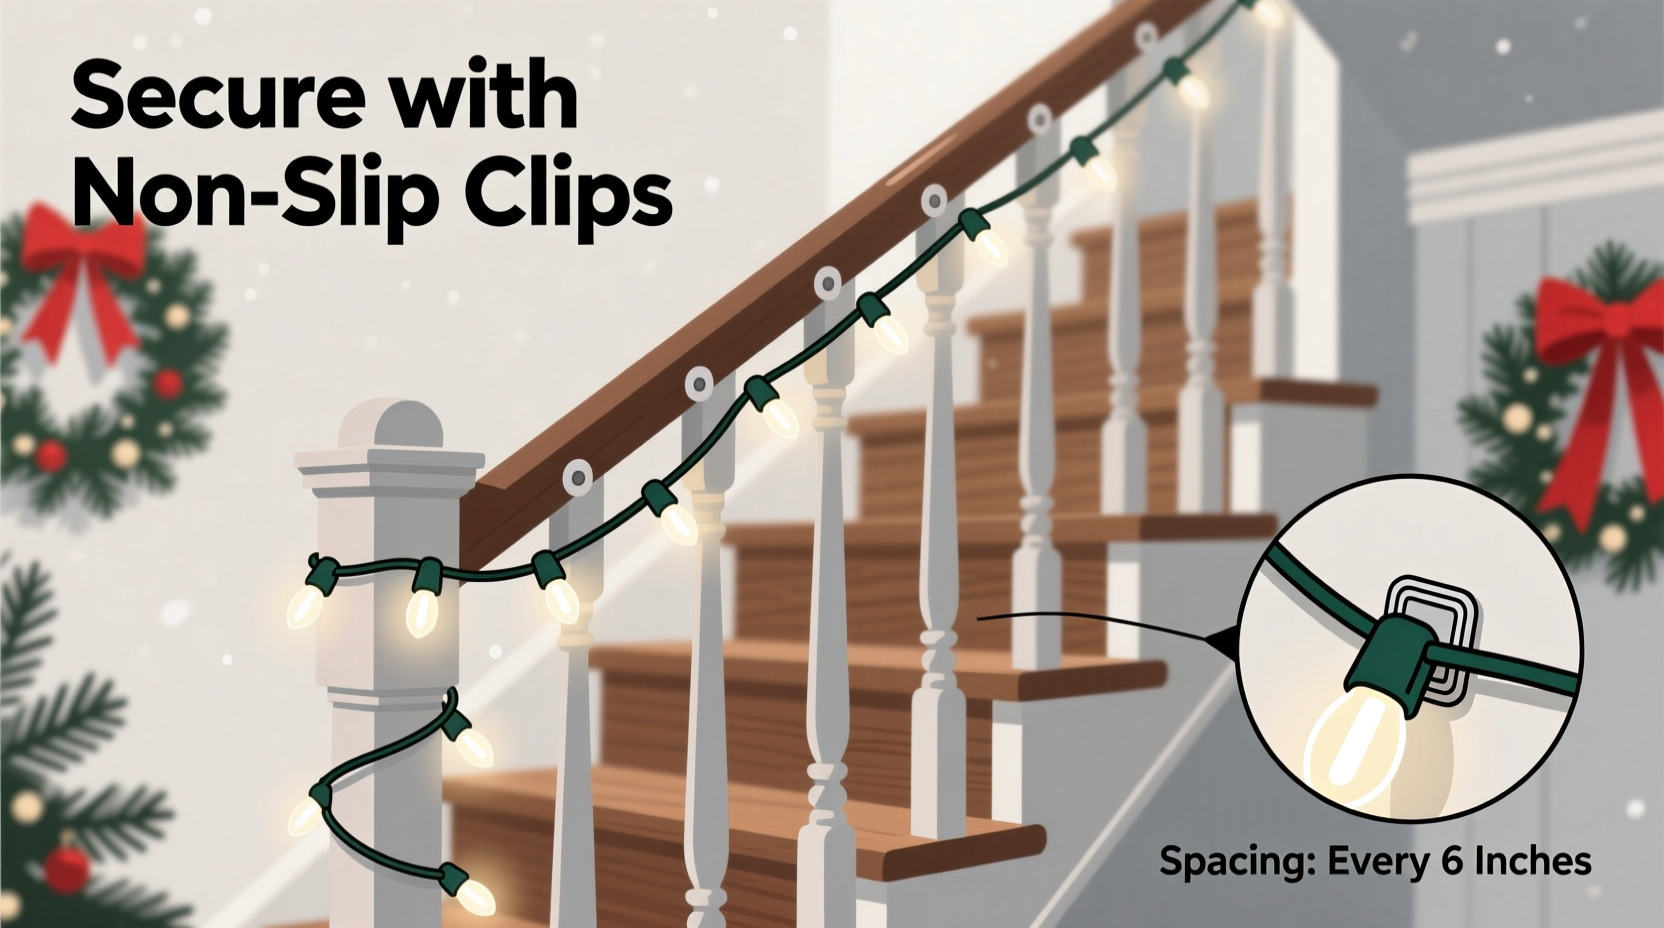
Railing clips are crucial. These small U-shaped fasteners snap over the railing and hold the light cord in place without scratching surfaces. They come in sizes for round, square, or ornate spindles. For wooden railings, choose soft-grip versions to avoid marring the finish.
Step-by-Step Installation Guide
Installing lights on a staircase requires precision and patience. Follow this sequence to ensure a professional, hazard-free result.
- Measure and plan the route. Use a measuring tape to determine the total length of railing. Decide whether you’ll wrap lights once or double-wrap for density. Mark starting and ending points near available outlets.
- Test all light strands. Plug in each set before installation to confirm they work. Replace any flickering or dead bulbs. Note which end has the male plug for routing.
- Install railing clips. Starting at the bottom, space clips every 6–8 inches along the railing’s underside or outer edge. Align them consistently so lights sit flush. Press firmly until they snap into place.
- Begin threading the lights. Start at the plug end closest to the outlet. Feed the first bulb into the first clip, then gently press the cord into each subsequent clip. Avoid pulling too hard—this can stretch or misalign the strand.
- Navigate corners and newel posts. At turns, loop the cord smoothly around posts instead of sharp bends. Use extra clips or twist ties (non-metal) to secure wraps. Never staple or nail into wood.
- Connect strands safely. Most manufacturers recommend no more than three light sets daisy-chained. Use a surge-protected power strip to manage multiple connections. Keep plugs accessible—never bury them under rugs or furniture.
- Secure loose ends and test again. Once fully installed, check for sagging sections or exposed wiring. Tuck excess cord neatly behind newel posts or baseboards. Turn on the lights to verify full operation.
Safety Best Practices and What to Avoid
A beautifully lit staircase should never compromise safety. Falls, electrical faults, and fire hazards are real concerns when lights aren’t secured properly. Follow these do’s and don’ts to keep your home safe.
| Do’s | Don’ts |
|---|---|
| Use UL-certified lights—look for the mark on packaging. | Never use outdoor lights indoors unless rated for both. |
| Inspect cords for frays, kinks, or cracked insulation before use. | Don’t overload circuits—limit daisy-chaining and use separate outlets. |
| Keep pathways clear—ensure lights don’t obstruct steps or handholds. | Don’t use tape, nails, or staples—these damage railings and pose shock risks. |
| Turn off lights when leaving home or sleeping to reduce fire risk. | Don’t let cords hang where people can trip—secure all slack. |
| Use clips or hooks designed for railings—they’re inexpensive and effective. | Don’t ignore manufacturer instructions on max connections or usage. |
Children and pets add another layer of consideration. If toddlers use the stairs, position lights higher on the railing or use motion-sensing nightlights below instead. Pets may chew low-hanging cords—consider bitter-taste cord covers if this is a concern.
Real Example: A Family’s Safe Staircase Transformation
The Thompson family in Portland, Oregon, wanted to elevate their narrow oak staircase for Christmas. Their previous attempts used duct tape and zip ties, which peeled varnish and created tangled messes. Last year, they invested in 25 feet of warm-white LED mini lights and a pack of 40 clear railing clips.
They began by measuring the spiral curve of their railing—exactly 22 feet—and bought two 12-foot strands. After testing both sets, they snapped clips underneath the railing every 6 inches, working clockwise from the bottom. By feeding the lights upward, they maintained consistent spacing. They routed the final plug into a wall outlet behind a decorative basket, using a 6-foot extension cord with a surge protector.
The result was a clean, glowing ribbon effect that lasted the entire season. No damage occurred, and their 4-year-old couldn’t reach the lights. “It took 45 minutes, cost $28, and looked better than anything we’ve done before,” said Sarah Thompson. “We’ll reuse the clips every year.”
Maintenance and End-of-Season Removal
Once installed, your lights need minimal upkeep—but regular checks prevent problems. Inspect them weekly for loose clips, flickering bulbs, or overheating. Dust can accumulate, reducing brightness; wipe bulbs gently with a dry microfiber cloth.
When taking down decorations, remove lights carefully. Unplug first. Starting at the top, unhook each bulb from its clip and coil the strand loosely—never yank. Store in a labeled container with tissue paper between loops to prevent tangling. Keep clips attached to a spare strand or store them in a small bag taped to the light box.
“Proper storage doubles the lifespan of your lights and saves time next year.” — Linda Wu, Seasonal Décor Organizer & Author of *Holiday Smart*
Frequently Asked Questions
Can I use smart lights on my staircase railing?
Yes, smart Christmas lights work well on railings as long as they’re indoor-rated and connected to a stable Wi-Fi network. Ensure the hub or bridge is within range. Control color and brightness via app or voice assistant. However, avoid complex animations that cycle rapidly—these can be distracting on stairways and increase electrical load.
How do I hide the power cord?
Route cords along baseboards using adhesive cord covers painted to match the wall. Alternatively, run them under a rug edge (only if the rug is non-flammable and the cord won’t overheat). Never cover cords completely—allow airflow. For permanent solutions, consider installing a discreet outlet at the base or top of the stairs.
Are battery-powered lights a good option?
Battery-operated lights are convenient for short railings or temporary displays, but they’re impractical for full staircases. They require frequent battery changes, dim over time, and lack the brightness of plug-in sets. Reserve them for accent areas, like newel post toppers or wreaths.
Final Checklist Before You Hang
- ✅ Measured total railing length
- ✅ Purchased enough lights (with 25% extra)
- ✅ Acquired UL-listed, indoor-rated strands
- ✅ Bought correct railing clips for your spindle type
- ✅ Tested all lights before installation
- ✅ Located nearest outlet and prepared surge-protected power strip
- ✅ Ensured ladder stability and safe access
- ✅ Confirmed no tripping hazards or obstructions
- ✅ Planned removal and storage method
Conclusion: Shine Bright, Stay Safe
Decorating a staircase railing with Christmas lights doesn’t have to be risky or complicated. With the right materials, careful planning, and attention to detail, you can create a dazzling display that enhances your home’s charm without compromising safety. The key lies in preparation—choosing quality lights, using proper fasteners, and respecting electrical limits. Whether you live in a historic home with carved wood railings or a modern townhouse with metal balusters, secure lighting is achievable and worth the effort.
Start today: measure your railing, order clips, and test last year’s lights. When the holidays arrive, you’ll be ready to illuminate your staircase with confidence and joy. Share your setup tips or photos with others—inspiring safe, beautiful celebrations one step at a time.
💬 Have a staircase lighting success story or creative idea? Share your experience in the comments and help fellow decorators light up the season—safely and beautifully.