A well-designed bar cart is more than storage—it’s the centerpiece of a home pub, a conversation starter, and a functional stage for hospitality. When thoughtfully illuminated with LED backlighting, it transforms from utilitarian furniture into ambient architecture: casting warm halos under glassware, highlighting bottle labels like museum exhibits, and subtly defining your entertaining zone after dark. Unlike off-the-shelf solutions, a custom-built LED-backlit cart lets you control color temperature, dimming responsiveness, material texture, and even integrated controls—all while reflecting your personal style. This article details five proven, field-tested approaches—from minimalist floating shelves to reclaimed-wood rolling islands—each grounded in electrical safety, thermal management, and visual cohesion. No prior electronics experience is required, but attention to detail, material compatibility, and layered lighting logic are non-negotiable.
Why Backlighting Matters Beyond Aesthetics
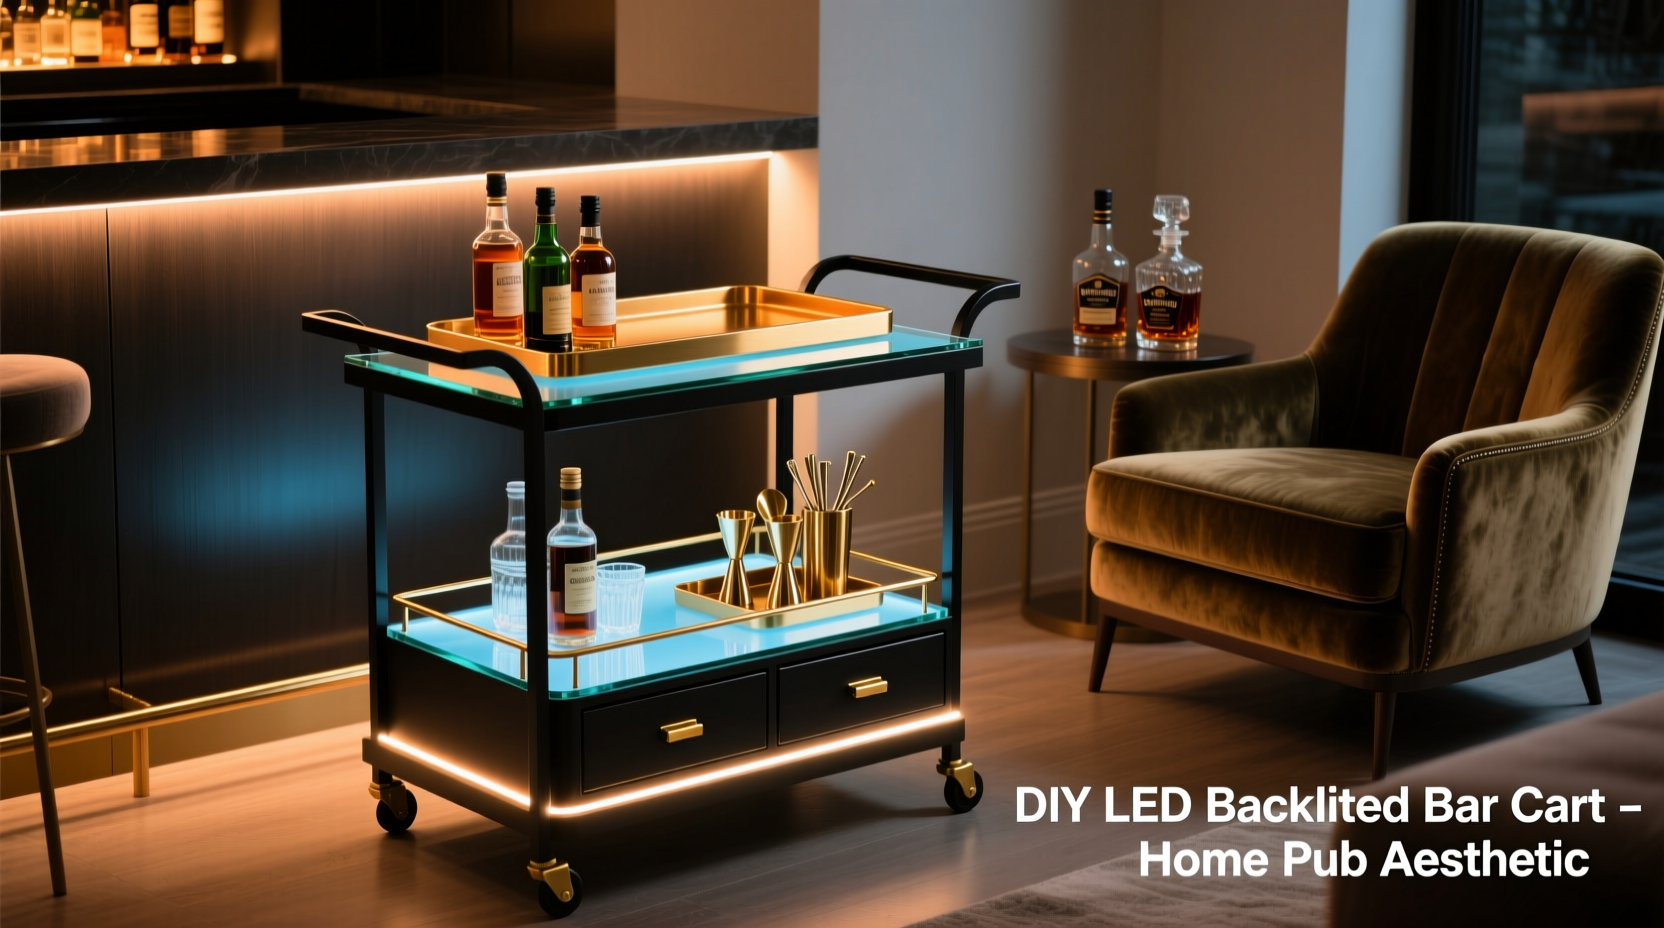
Backlighting isn’t just about “making things glow.” In a home pub context, it serves three distinct functional roles: spatial definition, visual hierarchy, and mood modulation. Ambient light from overhead fixtures flattens depth; directional backlighting restores dimensionality by separating objects (bottles, decanters, shakers) from their background plane. Studies in environmental psychology show that layered lighting increases perceived room size by up to 23% and improves guest comfort during extended social gatherings. Furthermore, cool-white LEDs (5000K–6500K) enhance clarity for cocktail preparation, while warm-white (2700K–3000K) creates intimacy during relaxed conversation. The key is intentionality—not uniform brightness, but strategic placement where light interacts meaningfully with form and function.
Tip: Never backlight glass or mirrored surfaces directly—use diffused edge lighting instead. Direct reflection creates glare and obscures contents.Five Practical DIY LED Backlit Bar Cart Concepts
Each concept balances build complexity, cost, and visual impact. All assume standard 12V DC LED strip systems (low-voltage, safe for DIY), passive heat dissipation, and modular wiring for future upgrades.
1. Floating Shelf Cart with Concealed Edge Glow
A minimalist, wall-mounted or freestanding cart built around 3–4 horizontal shelves. Instead of illuminating the shelf surface, LEDs run along the *underside front edge*, projecting a soft, downward-facing band of light onto the floor or lower shelf. This creates a “floating” illusion while keeping wiring fully hidden. Ideal for small spaces or modern interiors.
2. Reclaimed Wood Island with Under-Shelf Accent Bands
Uses salvaged oak, walnut, or barn wood for a rustic-industrial look. LED strips are mounted inside routed channels beneath each shelf, covered with frosted acrylic diffuser panels cut to match shelf width. Light spills gently upward, catching wood grain texture and warming the grain without washing out natural variations.
3. Glass-and-Steel Cart with Dual-Zone Illumination
A sleek, mid-century inspired cart featuring tempered glass shelves supported by black steel frames. Here, two independent LED zones operate: cool-white strips under upper shelves (for functional visibility) and warm-white strips under lower shelves (for ambiance). Controlled via a dual-channel dimmer switch mounted discreetly on the side rail.
4. Vintage Rolling Cart Conversion with Bottle-Rack Integration
Takes an authentic 1940s–50s chrome-and-wire bar cart and retrofits it with flexible silicone-coated LED strips tucked behind the wire grid of the bottom shelf. Light reflects off the polished chrome frame and bounces softly through the grid, creating a subtle, rhythmic pattern. Bottles placed above appear haloed without direct illumination.
5. Modular Bamboo Cart with Wireless Smart Control
Built from sustainably harvested, laminated bamboo panels, this cart features removable magnetic LED modules embedded in pre-milled grooves. Each module connects wirelessly to a central hub, enabling app-based scheduling, color shifting (for themed parties), and motion-triggered activation. Heat-sensitive adhesive ensures no drilling compromises bamboo integrity.
Essential Materials & Electrical Safety Checklist
Skipping proper component selection or safety protocols risks fire hazard, flickering, premature LED failure, or inconsistent color rendering. Below is a verified checklist used by professional lighting installers and home bar builders.
- 12V DC constant-voltage LED strips (not AC line-voltage strips)
- Aluminum mounting channel with integrated heat sink (mandatory for >3 meters of continuous run)
- Frosted polycarbonate or opal acrylic diffuser (2–3mm thickness)
- UL-listed power supply rated at least 20% above total LED wattage
- Wire gauge appropriate for run length (e.g., 18 AWG for ≤5m; 16 AWG for ≤10m)
- Strain relief connectors and solderless crimp terminals (no exposed wire splices)
- Thermal tape rated for ≥80°C operating temperature
- Non-conductive mounting clips (avoid metal screws piercing LED PCBs)
“Most DIY LED failures stem not from cheap strips—but from undersized power supplies and inadequate heat sinking. A 12V strip running at 60°C will lose 30% lumen output in 18 months. Aluminum channels aren’t optional—they’re longevity insurance.” — Rafael Mendez, Lighting Engineer, LuminaCraft Labs
Step-by-Step Build Guide: The Under-Shelf Reclaimed Wood Cart
This method delivers high visual return with moderate effort. Estimated build time: 6–8 hours (excluding drying/curing).
- Prepare the base structure: Assemble or refurbish a 36\" wide × 18\" deep × 36\" tall wooden cart with at least two fixed shelves (middle and lower). Sand thoroughly; apply food-safe mineral oil or matte water-based polyurethane—no glossy finishes, which reflect LED light unpredictably.
- Rout mounting channels: Using a router with a ¼\" straight bit, cut a ¼\" deep × ½\" wide channel along the entire underside front edge of each shelf. Keep channel centered and consistent—depth variance causes uneven light diffusion.
- Install aluminum heat sinks: Cut aluminum LED channels to match shelf lengths. Secure into routed grooves using thermal adhesive (not regular glue). Allow 2 hours to cure before proceeding.
- Mount LED strips: Peel backing and press 12V addressable or non-addressable LED strips firmly into channels. Ensure no kinks or folds—these create hot spots and burnouts. Solder connections only if using non-waterproof strips; otherwise, use IP65-rated connectors.
- Add diffusers: Cut frosted acrylic to ¾\" wider than shelf depth (e.g., 18.75\"). Mount with clear silicone adhesive at the very front edge—this creates a seamless light-emitting surface without visible hardware.
- Wire and test: Run low-voltage wires down interior leg cavities to a central junction box. Connect to UL-listed 12V/5A power supply. Test all zones before final assembly. Verify no voltage drop (use multimeter: should read 11.8–12.2V at farthest LED).
- Final integration: Install bottle racks, glass hooks, or tray dividers—positioning them so they don’t cast hard shadows across lit edges. Add rubber feet to prevent floor scratches and vibration noise.
Lighting Design Principles for Home Pubs
Effective backlighting follows three immutable principles: separation, balance, and intention. The table below compares common mistakes against professional-grade execution.
| Design Element | Amateur Approach | Professional Execution |
|---|---|---|
| Color Temperature | Mixing 2700K and 6500K strips haphazardly | Using 3000K throughout for warmth, or assigning zones: 3000K (lower shelves), 4000K (mixing station), 2700K (spirit display) |
| Dimming Control | Single on/off switch or basic wall dimmer (incompatible with most LED drivers) | Dedicated 12V PWM dimmer with smooth 0–100% fade, wired to tactile push-button or smart-home relay |
| Diffusion Quality | Using white paper, thin fabric, or uncut plastic wrap | Frosted acrylic with 60° beam angle, mounted ≥3mm from LEDs to avoid yellowing or melting |
| Heat Management | Adhesive-only LED mounting on bare wood | Aluminum channel + thermal tape + airflow gap behind diffuser panel |
| Electrical Redundancy | One long daisy-chained strip for all shelves | Individual runs per shelf, fused at 2A max, with independent terminations |
Real-World Case Study: The Brooklyn Loft Transformation
When Maya Chen renovated her 750 sq ft Williamsburg loft, she needed a bar solution that doubled as art. Her existing vintage mahogany cart was beautiful—but visually disappeared in the open-plan space after sunset. She opted for Concept #2 (reclaimed wood with under-shelf bands), sourcing fallen black walnut slabs from a local arborist. She routed channels, installed 3000K non-dimmable strips, and used 2mm opal acrylic cut with a laser for perfect edge alignment. Crucially, she added a micro-switch behind the top shelf: when lifted to retrieve a bottle, the lights brighten by 30% for 15 seconds—then fade back. Guests consistently comment on how “the cart breathes with the room.” Total cost: $227 (including $89 for the power supply and dimmer). Sixteen months later, all LEDs retain full output—no flicker, no discoloration.
FAQ
Can I use battery-powered LED strips for a cordless cart?
Not recommended for permanent installations. Most battery packs lack stable voltage regulation, causing rapid color shift and 40–60% reduced runtime after 3–4 months. If portability is essential, use a rechargeable 12V lithium-ion power bank with regulated DC output and built-in overcharge protection—but expect to recharge weekly under daily use.
How do I prevent light bleed between shelves?
Install vertical light-blocking baffles—thin strips of matte black MDF or felt-lined foam core—between shelves at the rear and sides. These absorb stray photons instead of letting them bounce upward. For glass carts, apply black vinyl film to the *back* of glass shelves (not the front) to eliminate secondary reflections.
Is it safe to run LED wiring inside wooden legs?
Yes—if you use stranded 18 AWG or thicker wire rated for in-wall use (e.g., CL2 or FT4), and avoid sharp bends or pinching points. Drill clean ⅜\" holes through leg centers, and secure wires every 12\" with nylon cable ties (never metal staples). Always route low-voltage wiring separately from any AC lines—minimum 6\" separation—to prevent electromagnetic interference.
Conclusion
A backlit bar cart is not a luxury—it’s a deliberate investment in how you inhabit your home. It signals care in curation, respect for craft (both mixology and woodworking), and understanding that ambiance is engineered, not accidental. You don’t need a workshop or engineering degree to begin. Start with one shelf, one warm-white LED strip, and one properly sized power supply. Measure twice, rout once, diffuse deliberately. Let the light serve the experience—not the other way around. Your guests won’t just notice the glow; they’ll feel the intention behind it.
💬 Share your build photos, wiring diagrams, or favorite LED suppliers in the comments. Help fellow home bartenders light up their spaces—safely, beautifully, and unmistakably.