Maintaining clean makeup brushes isn’t just about hygiene—it’s essential for flawless application and skin health. Over time, brushes accumulate oils, bacteria, and product buildup that can lead to breakouts, uneven blending, and premature wear of the bristles. While commercial brush cleaners are widely available, you don’t need to buy anything extra. Most homes already contain safe, effective ingredients capable of deep-cleaning your tools without harsh chemicals. This guide walks you through proven techniques using common household staples like dish soap, vinegar, olive oil, and more.
Why Cleaning Your Brushes Matters
Makeup brushes come into direct contact with your skin daily, transferring not only foundation or eyeshadow but also dirt, sweat, and environmental pollutants. Dermatologists consistently emphasize that unclean brushes contribute to clogged pores and acne flare-ups, especially around the T-zone and jawline. A 2021 study published in the *Journal of Cosmetic Dermatology* found that over 70% of used makeup brushes harbor harmful bacteria such as Staphylococcus and E. coli when not cleaned regularly.
Beyond skincare concerns, dirty brushes affect performance. Built-up residue makes bristles stiff, reducing their ability to pick up and distribute product evenly. This leads to patchy foundation, muddy eyeshadow blends, and wasted product. Regular cleaning restores softness, improves pickup, and extends the lifespan of both natural and synthetic brushes.
“Brush hygiene is non-negotiable. I recommend cleaning them at least once a week—more if you use them daily.” — Dr. Lena Patel, Board-Certified Dermatologist
Best Household Items for Cleaning Makeup Brushes
The good news? You likely already have everything you need under your sink or in your kitchen pantry. These everyday items are gentle on bristles yet powerful enough to dissolve makeup and sanitize surfaces:
- Dish soap – Cuts through oil-based products like foundation and mascara.
- White vinegar – Natural disinfectant that kills bacteria and removes mineral deposits.
- Olive or coconut oil – Breaks down stubborn waxes and pigments in eyeliners and lipsticks.
- Hydrogen peroxide (3%) – Adds antibacterial power without damaging bristles.
- Hand soap or baby shampoo – Mild cleansers ideal for sensitive bristle types.
Step-by-Step Guide: Deep Clean Brushes Using Common Items
Cleaning your brushes thoroughly doesn't require expensive kits. Follow this simple five-step process using supplies most households already own.
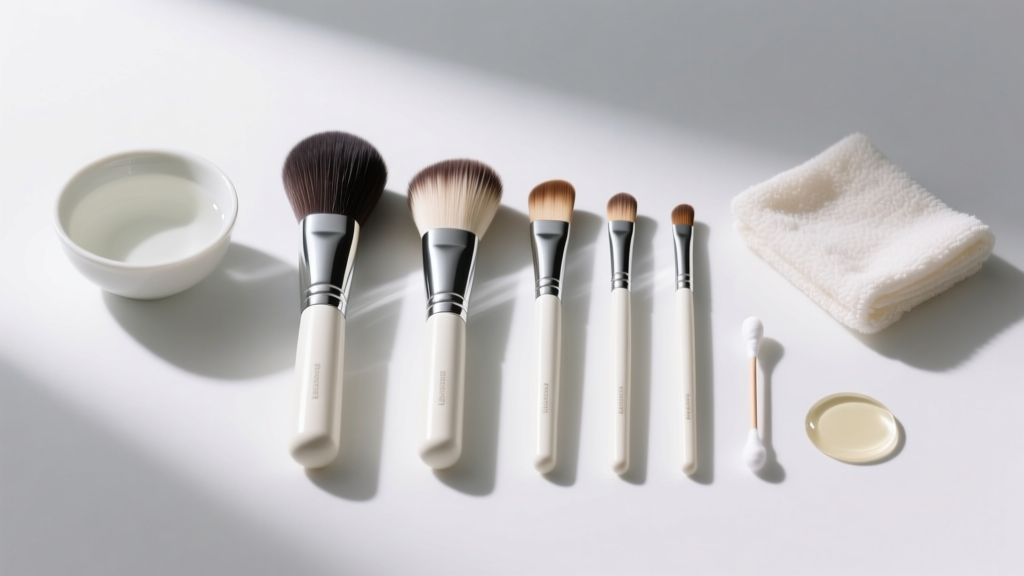
- Prep your workspace. Lay down an old towel near a sink. Have all cleaning agents ready: a small bowl, dish soap, white vinegar, and a bit of olive oil if needed.
- Rinse under lukewarm water. Hold the brush at an angle so water flows from base to tip. Avoid soaking the ferrule (metal part), as excess moisture can weaken glue and cause shedding.
- Create a cleaning solution. In a bowl, mix one tablespoon of dish soap with two tablespoons of white vinegar and one teaspoon of olive oil. The soap lifts grime, vinegar sanitizes, and oil dissolves dried pigments.
- Swirl and massage. Gently swirl the brush in the mixture for 30–60 seconds. For denser brushes like stippling or foundation tools, lightly massage bristles against the palm of your hand to dislodge trapped product.
- Rinse and dry. Rinse thoroughly until water runs clear. Reshape bristles with your fingers and lay flat on a clean towel, hanging slightly over the edge to allow airflow and prevent water pooling in the handle.
Drying upright in a cup can trap moisture in the ferrule, leading to mold growth or loosened bristles. Allow brushes to dry completely��usually 6 to 12 hours—before reuse.
Do’s and Don’ts When Cleaning Makeup Brushes
| Do’s | Don’ts |
|---|---|
| Use lukewarm water—not hot—to avoid damaging bristle glue. | Soak brushes overnight; prolonged exposure warps bristles and weakens handles. |
| Clean weekly for daily-use brushes, biweekly for occasional ones. | Use strong alcohol-based solutions frequently—they dry out natural fibers. |
| Reshape bristles after washing to maintain form. | Store wet brushes vertically; water seeps into the ferrule and causes shedding. |
| Spot-clean between deep washes with a quick wipe on a microfiber cloth dampened with soapy water. | Use abrasive sponges or scrub too hard—this frays delicate tips. |
Real Example: How One Artist Switched to DIY Brush Cleaning
Sophia M., a freelance makeup artist based in Portland, used to spend $40 a month on professional brush cleansers and drying racks. After developing sensitivity to synthetic fragrances in her commercial cleaner, she experimented with kitchen staples. She started using a mix of Dawn dish soap and apple cider vinegar, adjusting ratios based on brush type. Within weeks, she noticed her brushes felt softer, lasted longer, and caused fewer client breakouts.
“I was skeptical at first,” Sophia says. “But now I teach my clients how to do it too. It’s cheaper, safer for sensitive skin, and just as effective—if not better.” She estimates saving over $400 annually while reducing plastic waste from bottled cleaners.
Variations Based on Brush Type
Not all brushes respond the same way to cleaning. Tailor your method depending on material and usage:
- Synthetic brushes (foundation, concealer): These handle stronger degreasers well. Use a higher ratio of dish soap to oil. They dry faster—often within 4–6 hours.
- Natural hair brushes (blending, powder): More delicate. Opt for baby shampoo instead of dish soap, and skip vinegar if the scent lingers. Add a drop of conditioner occasionally to restore softness.
- Dense kabuki or stippling brushes: Require deeper agitation. Swirl them against a textured silicone pad or the bottom of a glass mixing bowl lined with soap.
- Eyeliner and lip brushes: Often overlooked but critical due to proximity to mucous membranes. Soak tip-first in hydrogen peroxide (3%) for 5 minutes before regular washing.
Alternative Quick-Clean Methods Between Washes
If you don’t have time for a full wash, these fast fixes keep brushes functional and hygienic:
- Soap bar swipe: Wet bristles slightly and swirl over a mild glycerin or oatmeal soap bar. Wipe on a tissue until residue clears.
- Vinegar mist: Mix equal parts water and white vinegar in a spray bottle. Mist bristles and wipe on a microfiber cloth.
- Olive oil dab: Apply a tiny amount to the tip of a stubbornly stained brush, work in gently, then follow with a soap rinse.
These aren’t substitutes for weekly deep cleans but help maintain performance during busy routines.
Frequently Asked Questions
How often should I clean my makeup brushes?
For brushes used daily (like foundation or blush), aim to clean them every 5 to 7 days. Less frequently used brushes (e.g., eyeshadow or highlighter) can be washed every 2–3 weeks. If you’ve had a breakout or illness, wash immediately to prevent reinfection.
Can I use baking soda to clean my brushes?
Baking soda is mildly abrasive and may wear down fine bristles over time. While it helps lift stains, it’s best reserved for scrubbing the base of handles or removing gunk from metal ferrules—not for direct bristle contact. Pair it with water to make a paste, apply only to non-bristle areas, then rinse carefully.
Is it safe to use dish soap on natural hair brushes?
Yes, but sparingly. Use a small amount of gentle dish soap (like Seventh Generation or Dawn Free & Clear) and avoid frequent use. Natural bristles benefit more from mild shampoos designed for delicate fibers. Overuse of degreasing agents can strip essential oils, making bristles brittle.
Checklist: Monthly Brush Care Routine
- Inspect each brush for shedding, odor, or discoloration.
- Remove loose hairs and debris with fingers or a soft comb.
- Choose appropriate cleaner based on bristle type and last use.
- Wash using recommended method; rinse until water runs clear.
- Dry horizontally on a clean towel, away from direct sunlight.
- Once dry, reshape and store in breathable container (not sealed plastic).
- Repeat weekly for daily-use tools, biweekly otherwise.
Final Thoughts: Simplicity Meets Skincare
Cleaning your makeup brushes doesn’t need to be complicated or costly. With basic household items, you can maintain hygiene, enhance application quality, and extend the life of your tools—all while avoiding unnecessary chemicals and single-use plastics. The key is consistency. Just as you cleanse your face nightly, treating your brushes with regular care supports healthier skin and better results.
Start tonight: gather a few brushes, mix up a batch of soap and vinegar, and give them a proper wash. Notice the difference in texture and performance. Once you see how easy and effective DIY cleaning can be, you’ll wonder why you ever relied on store-bought solutions.
💬 Have a favorite homemade brush-cleaning hack? Share your tip in the comments and help others discover smarter, simpler ways to keep their tools pristine!