Matte lipsticks are beloved for their long-wearing, velvety finish and bold pigmentation. However, their low moisture content makes them especially prone to drying out over time. Whether left uncapped, exposed to heat, or simply aged past its prime, a once-smooth bullet can harden into an unusable stick. Before tossing it in the trash, consider this: most dried matte lipsticks can be revived with simple household tools and ingredients. With careful techniques, you can restore texture, improve application, and extend the life of your favorite shade—without spending extra money.
Why Matte Lipsticks Dry Out Faster
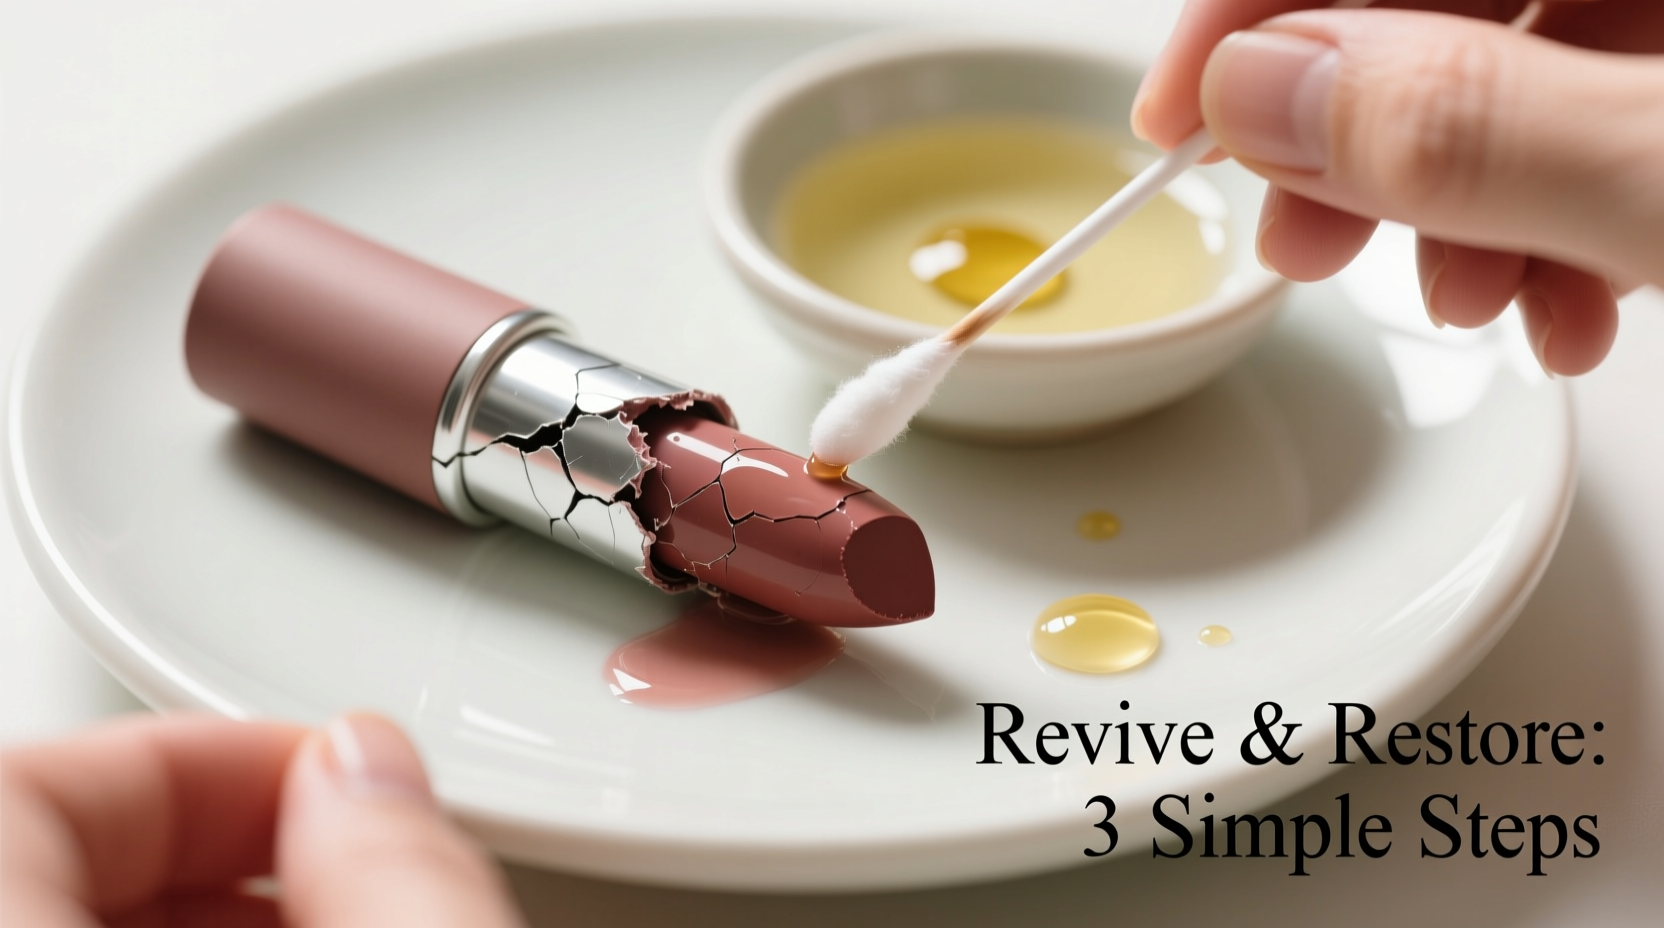
Unlike creamy or glossy formulas, matte lipsticks contain minimal oils and waxes designed to create a flat, non-reflective finish. This lack of emollients means they’re more vulnerable to moisture loss. Exposure to air accelerates oxidation and evaporation of volatile compounds, leading to hardening. Temperature fluctuations—like leaving a lipstick in a hot car or near a bathroom heater—further degrade its structure. Over time, the pigment may separate from the base, resulting in patchy, uncomfortable wear.
Reviving a dried lipstick isn’t just about aesthetics—it’s also economical and eco-conscious. The average lipstick costs $20–$40, and makeup waste contributes significantly to landfill pollution. By restoring a dried product, you reduce both financial loss and environmental impact.
“Makeup doesn’t always expire when it dries. Many formulas can be rehydrated safely if contamination is ruled out.” — Dr. Lena Park, Cosmetic Chemist & Formulation Consultant
Step-by-Step Guide to Reviving Dried Matte Lipstick
Reviving a dried matte lipstick involves gentle heating and controlled rehydration. The goal is to restore smoothness without compromising safety or altering color integrity. Follow this detailed process for best results:
- Assess the Condition: Check for signs of mold, discoloration, or rancid odor. If present, discard immediately. Only proceed if the lipstick appears dry but otherwise intact.
- Gather Supplies: You’ll need a clean spoon, small bowl, boiling water, tissue paper, and optional hydrating agents (like coconut oil or vitamin E).
- Remove the Lipstick from the Tube: Use a sanitized pin or butter knife to gently push the bullet upward. If stuck, place the tube in the freezer for 10 minutes to contract the plastic slightly.
- Create a Double Boiler Setup: Boil water and pour into a bowl. Place the lipstick on a metal spoon and hover it above the steam—do not submerge. Let the heat soften the surface gradually.
- Melt Gently: Rotate the spoon so all sides warm evenly. After 2–3 minutes, the outer layer should begin to liquefy. Avoid overheating, which can burn the formula or cause separation.
- Add Moisture (Optional): For severely dry sticks, mix in a tiny drop (less than 1/16th of a teaspoon) of food-grade oil like coconut, jojoba, or sweet almond. Vitamin E oil works well too—just one capsule punctured and blended in.
- Stir and Smooth: Use a sterilized toothpick or cotton swab to blend the added oil thoroughly. Ensure no lumps remain.
- Pour Back or Reshape: Carefully transfer the softened mixture back into the original tube. Alternatively, pour into a small silicone mold or compact for a custom balm-like texture.
- Cool and Set: Let sit undisturbed at room temperature for 1–2 hours. Do not refrigerate, as rapid cooling may cause cracking.
- Test and Apply: Once solidified, test on the back of your hand. It should glide smoothly without tugging.
Household Items That Work Best for Revival
You don’t need specialty products to bring your lipstick back to life. Common kitchen and bathroom staples can effectively recondition dried formulas. Here’s what works—and what to avoid:
| Item | How It Helps | Caution |
|---|---|---|
| Boiling Water / Steam | Safely softens wax base without burning | Never immerse lipstick directly in water |
| Coconut Oil | Natural emollient; adds slip and shine | Use sparingly—too much alters matte finish |
| Vitamin E Oil | Antioxidant-rich; conditions and stabilizes | One drop per lipstick is sufficient |
| Jojoba Oil | Mimics skin sebum; blends seamlessly | Choose fragrance-free version |
| Honey | Humectant that draws in moisture | Can make formula sticky; not recommended |
| Aloe Vera Gel | Hydrating but water-based | Causes clumping; avoid in oil-based cosmetics |
The key is moderation. Adding even a fraction too much oil can turn a matte lipstick into a gloss, defeating the purpose. Stick to micro-doses and prioritize lightweight, non-comedogenic oils.
Real Example: Saving a Cherished Shade
Marissa, a freelance makeup artist in Portland, had a vintage red matte lipstick she used for retro-themed shoots. After six months stored in her kit near a window, the product hardened completely. “I tried swiping it on, but it felt like sandpaper,” she recalls. “I almost threw it away, but remembered reading about steam revival.”
She placed the lipstick on a spoon over a steaming cup of tea, rotating it every 30 seconds. After two minutes, the surface softened. She added half a drop of jojoba oil from her skincare serum, stirred with a clean pin, and poured it back into the case. Once cooled, the lipstick applied smoothly—matte, pigmented, and true to original performance. “It saved me $28 and kept a signature look alive,” she says. “Now I do this with any lipstick that starts feeling rough.”
Do’s and Don’ts When Reviving Lipstick
To ensure safety and effectiveness, follow these guidelines:
| Action | Reason |
|---|---|
| Do: Sanitize all tools | Prevents introducing bacteria into the product |
| Do: Use indirect heat (steam) | Even melting without scorching |
| Do: Add oil in microscopic amounts | Maintains intended finish and consistency |
| Don’t: Microwave the lipstick | Uneven heating causes breakdown and potential fire hazard |
| Don’t: Use water-based liquids | Oil and water don’t mix—leads to graininess or spoilage |
| Don’t: Revive lipsticks with visible mold | Risk of infection or irritation on sensitive lip tissue |
Frequently Asked Questions
Can I use olive oil to revive my dried lipstick?
Yes, but sparingly. Olive oil is heavier than other options and may leave a greasy feel. Opt for lighter oils like jojoba or sweet almond for better texture retention. Always use pure, unrefined olive oil if chosen.
Will adding oil change the color of my lipstick?
Not significantly, as long as the amount is minimal. Oils primarily affect texture, not pigment. However, excessive oil may dilute intensity slightly. Test on your wrist first to confirm color payoff.
How long will a revived lipstick last?
If properly stored—away from heat and sunlight—a restored lipstick can remain usable for 3–6 months. Discard if you notice changes in smell, texture, or appearance. Never share revived lip products to minimize contamination risk.
Extending the Life of Your Lipsticks
Prevention is the best strategy. To keep matte lipsticks from drying out prematurely:
- Always cap tightly after use—exposure to air is the primary culprit.
- Store upright in a cool, dark drawer—not in a car, bathroom, or near windows.
- Wipe the bullet lightly with a tissue before capping to remove excess oils or residue.
- Rotate your collection; avoid letting one shade sit unused for over 6 months.
- Consider transferring older lipsticks into sealed containers with silica gel packs to absorb moisture.
“Airtight storage is just as important as formulation. A well-preserved lipstick can last years beyond its ‘best by’ date.” — Rachel Kim, Beauty Product Archivist
Conclusion
Dried out matte lipstick doesn’t have to mean the end of its life. With everyday items like boiling water, a spoon, and a drop of natural oil, you can restore functionality and enjoy your favorite shades again. The process is simple, cost-effective, and environmentally responsible. More than just a quick fix, it reflects a smarter approach to beauty consumption—valuing what you already own and reducing unnecessary waste.
Next time you reach for a stiff lipstick, pause before discarding it. Take five minutes to revive it using the steam method. You might rediscover a forgotten favorite or rescue a high-end product worth far more than replacement cost. Small acts of care add up to big savings and a more sustainable routine.
💬 Have you successfully revived a dried lipstick? Share your method or favorite tip in the comments below!