There’s something timeless about a homemade apple pie—the golden crust, the sweet-tart aroma of baked apples, and that first warm bite with a scoop of vanilla ice cream. Yet many home bakers shy away from making it, fearing dry fillings, soggy bottoms, or tough pastry. This recipe changes that. Designed for both beginners and seasoned cooks, it delivers a consistently perfect apple pie: flaky, flavorful, and surprisingly simple. With tested techniques and practical advice, this guide ensures your next pie isn’t just good—it’s unforgettable.
The Secret to a Truly Great Apple Pie
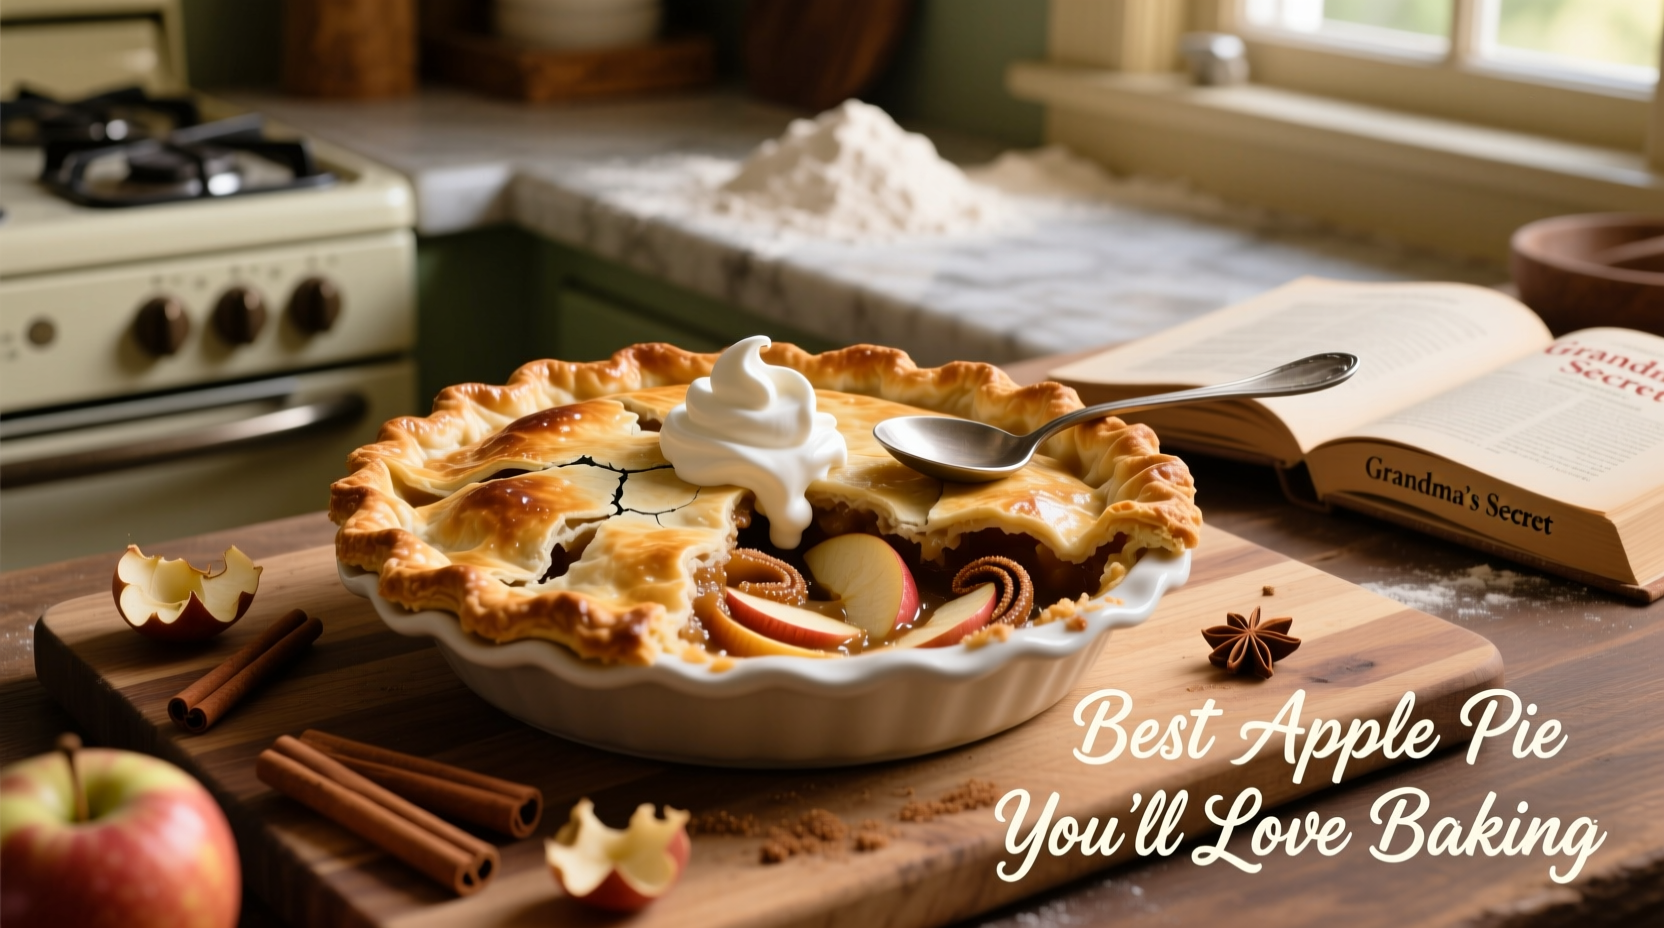
A great apple pie balances texture, flavor, and structure. The crust should be crisp on the outside, tender within, and hold its shape when sliced. The filling must be juicy without being runny, spiced just right, and feature apples that soften but don’t turn to mush. Achieving this requires more than following steps—it demands understanding the role of ingredients and technique.
For instance, using a mix of apple varieties prevents a one-note flavor profile. Tart Granny Smiths balance the sweetness of Honeycrisps or Fujis. The sugar amount is calibrated not just for taste, but to draw out moisture and enhance caramelization. And chilling the dough? It’s not optional—it keeps butter solid during baking, which creates steam pockets and that sought-after flakiness.
“Apple pie is America’s favorite dessert not because it’s complicated, but because it’s honest. When made with care, every ingredient shines.” — Clara Bennett, Pastry Chef & Author of *The Art of American Pies*
Step-by-Step Guide to Baking the Best Apple Pie
This method breaks down the process into manageable stages, ensuring success from crust to crimp. Follow each step closely, especially if it's your first time.
- Prepare the pie dough (15 min + chilling): In a large bowl, combine 2 ½ cups all-purpose flour, 1 tsp salt, and 1 tbsp sugar. Cut in 1 cup (2 sticks) cold unsalted butter, cubed, using a pastry cutter or fork until the mixture resembles coarse crumbs. Gradually add ¼ to ½ cup ice water, 1 tablespoon at a time, mixing until the dough just holds together. Divide into two equal disks, wrap in plastic, and chill for at least 1 hour (or up to 2 days).
- Make the filling (10 min): Peel, core, and thinly slice 6–7 medium apples (about 6 cups). Toss them in a large bowl with ¾ cup granulated sugar, 2 tbsp brown sugar, 2 tsp cinnamon, ¼ tsp nutmeg, 1 tbsp lemon juice, and 3 tbsp all-purpose flour. The flour helps absorb excess liquid during baking.
- Roll out the bottom crust (10 min): On a lightly floured surface, roll one dough disk into a 12-inch circle. Carefully transfer it to a 9-inch pie dish. Trim edges to leave a ½-inch overhang.
- Add the filling: Pour the apple mixture into the crust, mounding it slightly in the center. Dot the top with 1 tbsp cold butter, cut into small pieces.
- Top the pie (10 min): Roll out the second dough disk. You can place it whole for a classic double crust, or cut strips for a lattice. Seal the edges by pressing with a fork or crimping with fingers. Cut slits in the top if using a full crust to allow steam to escape.
- Chill before baking (optional but recommended): Place the assembled pie in the freezer for 15 minutes. This helps maintain shape and prevents shrinkage.
- Bake (50–60 min): Preheat oven to 375°F (190°C). Place pie on a baking sheet (to catch drips). Bake for 50–60 minutes, until the crust is deep golden and filling bubbles through vents. If edges brown too quickly, cover with foil or a silicone shield.
- Cool completely: Let the pie rest for at least 3 hours. This allows the filling to set and prevents a runny slice.
Choosing the Right Apples: A Comparison
Not all apples behave the same in the oven. Some dissolve into mush; others stay too firm. The ideal pie apple softens while holding its shape and offers balanced acidity. Here’s a comparison of common choices:
| Apple Variety | Baking Texture | Flavor Profile | Best Used With |
|---|---|---|---|
| Granny Smith | Firm, holds shape | Tart, bright | Honeycrisp, Fuji |
| Honeycrisp | Semi-firm, juicy | Sweet with mild tartness | Granny Smith, Braeburn |
| Fuji | Softens significantly | Very sweet | Granny Smith only |
| Braeburn | Firm, holds well | Spicy-sweet | Any tart apple |
| Jonagold | Tender but intact | Balanced sweet-tart | Standalone or mixed |
A blend of Granny Smith and Honeycrisp (3:4 ratio) is recommended for optimal structure and flavor depth.
Common Mistakes and How to Avoid Them
- Skipping the chill time: Warm dough melts butter too fast, leading to greasy, dense crust. Always chill before rolling and after shaping.
- Overfilling the pie: Too many apples cause overflow and uneven cooking. Stick to 6–7 cups of sliced fruit.
- Not preheating the oven fully: A cold oven steams the crust instead of crisping it. Wait until the temperature is fully reached.
- Cutting too soon: Slicing before the pie sets results in a soupy mess. Patience pays off—wait at least 3 hours.
- Using only one apple type: Single varieties often lack complexity. Mixing textures and flavors improves the final result.
Real Example: From Doubt to Delight
Sarah, a home cook from Ohio, had tried apple pie three times before giving up. “The crust was tough, the bottom was soggy, and the apples turned into soup,” she said. After switching to this recipe, she followed the chilling instructions precisely, used a mix of Granny Smith and Honeycrisp, and let the pie cool overnight. At her family reunion, her pie was voted the favorite dessert—beating out store-bought competition. “I finally understand why people get emotional about apple pie,” she shared. “It’s not just food. It’s memory, warmth, and effort all in one slice.”
Frequently Asked Questions
Can I make this pie ahead of time?
Yes. Assemble and bake the pie up to 2 days in advance. Store at room temperature, covered loosely with foil. Reheat at 300°F for 15 minutes before serving for best texture.
Can I use a store-bought crust?
You can, but the flavor and texture won’t match a homemade version. If using store-bought, look for butter-based crusts and let them come to fridge temperature before handling to avoid cracking.
Why did my filling bubble over?
Some bubbling is normal, but excessive overflow means too much moisture. Ensure you’re using the correct amount of thickener (flour or cornstarch), and always place the pie on a baking sheet to catch drips.
Baking Tips Checklist
Use this checklist before starting to ensure success:
- ✓ Butter and water are ice-cold
- ✓ Dough has chilled at least 1 hour
- ✓ Oven is fully preheated
- ✓ Apples are mixed with flour or cornstarch
- ✓ Top crust has vent holes or is latticed
- ✓ Pie is placed on a baking sheet
- ✓ Pie cools at least 3 hours before slicing
Conclusion: Your Turn to Bake Something Special
This apple pie recipe isn’t just about measurements and steps—it’s about reclaiming a tradition that brings people together. With a few smart techniques and quality ingredients, anyone can create a pie that tastes like comfort, care, and celebration. Whether it’s for a holiday, a quiet Sunday, or simply the joy of baking, this pie deserves a spot in your kitchen repertoire.
💬 Now it’s your turn. Bake this pie, share it with someone you love, and let us know how it turned out in the comments. What twist will you add? A hint of cardamom? A crumb topping? Keep the tradition alive—one delicious slice at a time.