The puff stitch is one of the most expressive and dimensional stitches in crochet. It creates soft, rounded clusters that add depth and visual interest to blankets, scarves, hats, and decorative pieces. While it may appear complex at first glance, mastering the puff stitch is within reach for crocheters with basic skills. This guide breaks down every aspect of the technique—from foundational steps to advanced applications—so you can confidently incorporate rich texture into your work.
Understanding the Puff Stitch: What Makes It Unique
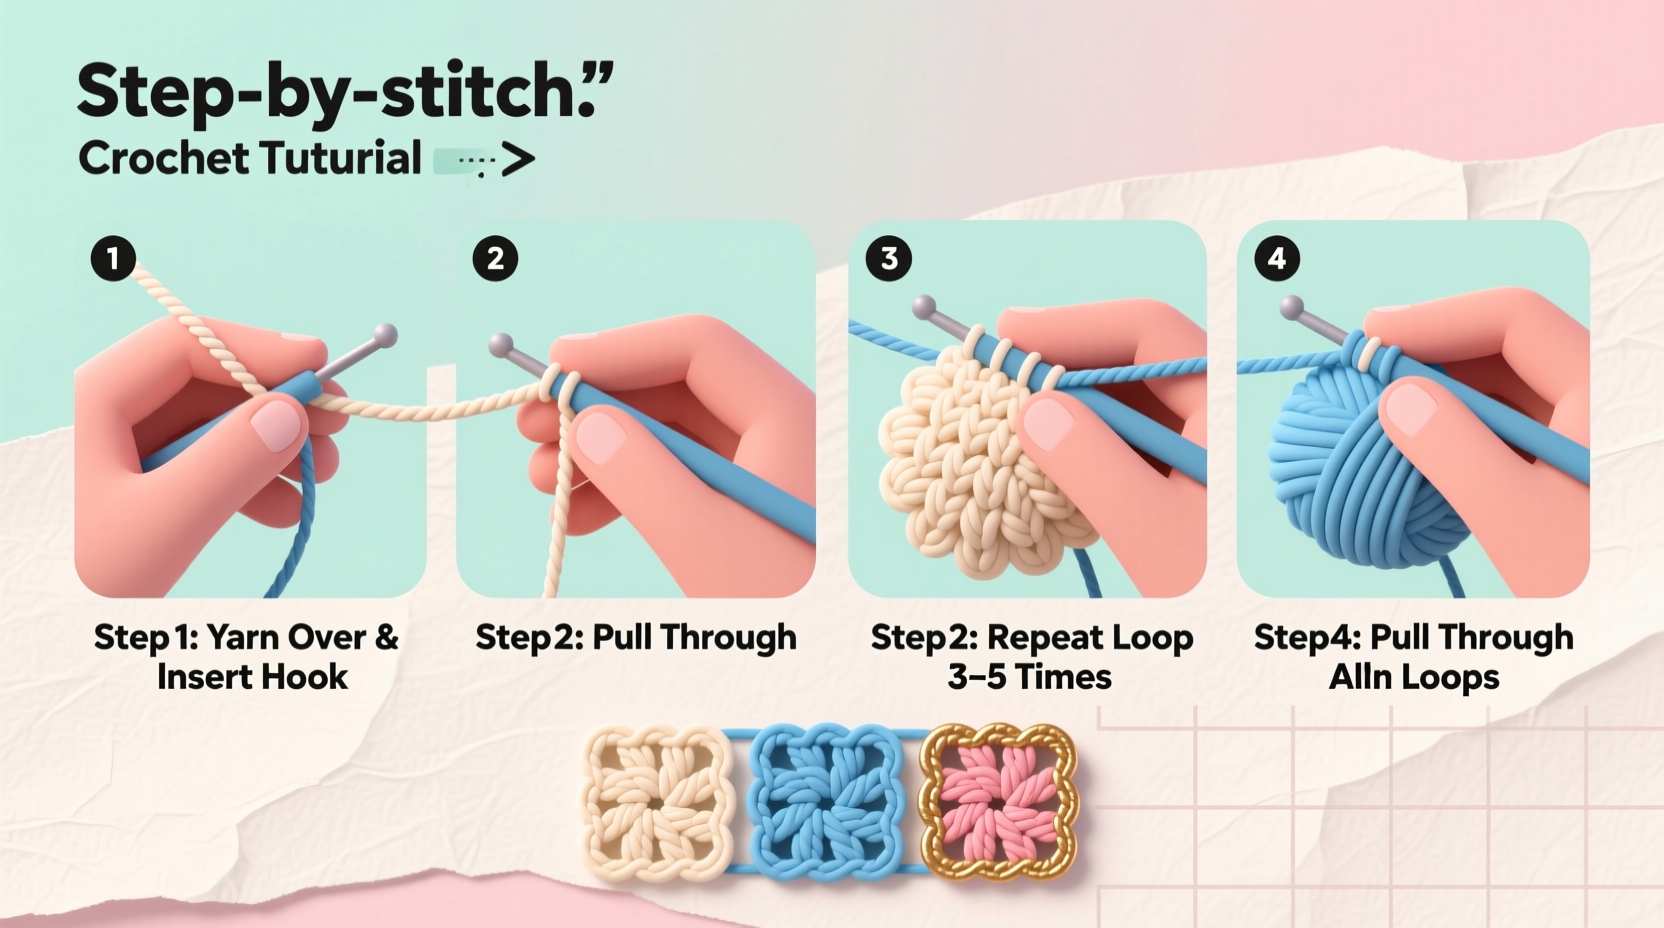
Unlike flat or linear stitches, the puff stitch builds volume by grouping multiple incomplete double crochets into a single base stitch. The result is a plump, cloud-like bump that stands proud from the fabric. Each puff typically consists of 5 to 7 yarn overs pulled up in the same stitch, followed by a final chain-through-all-loops finish.
This stitch excels in projects where tactile appeal matters. It's often used in baby blankets for its softness, in winter wear for added warmth, and in modern home décor for artistic contrast. Because it uses more yarn than standard stitches, it also produces a denser, less stretchy fabric—ideal for structure without stiffness.
Tip: Use a slightly larger hook than recommended for your yarn weight to keep puff stitches loose and defined.Step-by-Step Guide to Crocheting the Basic Puff Stitch
Follow these clear instructions to create a classic 5-loop puff stitch. Once mastered, you can adjust the number of loops to increase or reduce the puffiness.
- Start with a foundation chain. Make sure it’s a multiple of 2 + 1 (e.g., 21 chains) for a simple repeating pattern.
- Skip the first chain and single crochet in the second chain from the hook to anchor the row.
- Chain 2 (this counts as the first double crochet height but doesn’t complete the stitch).
- Work into the next stitch: Yarn over, insert hook, yarn over and pull up a loop (2 loops on hook). Repeat this four more times in the same stitch, leaving each set of loops on the hook. You’ll now have 11 loops on your hook (including the initial chain).
- Yarn over and pull through all 11 loops to close the puff stitch.
- Chain 1 to secure the top of the puff and separate it from the next stitch.
- Single crochet in the next chain space to create a valley between puffs.
- Repeat from step 3 across the row.
- At the end of the row, turn and chain 2 to begin the next round.
Consistency in tension is key. If your puffs look flattened, try loosening your grip during the yarn-over pulls. If they’re too loose, tighten slightly on the final pull-through.
Common Variations and Creative Applications
Once comfortable with the standard puff stitch, experiment with modifications to expand your design possibilities.
| Variation | Description | Best Used In |
|---|---|---|
| Mini Puff Stitch | Uses only 3 yarn overs; creates subtle texture | Linen-look garments, lightweight shawls |
| Extra-Large Puff | 7–9 yarn overs for dramatic dimension | Statement pillows, art installations |
| Front-Post Puff | Wraps around previous row’s stitch for ribbed effect | Hats, cuffs, textured panels |
| Alternating Rows | Puff rows separated by plain double crochets | Blankets with rhythmic depth |
| Clustered Puffs | Multiple puffs in one stitch for floral motifs | Doilies, appliqués, embellishments |
Designers like Claire Ortega-Reyes emphasize versatility:
“The puff stitch isn’t just about thickness—it’s about storytelling with texture. One well-placed row can transform a simple scarf into a heirloom piece.” — Claire Ortega-Reyes, Textile Artist & Instructor
Tips for Perfect Tension and Long-Term Success
Even experienced crocheters struggle with puff stitch consistency. These practical strategies help maintain even results across large projects.
- Count your loops aloud during each puff to avoid missing a yarn-over pull-up.
- Mark puff locations with stitch markers if working in the round.
- Use smooth, medium-weight yarn (like worsted acrylic or cotton blends) until confident—avoid fuzzy or slippery fibers initially.
- Rest your hands frequently; puff stitches require more finger movement and can cause fatigue.
- Block finished pieces lightly to open up the texture without distorting shape.
Real-World Example: Reviving an Old Blanket Design
Sophie, an intermediate crocheter from Portland, had abandoned a baby blanket project after two failed attempts at the puff stitch. Her early versions were lopsided, with some puffs collapsing while others ballooned out.
She revisited the pattern using a 5.5mm hook (up from 5.0mm) and switched to a mercerized cotton yarn for better stitch definition. She also added a chain-1 spacer after each puff and marked every other stitch with locking clips. After blocking the finished piece with light steam, the texture became uniform and plush.
Her revised blanket won praise at a local craft fair and inspired her to teach a beginner workshop on textured stitches—proving that small technical adjustments lead to big creative gains.
Essential Checklist Before Starting Your Next Puff Project
Before casting on, ensure you’re set up for success:
- ✔ Choose a yarn with good stitch definition (avoid mohair or eyelash yarns)
- ✔ Select a hook size that allows easy loop manipulation
- ✔ Swatch a 4x4 inch square to test gauge and texture
- ✔ Mark your pattern repeat with stitch markers
- ✔ Keep scissors and a tapestry needle handy for securing ends
- ✔ Set aside adequate time—puff stitches take longer per row than basic stitches
Frequently Asked Questions
Can I substitute puff stitches in any pattern?
Not directly. Because puff stitches consume more yarn and alter drape, substitutions require recalculating row counts and adjusting for reduced vertical growth. Use them as accents unless the pattern specifically accommodates their density.
Why are my puff stitches leaning to one side?
This usually happens when the final pull-through isn’t centered or when tension varies between yarn overs. Practice on a swatch, focusing on consistent yarn tension and pulling straight up through all loops.
How do I clean a puff stitch garment without flattening the texture?
Hand wash in cool water with mild detergent. Gently press out excess moisture—never wring. Reshape on a flat towel and allow to air dry completely. For delicate items, consider professional cold-water cleaning.
Bring Depth to Your Craft
The puff stitch invites you to think beyond the surface. It rewards patience with beauty, turning ordinary yarn into something sculptural and intimate. Whether you're crafting a gift, enhancing a wardrobe staple, or exploring fiber art, this stitch offers a powerful tool for expression.
💬 Ready to elevate your texture game? Pick up your hook today, make a practice swatch, and share your first puff stitch creation with fellow makers online. Let your creativity rise—one puff at a time.