Drawing angel wings is more than just sketching feathers—it’s about capturing grace, motion, and spiritual symbolism through form and structure. Whether you're illustrating a celestial being, designing a character for a comic, or exploring personal artistry, mastering angel wings elevates your work from simple to sublime. This guide breaks down the process into actionable steps, combining anatomical logic with artistic expression to help you create wings that feel both believable and transcendent.
Understanding Wing Anatomy and Symbolism
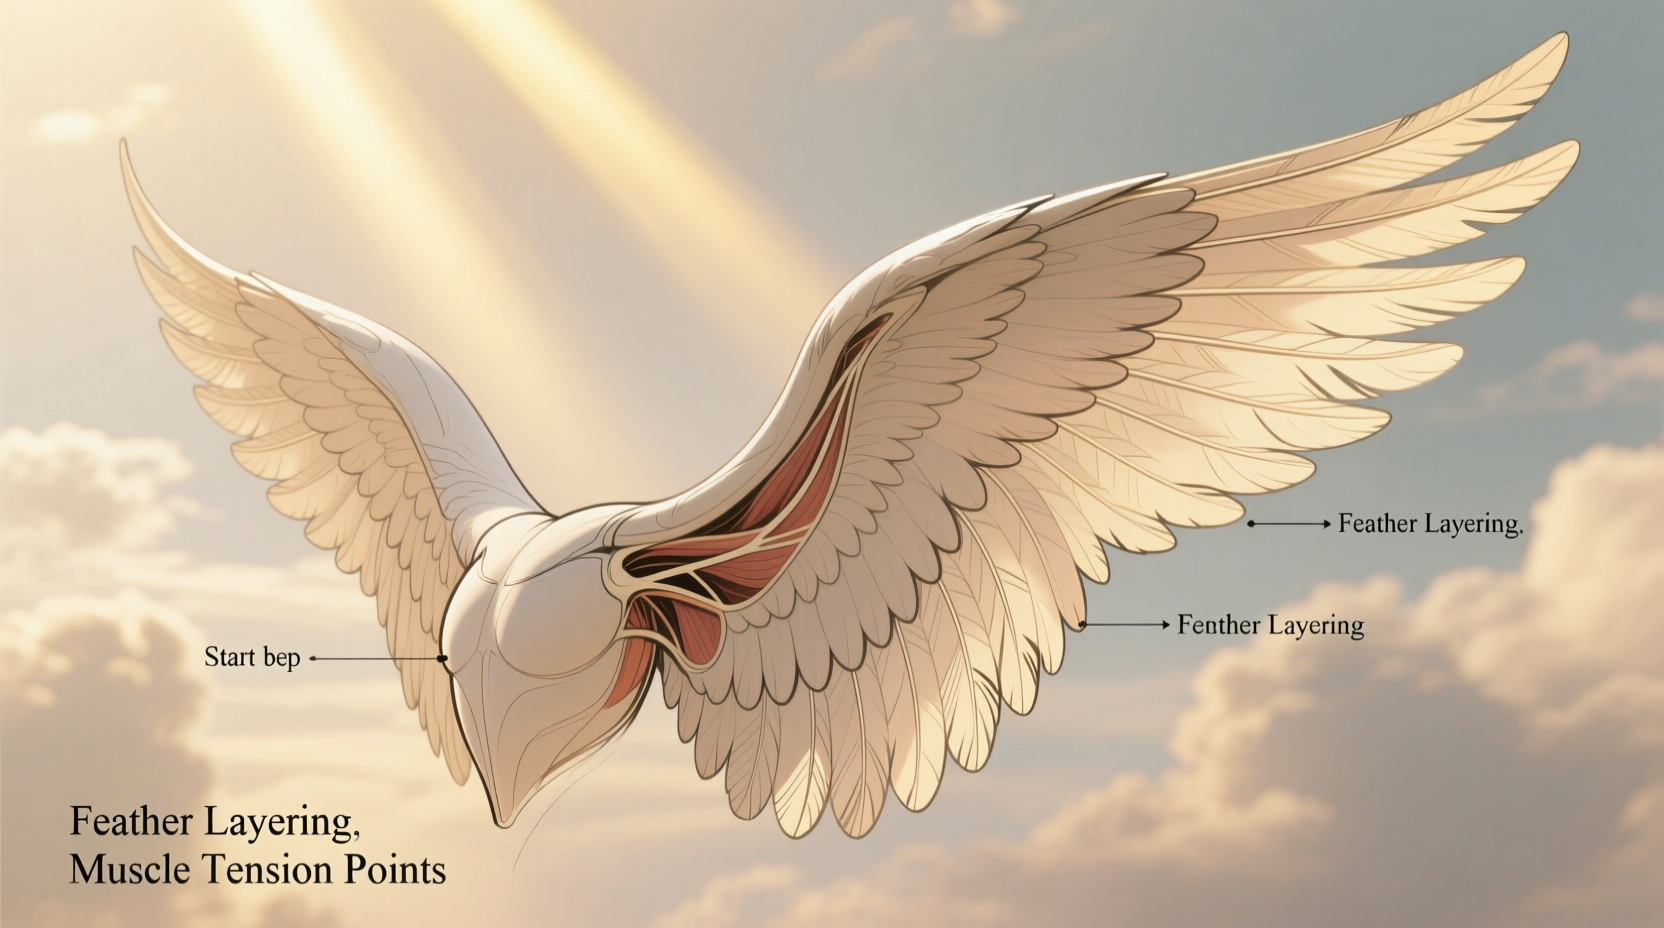
Angel wings are not random clusters of feathers; they follow a structural logic inspired by real bird anatomy, though stylized to reflect divine elegance. At their core, angel wings consist of three primary sections: the primary flight feathers (longest, outermost), secondary feathers (midsection), and covert feathers (overlapping layers that smooth transitions). These segments mirror the alula, remiges, and coverts found in avian biology, but in angelic depictions, they’re often elongated, symmetrical, and imbued with symbolic meaning.
In religious and mythological contexts, wings represent protection, ascension, and purity. Their size, posture, and feather texture communicate emotion—outstretched wings suggest power or welcome, while folded wings imply reverence or mourning. Recognizing these nuances ensures your drawings convey the intended mood beyond mere technical accuracy.
“Wings are not just appendages—they are extensions of the soul. The way they curve, overlap, and catch light tells a story before the figure speaks.” — Lila Montrose, Concept Artist & Illustrator
Step-by-Step Guide to Drawing Angel Wings
Creating realistic angel wings requires planning, layering, and attention to perspective. Follow this structured approach to build depth and elegance from the first stroke.
- Sketch the Torso and Shoulder Base: Begin with the upper back and shoulders. Mark where the wing attaches—just above the shoulder blades. Use light guidelines to indicate the spine and centerline.
- Define the Wing Spine: Draw a central curved line extending diagonally from the back. This acts as the “spine” of the wing and determines its overall arc and direction.
- Outline Major Sections: Divide the wing into upper arm (propatagium), forearm (ulna section), and hand (manus) regions, loosely based on avian skeletal structure. These don’t need labels but help organize feather groups.
- Block In Primary Feathers: Along the outer edge, draw long, tapered shapes radiating from the wing spine. Start with 6–8 large primaries, varying lengths slightly for naturalism.
- Add Secondary and Covert Feathers: Fill the inner wing with shorter, layered feathers. Overlap them like shingles, using curved lines to suggest volume and flow.
- Refine Feather Details: Add barbs and minor ridges to select feathers, especially those in focus. Avoid detailing every feather—this can flatten the image.
- Apply Light and Shadow: Determine the light source. Shade the underside of feathers and deeper layers to create dimension. Highlight edges catching light for ethereal glow.
- Finalize Linework and Erase Guidelines: Darken essential outlines, soften others, and remove construction lines. Adjust symmetry if needed.
Techniques for Realism and Elegance
Realistic wings rely on texture, perspective, and dynamic posing. Elegant designs emphasize balance, rhythm, and soft transitions between elements.
- Feather Layering: Think in tiers. Outer feathers should be defined and directional, while inner layers blend softly. Use hatching or stippling to simulate downy textures near the body.
- Perspective Mastery: For wings seen from behind, narrow the width and angle feathers toward the center. Frontal views require broader spans and careful foreshortening.
- Motion Cues: Slightly curl feather tips upward to suggest a gentle breeze. For dramatic poses, exaggerate the arc and add wind-swept gaps between plumes.
- Symmetry with Variation: While angel wings are typically symmetrical, introduce subtle differences—feather length, slight tilt, or shadow variation—to avoid mechanical rigidity.
Common Pitfalls and How to Avoid Them
| Do | Don’t |
|---|---|
| Use overlapping layers to create depth | Draw feathers as flat, evenly spaced lines |
| Vary feather length and curvature | Make all feathers identical in shape and size |
| Consider wind direction and body posture | Ignore environmental interaction (e.g., wind, movement) |
| Shade undersides and inner folds | Leave wings uniformly lit or flat |
| Anchor wings to the back musculature | Float wings disconnected from the body |
Mini Case Study: From Sketch to Final Illustration
Maya, a self-taught illustrator, struggled with stiff, cartoonish wings for months. Her early attempts used rigid geometric patterns and lacked depth. After studying bird anatomy and applying layered sketching techniques, she revised her approach. She began with a gesture drawing of an archangel in mid-flight, establishing pose and momentum first. Using eagle wing references, she mapped out the primary feather structure along a dynamic curve. By focusing on three key feathers in the foreground and softly blending the rest, her final piece achieved both realism and emotional impact. The breakthrough came when she shaded the wing base to cast a subtle shadow on the back—this small detail grounded the wings in physical space.
Tip: Practice gesture sketches of wings in motion—flapping, folding, or fanned out—to internalize fluidity.Essential Tools and Materials Checklist
Whether working digitally or traditionally, having the right tools streamlines your workflow and improves results.
- Soft graphite pencils (2B–6B) for shading and blending
- Kneaded eraser for lifting highlights from feather edges
- Fine liner or ink pen (0.1–0.5 mm) for clean final lines
- Blending stump or tissue for smooth gradients
- Digital artists: Use textured brushes that mimic pencil or charcoal
- Reference library: High-resolution bird wing photos and classical angel art (e.g., Renaissance paintings)
- Lightbox or tracing paper for refining drafts without redrawing
FAQ: Common Questions About Drawing Angel Wings
How do I make wings look like they’re attached to the body?
The key is anchoring. Draw the innermost feathers emerging from between the shoulder blades, with subtle muscle contours suggesting attachment. Add a slight depression or fold where the wing meets the back, and ensure shadows connect the wing base to the torso.
Should angel wings always be symmetrical?
While traditional depictions favor symmetry for balance and harmony, asymmetry can serve narrative purposes—such as injury, transformation, or dynamic movement. Use symmetry as a foundation, then adjust for storytelling.
How many feathers should I draw?
Avoid counting each one. Focus on major groups: 6–8 primaries, 10–12 secondaries, and multiple layers of coverts. Detail only the most visible feathers; suggest the rest with strokes and shading.
Cultivating Your Unique Style
Once fundamentals are mastered, explore stylistic variations. Some artists render wings with razor-sharp precision, mimicking stained glass or armor. Others use flowing, wispy lines to evoke mist or light. Consider experimenting with:
- Ethereal Glow: Leave feather edges unshaded or use white gel pens for halo effects.
- Stylized Forms: Abstract feather shapes into curves or flame-like tips for fantasy themes.
- Hybrid Designs: Blend avian structure with bat-like membranes or butterfly translucence for unique characters.
“The best angel wings aren’t perfect—they breathe. They respond to the world around them, just like living things.” — Rafael Jin, Fantasy Art Instructor
Conclusion
Drawing angel wings is a fusion of observation, technique, and imagination. By grounding your work in anatomical truth and refining it with artistic intent, you create more than an image—you craft a symbol of beauty, freedom, and transcendence. Each stroke adds not just form, but feeling. Whether you're sketching for pleasure or building a portfolio, the journey of mastering angel wings deepens your understanding of form, light, and expression.
🚀 Now it’s your turn. Grab your sketchbook, study a bird in flight, and draw your first pair of wings—not perfectly, but passionately. Share your progress, refine your technique, and let your creativity take flight.