Rolling the sleeves of a dress shirt or blouse is a simple way to add casual elegance, adjust for warmth, or elevate your style. Yet, few things are more frustrating than meticulously rolled sleeves that unravel minutes later. The key lies not just in technique, but in understanding fabric behavior, sleeve structure, and securing methods that work with your clothing—not against it. Whether you're dressing for a business-casual meeting, a weekend outing, or transitioning from office to evening, mastering the art of the stay-put sleeve roll ensures a polished look all day long.
Understanding Sleeve Fabric and Structure
The success of a neat sleeve roll begins with knowing what you’re working with. Not all fabrics behave the same under manipulation. Lightweight cotton may hold a crisp fold briefly but often loosens quickly. Linen, while breathable and stylish, tends to wrinkle and sag when rolled. Thicker materials like chambray or denim offer more resistance and naturally maintain shape better due to their weight and weave.
Sleeve construction also plays a crucial role. Shirts with fused interlinings in the cuffs or barrel cuffs (the standard two-button closure) tend to support rolls better than those with soft, unfused cuffs. French cuffs, though elegant, can be trickier to roll because of their double-layer thickness and cufflink design.
Tip: Test the roll on one sleeve first to assess how the fabric responds before committing to both.Additionally, consider sleeve length. A sleeve ending at the wrist bone allows for cleaner rolls, whereas overly long sleeves may require multiple folds that compromise stability. If you frequently roll sleeves, consider having them tailored slightly shorter for optimal rolling length—just above the wrist is ideal.
Step-by-Step Guide to Rolling Sleeves That Stay Put
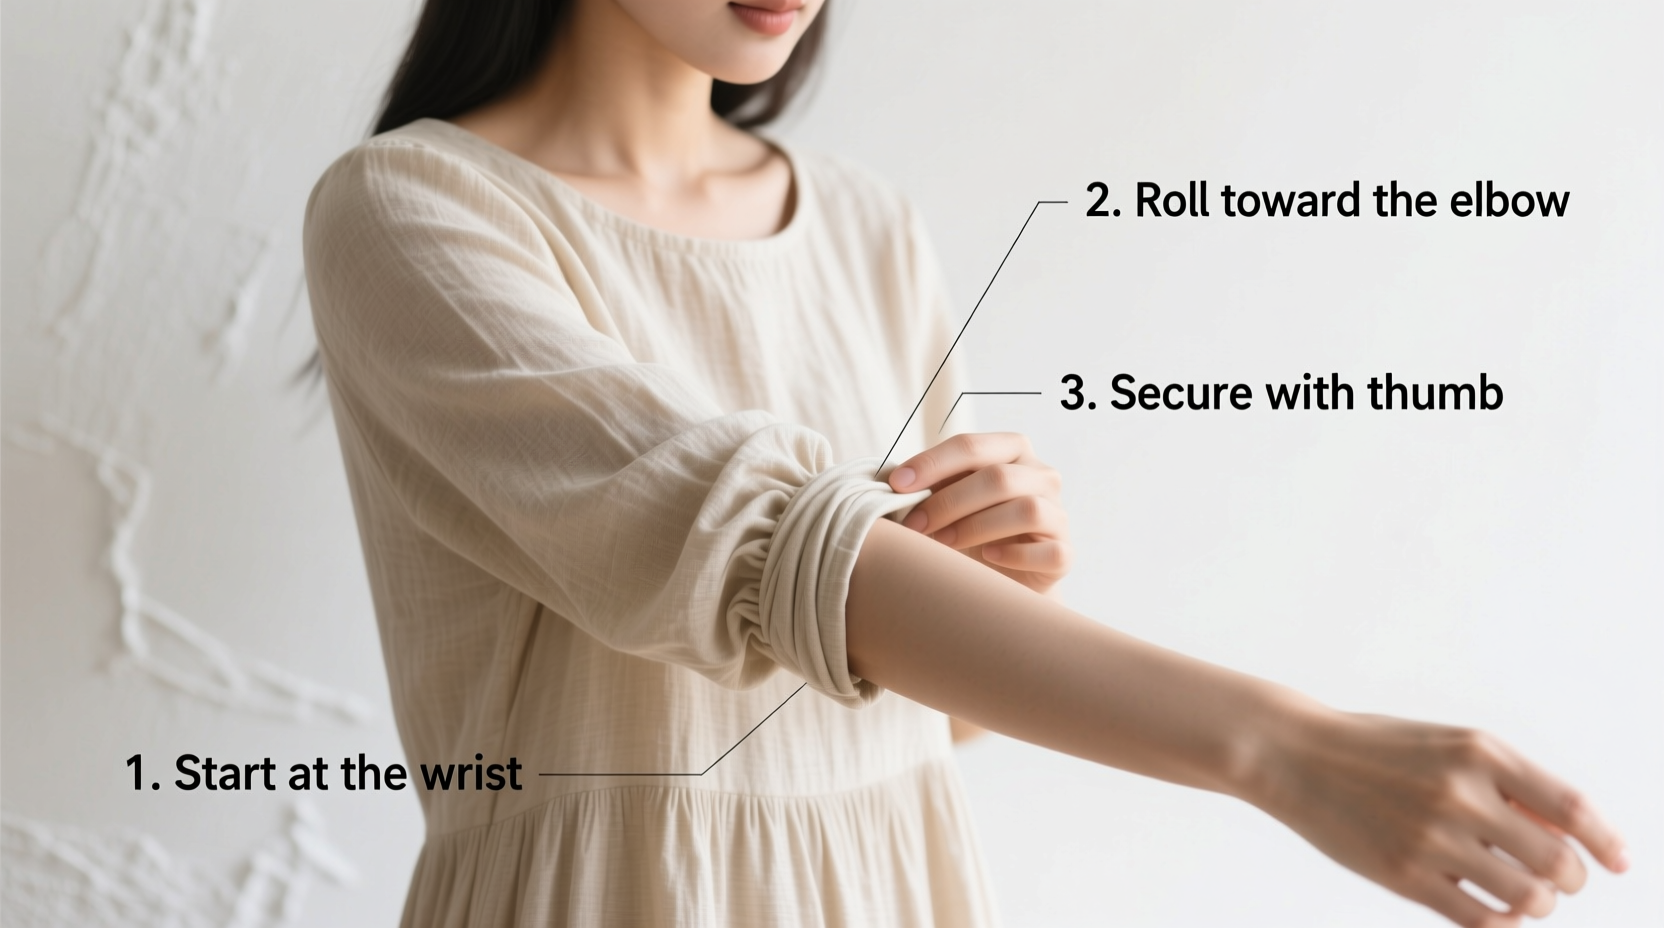
Achieving a durable, clean roll involves more than simply folding fabric upward. It requires precision, tension control, and attention to detail. Follow this five-step method for reliable results:
- Start with a flat arm position. Extend your arm straight out in front of you or rest it on a surface. This keeps the fabric taut and prevents bunching.
- Lift the sleeve from the cuff edge. Grasp the bottom hem of the sleeve between your thumb and forefinger, lifting it about 1–2 inches up. This initial lift creates the foundation fold.
- Make a clean, horizontal fold. Fold the fabric upward evenly across the width of the sleeve. Ensure the fold is parallel to the cuff; crooked folds lead to uneven tension and early slippage.
- Repeat the fold 1–2 times. For short rolls (just above the elbow), two folds usually suffice. For longer rolls, continue upward, but avoid exceeding three folds to prevent bulkiness.
- Smooth and press the folds. Use your palm to gently flatten each layer. Pressing helps set the memory of the fold into the fabric, especially effective with cotton or linen.
This technique, known as the “clean roll” or “hospital roll,” is widely used by professionals for its simplicity and reliability. It works best on structured shirts with defined hems.
Advanced Method: The Tuck-and-Hold Roll
For slippery fabrics like silk, rayon, or thin polyesters, the standard roll often fails. In these cases, use the tuck-and-hold variation:
- After the first fold, instead of rolling upward again, take the newly formed top edge and tuck it slightly inward toward the arm.
- This creates a small pocket that grips the underlying sleeve fabric.
- Proceed with additional folds, ensuring each new layer tucks slightly into the previous one.
This self-locking mechanism uses friction and internal tension to resist unfolding, making it ideal for lightweight or drapey materials.
Do’s and Don’ts of Sleeve Rolling
| Do’s | Don’ts |
|---|---|
| Do roll on dry fabric—damp sleeves stretch and lose shape. | Don’t over-roll—excessive layers create bulk and instability. |
| Do use slight pressure when smoothing folds to set creases. | Don’t roll too tightly—it can distort shoulder seams. |
| Do match roll height on both sleeves for symmetry. | Don’t rely solely on pins or clips unless hidden and secure. |
| Do consider fabric memory—ironed sleeves hold rolls better. | Don’t roll vintage or delicate fabrics without testing first. |
Securing Techniques for Long-Lasting Holds
Even perfect folds can loosen with movement. To lock sleeves in place, consider these discreet yet effective solutions:
1. Shirt Stays (Sleeve Garters)
Originally designed for military uniforms, elasticated sleeve garters loop over the shoulder and attach inside the sleeve, providing constant tension. While less common today, modern versions are slim and invisible under jackets.
2. Adhesive Solutions
Double-sided fashion tape applied to the underside of the final fold adheres gently to the arm or inner sleeve. Choose hypoallergenic, low-residue tape to avoid skin irritation or fabric damage.
Tip: Apply fashion tape to the inner seam allowance of the roll, not directly on skin, for longer wear and easier removal.3. Hidden Stitch Pins
Small safety pins inserted through the fold and into a seam allowance can anchor the roll. Position them where they won’t catch on jewelry or outerwear. Opt for nickel-free pins if you have sensitive skin.
4. Magnetic Snaps (DIY Option)
For frequent rollers, sew tiny magnetic snaps inside the sleeve and roll. When folded, the magnets align and hold the roll securely. This permanent solution works well for favorite shirts worn regularly.
“Proper sleeve rolling isn’t just about aesthetics—it’s about garment integrity. A secure roll reduces stress on the shoulder seam and prevents unwanted stretching.” — Daniel Reyes, Menswear Tailor & Garment Consultant
Real-World Example: Office to Evening Transition
Consider Sarah, a marketing executive who wears tailored cotton-poplin shirts daily. During morning meetings, she keeps her sleeves down for a formal appearance. After work, she transitions to a rooftop dinner with friends. Rather than changing clothes, she rolls her sleeves for a relaxed vibe.
Using the tuck-and-hold method, she achieves a clean roll just below the elbow. Before leaving her desk, she applies a ½-inch strip of fashion tape to the underside of the final fold. The tape secures the roll through handshakes, commuting, and dining—without any slippage. Her colleagues later compliment her effortless style, unaware of the subtle technique behind it.
This scenario illustrates how a reliable roll enhances versatility without sacrificing professionalism or comfort.
Frequently Asked Questions
Can I iron my rolled sleeves to keep them in place?
Yes, but with caution. Lightly pressing the folds with a warm iron (using a pressing cloth for delicate fabrics) can help the fabric remember the shape. Avoid high heat on synthetics or blended fibers, which may melt or shine. Iron only when the shirt is clean and dry.
Why do my rolled sleeves always twist?
Twisting usually occurs when the initial fold isn’t aligned horizontally or when one side of the sleeve is pulled tighter than the other. To prevent this, lay the shirt flat or extend your arm fully while rolling. Check alignment by viewing the roll from the front—both sides should mirror each other.
Are there specific shirts designed for rolling?
Yes. Some brands offer “roll-up” or “convertible” sleeves with reinforced cuffs, snap buttons, or built-in tabs to secure folds. These are especially common in travel-friendly or performance dress shirts. Look for features like barrel cuffs with extended button stances or hidden fasteners inside the placket.
Checklist: Achieve a Perfect, Secure Sleeve Roll
- ✅ Ensure sleeves are clean and dry before rolling.
- ✅ Extend arm fully to keep fabric taut.
- ✅ Make the first fold straight and even across the sleeve.
- ✅ Limit rolls to 2–3 folds for optimal stability.
- ✅ Smooth and press folds to set the crease.
- ✅ Use fashion tape, pins, or tucking for extra hold.
- ✅ Match roll height on both arms for symmetry.
- ✅ Avoid excessive pulling that distorts the shoulder seam.
Maintaining the Look Throughout the Day
A successful roll isn’t just about the initial setup—it’s about endurance. Movement, temperature changes, and contact with surfaces all challenge the roll’s integrity. To maintain neatness:
- Reinforce folds during bathroom breaks or midday touch-ups.
- Carry a small piece of double-sided tape in your wallet for quick fixes.
- Choose shirts with some natural stiffness—lightly starched cotton holds better than soft finishes.
- Avoid resting elbows on rough surfaces that can catch and pull folds.
With practice, rolling becomes second nature. Over time, you’ll develop a feel for how much tension to apply and which methods work best for your wardrobe.
Conclusion
Rolling dress sleeves neatly—and keeping them that way—is a blend of technique, material awareness, and smart reinforcement. Whether you prefer the crisp hospital roll, the secure tuck-and-hold method, or discreet aids like fashion tape, the goal remains the same: a sharp, intentional look that lasts from morning to night. By respecting the fabric, applying consistent folds, and using subtle securing tricks, you gain both style and functionality.
💬 Mastered your sleeve roll? Share your go-to technique in the comments—your tip might help someone finally solve the slipping sleeve struggle!