Working from home has become the norm for millions, but background noise—from barking dogs to household appliances—can undermine professionalism during video calls. A well-soundproofed home office doesn’t require expensive renovations or studio-grade materials. With strategic, budget-friendly solutions, you can significantly reduce sound leakage and improve audio clarity without breaking the bank. Whether you're in a shared apartment, a noisy house, or simply want better call quality, these practical methods will help create a quieter, more focused workspace.
Understanding Sound vs. Noise: What You’re Actually Fighting
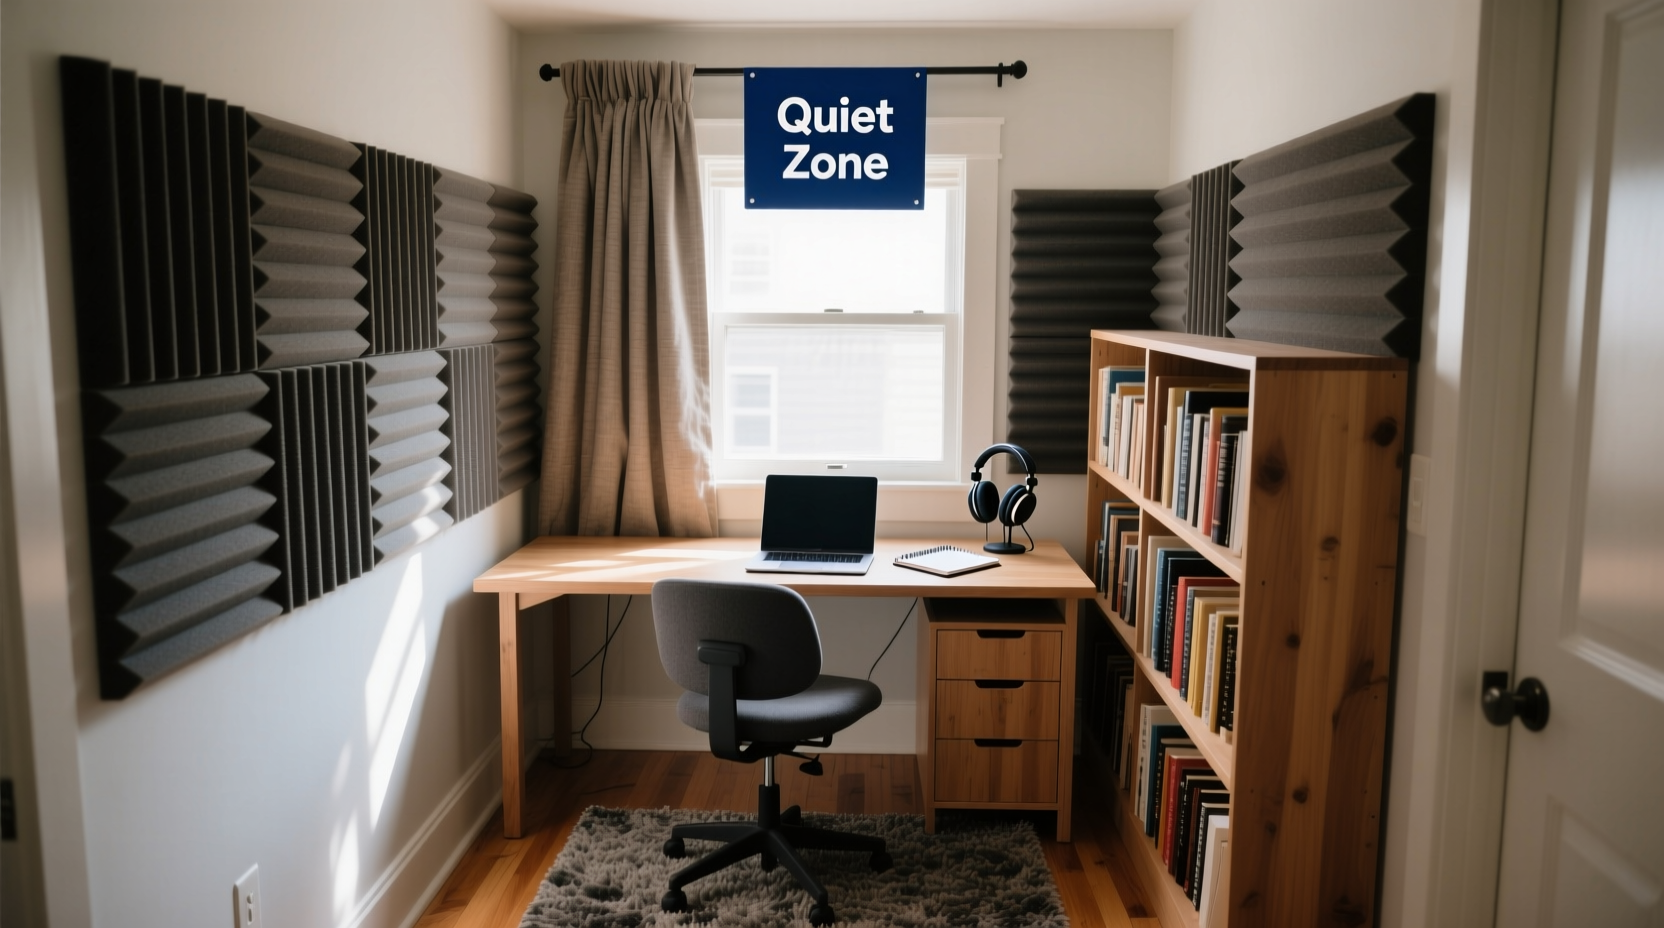
Before diving into solutions, it’s important to distinguish between sound transmission and noise reduction. Soundproofing aims to block sound from entering or exiting a room, while acoustic treatment manages how sound behaves inside the space. For remote workers, both matter—but blocking external noise and preventing your voice from disturbing others is often the priority.
Sound travels through air gaps, thin walls, doors, floors, and windows. High-frequency sounds (like voices) are easier to absorb than low-frequency ones (like traffic rumble), but even modest improvements can make a noticeable difference in call quality. The goal isn’t perfect silence—it’s creating an environment where your microphone picks up your voice clearly, not the blender in the kitchen or your neighbor’s lawnmower.
“Even small changes like sealing door gaps or adding soft furnishings can cut down on echo and external noise by 30–50%.” — Dr. Lena Torres, Acoustic Consultant at Urban Sound Lab
Top 7 Affordable Soundproofing Strategies
You don’t need to rebuild your walls to achieve better acoustics. These cost-effective techniques focus on accessibility, ease of installation, and measurable results.
1. Seal Air Gaps and Cracks
Air leaks are major culprits in sound transmission. Even a tiny gap under a door can let in significant noise. Focus on:
- Door sweeps or draft stoppers
- Acoustic sealant around baseboards and window frames
- Foam gaskets behind electrical outlets on shared walls
2. Upgrade Your Door
Hollow-core interior doors offer almost no sound insulation. If replacing the door isn’t feasible, consider:
- Adding a solid core overlay panel (under $100)
- Using a heavy moving blanket hung temporarily during calls
- Installing a temporary door gasket kit with rubber seals
3. Hang Thick Curtains or Blankets
Heavy, dense fabrics absorb sound and block outside noise. Thermal blackout curtains, commonly found at home goods stores, are surprisingly effective. Mount them with ceiling-mounted rods that extend beyond the window frame to maximize coverage.
For maximum impact, layer two sets—one close to the glass, one further out. This creates an air gap that enhances sound absorption.
4. Use Rugs and Carpets with Pads
Hard floors reflect sound, contributing to echo and poor mic quality. A thick rug with a high-density underlayment absorbs both airborne noise and impact vibrations (like footsteps). Choose rugs made of wool or densely woven synthetics, ideally large enough to cover most of the floor area.
5. Add Soft Furnishings Strategically
Furniture and textiles naturally dampen sound. Prioritize items that serve dual purposes:
- Cloth-upholstered chairs or sofas
- Bookshelves filled with books (the uneven surfaces scatter sound)
- Pillows and throws on nearby seating
6. Build a DIY Acoustic Panel (Under $30)
Commercial acoustic panels can cost $50+ each. But you can make your own using:
- Fiberglass insulation (OC 703 or Rockwool Safe n’ Sound)
- Wooden picture frame or simple wooden border
- Breathable fabric (like cotton duck canvas)
Wrap the insulation in fabric, secure it to the frame, and hang it on reflective surfaces—especially walls opposite your desk. One panel behind your chair can dramatically reduce echo picked up by your webcam mic.
7. Optimize Your Microphone Setup
No amount of soundproofing helps if your microphone is poorly positioned or low quality. Directional (cardioid) USB mics like the Audio-Technica AT2020 or Elgato Wave:3 focus on capturing sound directly in front of them, rejecting ambient noise. Position the mic 6–8 inches from your mouth and use a foam windscreen to reduce plosives.
Tip: Turn off “automatic gain” in your conferencing software—it amplifies background noise when you pause.Step-by-Step Guide: Soundproof Your Office in a Weekend
Follow this realistic two-day plan to transform your home office acoustics without overspending.
- Day 1 – Assessment & Sealing (2–3 hours)
- Walk around your office and listen for drafts or outside noise.
- Seal gaps under doors with a draft stopper ($15).
- Apply acoustic caulk around window edges and electrical outlets ($12).
- Install weatherstripping around the door frame ($10).
- Day 2 – Absorption & Optimization (3–4 hours)
- Lay down a rug with padding over hard flooring ($40–$80).
- Hang heavy curtains over windows using extended rods ($25–$50).
- Place bookshelves or furniture along noisy walls.
- Build or install one DIY acoustic panel ($25).
- Test your microphone setup with a Zoom or Teams call.
Total estimated cost: $100–$150. Most materials are available at hardware stores or online retailers like Amazon or Home Depot.
Do’s and Don’ts: Common Mistakes to Avoid
| Do | Don't |
|---|---|
| Use dense, heavy materials for blocking sound | Use egg cartons or thin foam—they don’t stop sound transmission |
| Fill wall voids with insulation if accessible | Ignore air gaps—even small ones leak sound |
| Position your desk away from shared walls | Place your desk in a corner with bare walls (creates echo chamber) |
| Invest in a directional microphone | Rely solely on laptop mics in untreated rooms |
| Add layers of soft materials (rugs, curtains, furniture) | Assume carpet alone is enough to soundproof a room |
Real-World Example: Maria’s Apartment Office Makeover
Maria works as a customer success manager from her one-bedroom apartment in Chicago. Her office is a converted dining nook adjacent to the living room, where her partner watches TV. During client calls, background noise was a constant issue—her colleagues heard laughter from sitcoms and kitchen clatter.
On a $120 budget, she implemented several key fixes:
- $20: Door draft stopper to seal the gap between the nook and living room
- $35: Pair of thermal curtains hung on a ceiling track covering the open archway
- $40: Area rug with thick pad to reduce floor reflections
- $25: DIY acoustic panel made from recycled insulation and fabric
She also repositioned her desk to face a wall lined with books and started using a USB mic instead of her laptop’s built-in mic. After the changes, her team noticed an immediate improvement. “I stopped getting asked if I was on speaker,” she said. “My calls finally sound professional.”
Checklist: Quick Soundproofing Audit for Your Home Office
Use this checklist before your next big meeting to ensure optimal audio conditions:
- ✅ Is the door tightly sealed? (Test with the dollar bill method)
- ✅ Are windows closed and covered with heavy curtains?
- ✅ Is there at least one large soft surface (rug, couch, panel)?
- ✅ Is your microphone positioned correctly and set to manual input levels?
- ✅ Are noisy appliances (fridge, HVAC) minimized during calls?
- ✅ Have you tested your audio in a real meeting recently?
- ✅ Is your desk not placed directly against a shared wall?
Frequently Asked Questions
Can I soundproof a room without remodeling?
Yes. Most effective soundproofing for remote work involves adding mass (rugs, curtains), sealing leaks (door sweeps), and using directional microphones. Structural changes aren’t necessary for noticeable improvements.
Will foam panels stop outside noise?
No. Thin foam panels only reduce echo *inside* the room; they do not block sound from entering or leaving. For noise isolation, focus on sealing gaps and adding heavy, dense materials.
What’s the cheapest way to reduce echo?
Hanging a thick moving blanket on the wall behind your desk costs under $20 and dramatically reduces reverberation. Combine it with a rug and a pillow on your chair for instant improvement.
Final Thoughts: Clarity Starts Before the First Word
Your voice matters—how it’s heard matters just as much. In remote work, audio quality shapes first impressions, conveys confidence, and ensures your ideas aren’t drowned out by a washing machine or street noise. The best part? You don’t need a dedicated studio or thousands in equipment to achieve clear, distraction-free calls.
Start small: seal that door gap, drape a curtain, lay down a rug. Each step compounds. Within a weekend and under $150, you can transform an echoey, noisy corner into a functional, professional workspace. And when your next client says, “You sound crystal clear,” you’ll know exactly why.
💬 Ready to upgrade your home office sound? Pick one tip from this guide and implement it today—then share your experience in the comments.